29 Cooking Tips and Tricks for Smaller Households
Our best kitchen hacks to help you eat better, waste less, and have more fun cooking for two or just for you!
This post contains some affiliate links, which means that we make a small commission off items you purchase at no additional cost to you.
Creating toaster oven recipes and meatless meals for two (over 230+ recipes and counting!) we’ve picked up a lot of fun tips and tricks.
Today we’re sharing our favorites along with some great reader suggestions that we’ve received over the years. *Many of these quick tips are from our free monthly newsletter, if you’re not a subscriber yet you can sign up here.
Below you’ll find our best “why didn’t I think of that” kitchen hacks including clever shortcuts, ideas for using up leftover ingredients, and tasty ways to avoid food waste.
All meant to make cooking for your small household easier and more enjoyable!
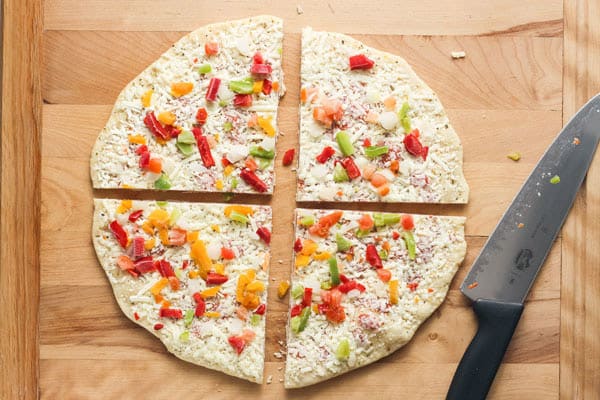
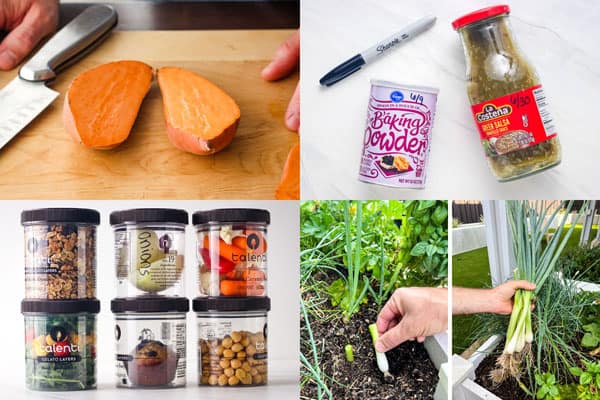
1. Cut Frozen Pizza Into Smaller Servings
If you have a smaller toaster oven or just don’t feel like eating leftover pizza, pre-portioning a frozen pizza is a convenient option.
Then you can bake a slice (or two) to eat now and keep the rest frozen for later.
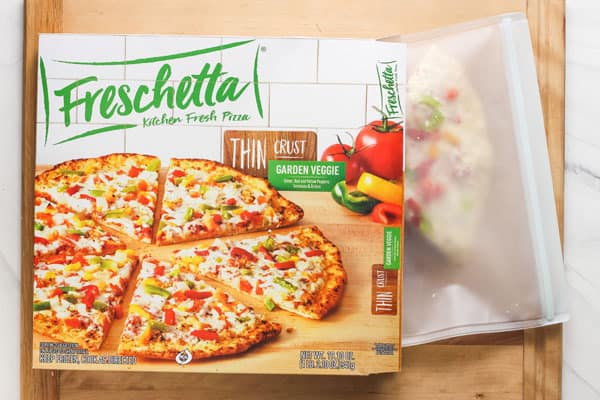
In my experience, frozen thin-crust pizzas are the easiest to cut. For thicker crusts, I usually let them thaw for a few minutes before carefully slicing/sawing my way through the toppings and crust.
To keep the directions handy, we like to pop the slices into a freezer-safe bag and stuff it back in the box. Alternatively, you can cut out the directions and add them to the bag.

When you go to bake a slice, make sure to check on it early as it will cook a little faster than a whole pizza.
Read More >>> Toaster Oven Frozen Pizza Cooking Tips
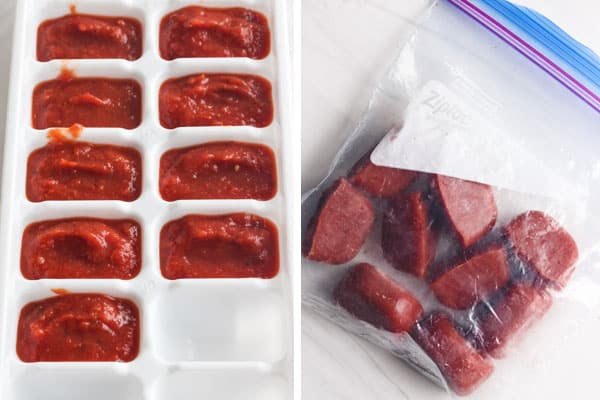
2. Freeze Leftover Sauces In Ice Cube Trays
It’s hard to use up ingredients when you’re cooking for just one or two people. Especially condiments!
To avoid wasting food (and create a handy stash for later) we like to freeze leftover pizza sauce, roasted cranberries, tomato paste, pesto, and BBQ sauce using ice cube trays.
Just spoon the sauce into a clean ice cube tray and freeze until solid. Then pop out the cubes and store them for later.
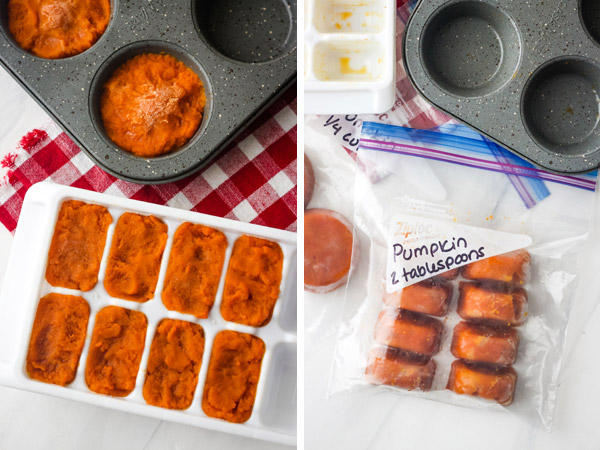
Freezing the sauce in smaller portions (about 2 tablespoons) makes it easy to grab only what you need for your recipe and keep the rest frozen.
Bonus: You can also use your trays to freeze leftover canned pumpkin, applesauce, and juices too.
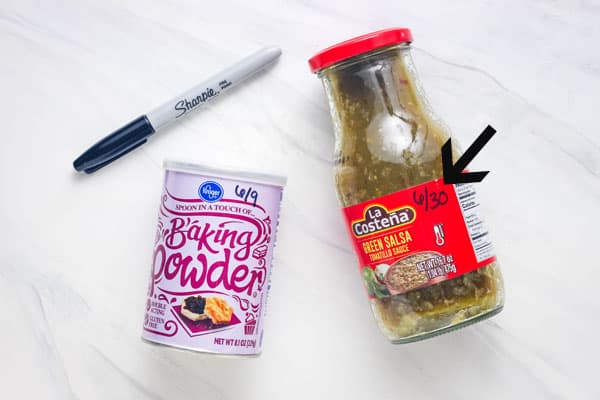
3. Keep a Sharpie In The Kitchen
It’s easy to tell if bread is moldy or milk’s gone sour but condiments and pantry staples are a different story.
Replacing your baking powder and baking soda 6 months after you open them is a good rule of thumb. And a bottle of store-bought ranch dressing will usually keep for a few weeks once opened.
But how are you supposed to remember when you opened something? Whenever you’re about to open a new condiment or pantry staple, grab a permanent marker and write the date on it.
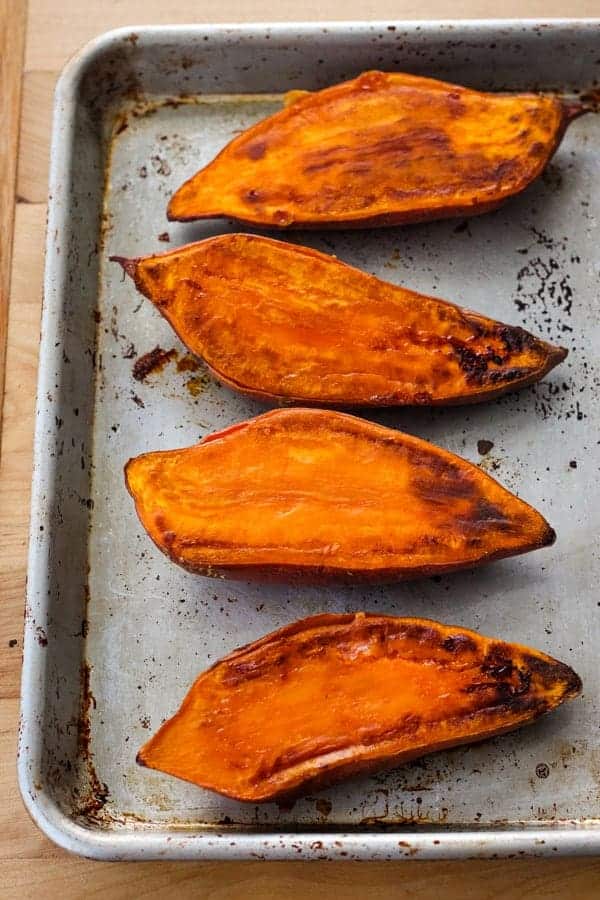
4. Slice Sweet Potatoes in Half To Cook Them Faster
This simple hack is a weeknight dinner game-changer! If you’re feeling skeptical that the sweet potatoes won’t taste as good as traditional baked ones, check out this review a reader left after making them.
“These are so yummy and so quick. I made them in the oven and I don’t know why I’ve ever spent an hour making baked sweet potatoes actually I don’t know why anyone would if this option exists. Trust me you won’t be disappointed.” ~ Elisha
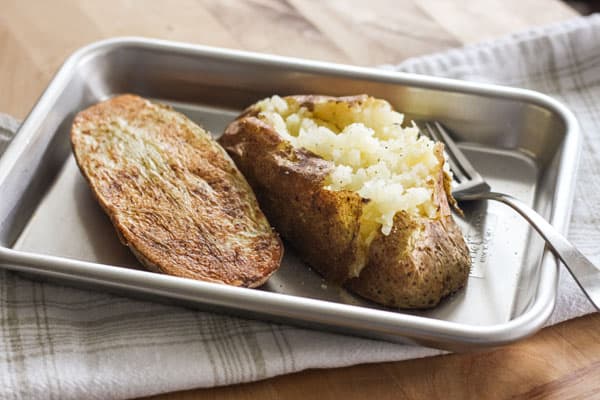
Did I mention you can use this shortcut to make regular baked potatoes faster too! Click on the links below and we’ll walk you through how to make delicious baked potatoes in less time!
Read More >>> Quick Baked Sweet Potatoes (Step-By-Step)
Read More >>> Quick Baked Potatoes (Step-By-Step)
Bonus Tip: If you’re finding it difficult to slice the raw sweet potato, pop it in the microwave for one minute. It will soften slightly and be easier to chop in half.
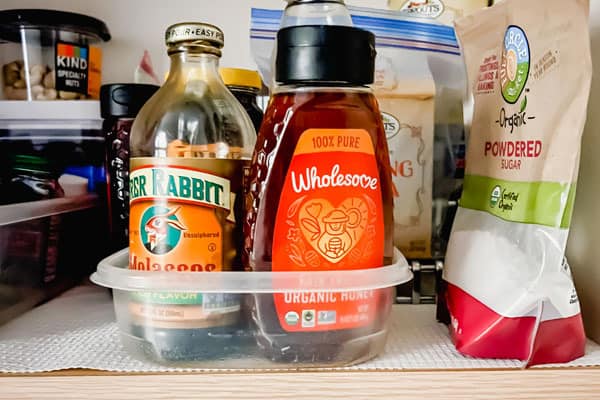
5. Avoid Sticky Shelves
Even when I remember to wipe down sticky jars before I put them away they still sometimes make a mess. That’s why I have a little plastic container in our pantry that’s just for them.
This way, if I missed getting a drip or two of molasses off the jar, that sugary mess ends up in the container (which is easy to clean) and not on the shelf.
I use an old plastic lunch container but a leftover yogurt or sour cream container would work great. And you can use them to hold other drippy things like bottles of oil.
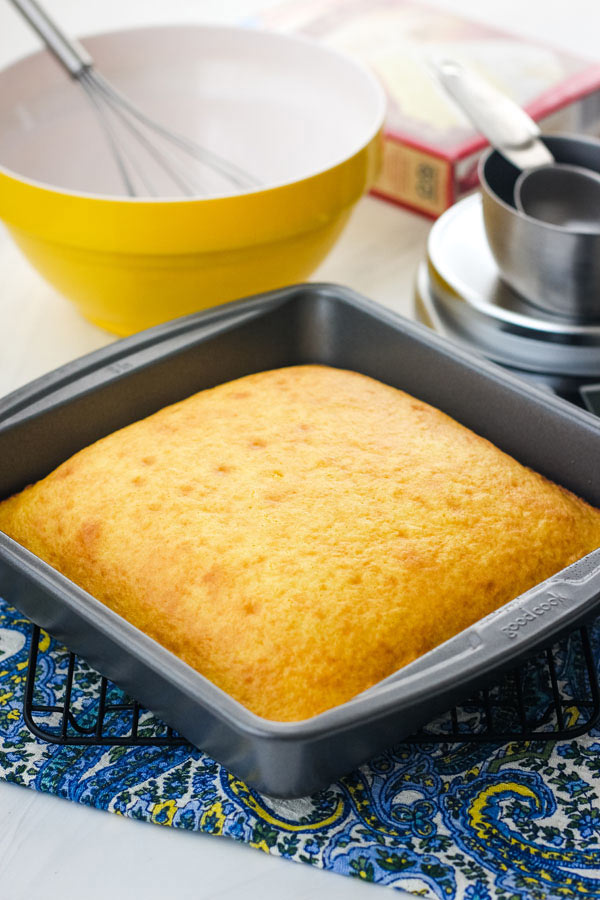
6. Make Half a Boxed Cake Mix
This is one of my favorite cooking hacks. By dividing a cake mix in half, you can bake up a tasty (but smaller cake) and use the remaining mix to bake muffins or cookies.
Many readers also suggest mixing up the whole cake mix but baking it in two 8 x 8 pans. They eat one of the cakes and give the leftover cake away or freeze it for later.
Read More >>> How To Make Half A Cake Mix
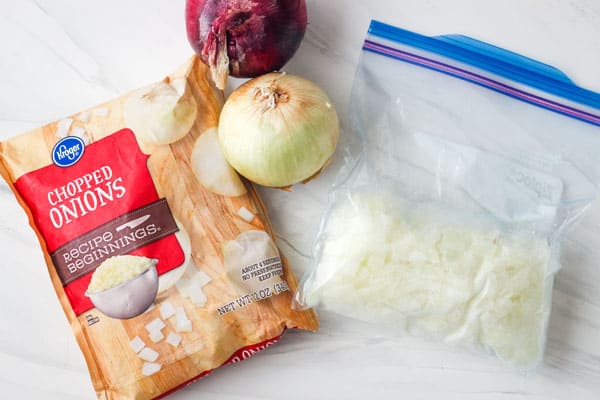
7. Keep Frozen Onions On Hand To Make Dinner Faster
Did you know that frozen diced onions can be substituted for fresh ones in most cooked recipes?
You can chop up leftover fresh onions and freeze them (food waste win!). Or grab a bag of already diced onions from the freezer section at your grocery store.
While frozen onions can’t be used in fresh recipes like salsa and sandwiches (unless you enjoy things mushy and watery), they are great for recipes that begin with sautéed onions.
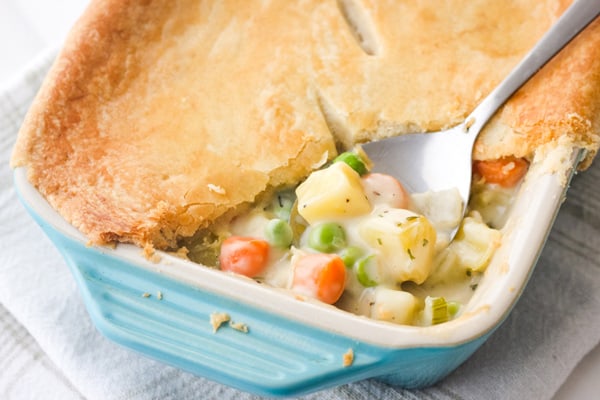
We like to keep a bag in the freezer for cooking up quinoa salsa bowls, chili, soup, and this vegetable pot pie for two.
Just measure out the frozen diced onions (no thawing needed) and toss them into the pan.
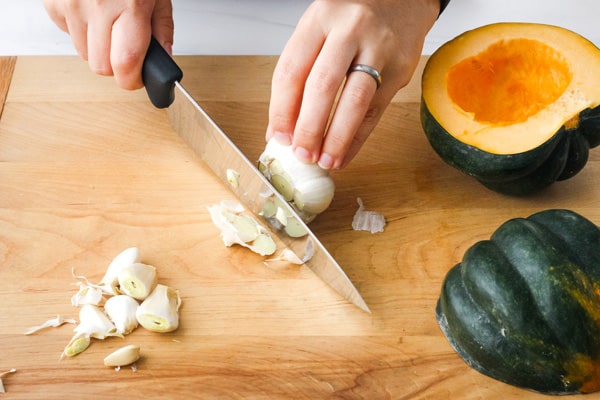
8. Roast Garlic With Your Winter Squash
Reader Megan G. shared this fantastic tip on our toaster oven acorn squash recipe. When cooking squash, she tucks a few garlic cloves under it so the garlic can roast along with the squash!
While raw garlic has a sharp bite, roasted garlic is sweeter with a creamy texture that makes a great addition to any squash filling.
Cooking acorn squash recently, I used Megan’s tip to roast a small head of garlic and a handful of individual cloves.
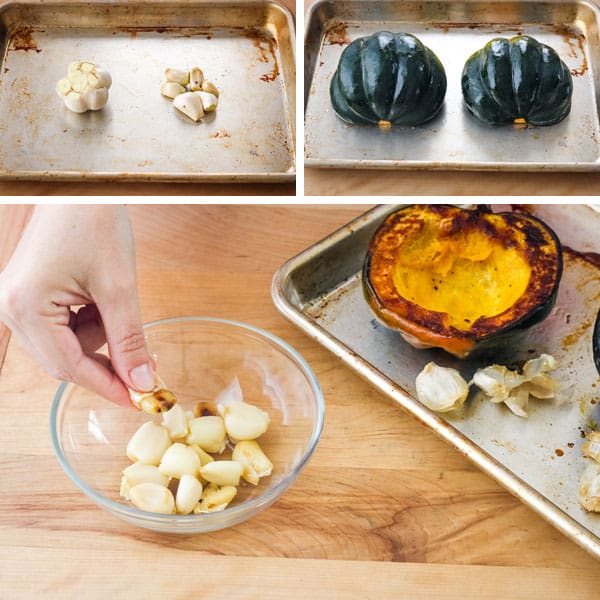
For the head of garlic, I sliced the top off and poured a little olive oil over the exposed cloves.
Unpeeled individual cloves can burst during roasting. To keep that from happening just slice a little piece off the bottom of each one. Then, I covered the garlic with the squash and roasted everything for about 35 minutes.
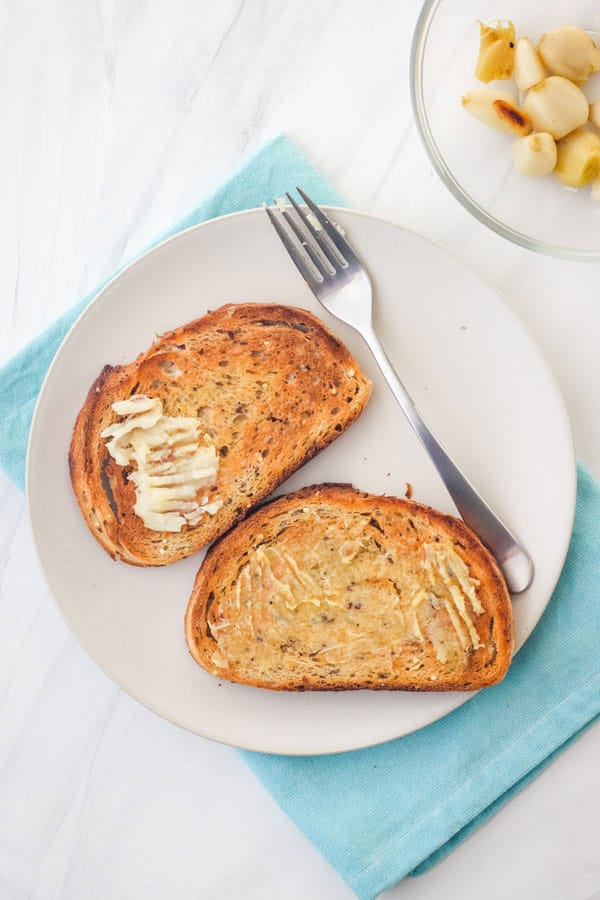
The individual cloves were mellow and sweet while the head of garlic was lighter in color with a bolder flavor. Both of them tasted fantastic spread on toast.
You can use this fun garlic hack when cooking other squash like butternut squash or spaghetti squash.
And if you’ve got leftover roasted garlic, try mixing it into sauces and dips, adding it to mashed potatoes, or spreading some on a grilled cheese sandwich. The possibilities are endless.
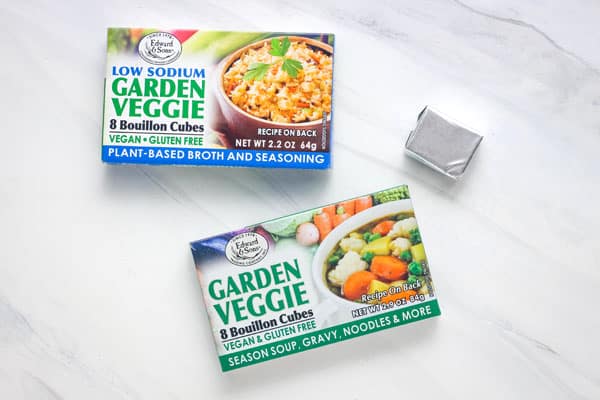
9. Keep Bullion Cubes on Hand
Bullion cubes and jars of broth concentrates are super easy to store. They take just a few minutes to turn into a broth for recipes and cost substantially less than those boxes of shelf-stable broth sold in non-recyclable packaging.
Plus, when your recipe calls for just 1/2 cup of broth you won’t be stuck with a bunch of leftover broth that you’ll need to worry about using up.
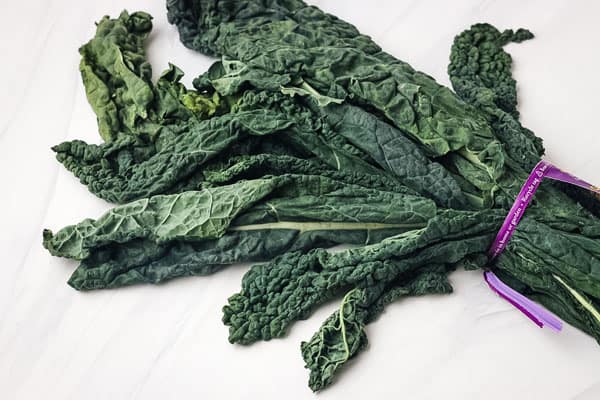
10. Revive Limp Kale (plus celery, green beans, and more!)
Ever grabbed a bunch of kale from the fridge only to find it wilted and sad-looking? If those greens ended up in the trash, then this tip is for you!
The best way to revive limp produce is to replenish its lost water. Here’s how to do that:
Fill a large bowl with cold water and add a few ice cubes if you’ve got them. Bunch the kale together and use a knife to trim a little off the stems.
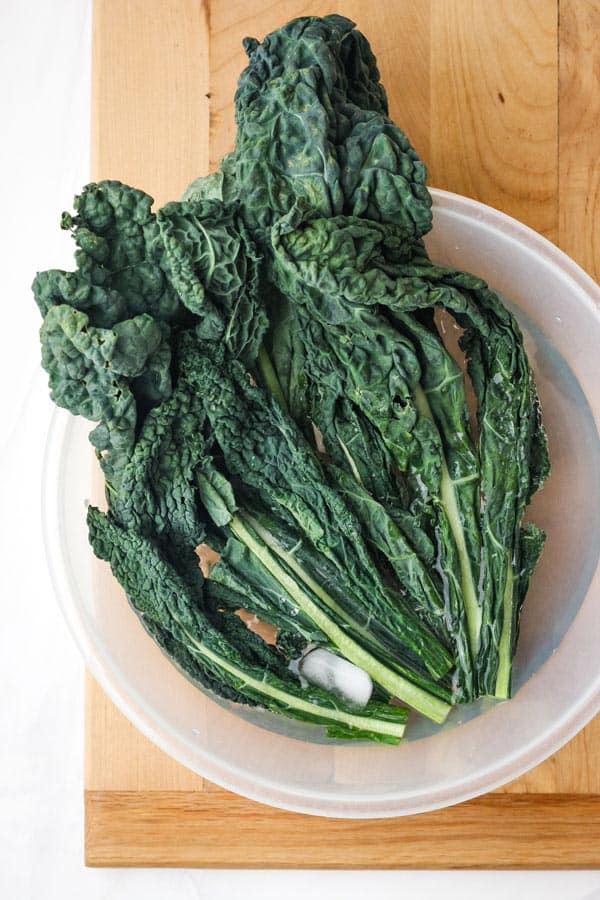
Place the kale stems into the ice water. Then gently push the leaves down into the bowl until they’re fully submerged.
Let the kale sit for about an hour. If you’ve got enough room in your fridge, I find that popping the bowl in there helps too.
After an hour, pull a few pieces out. The leaves should feel crisp and bouncy. If they’re not, let the kale keep soaking in the water.
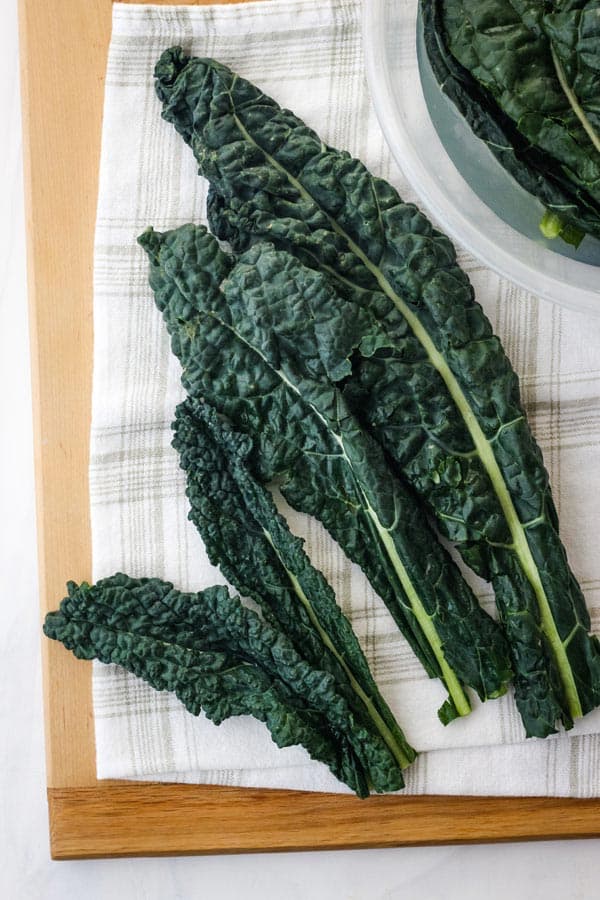
*You might have a few stubborn leaves that just refuse to come back to life but most of them should get on board eventually.
Drain the water and dry the kale with a towel or in a salad spinner and enjoy your revived greens!
Even better, you can use this method to refresh bendy celery, green beans, carrots, and broccoli stalks too.
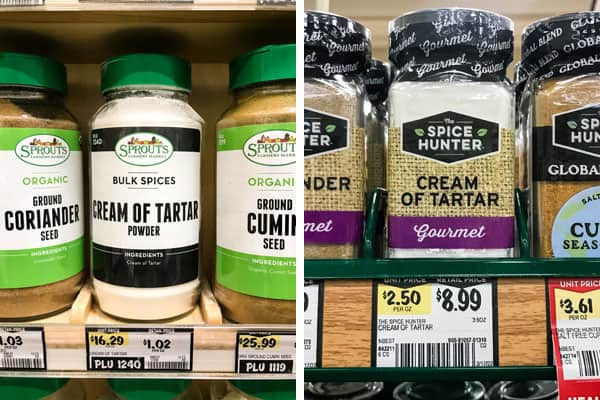
11. Shop The Bulk Bins
If your store has a bulk spice section you should definitely check it out. One of my favorite things to buy at ours is cream of tartar.
A full-sized jar costs around $9.00 but we only use a few teaspoons a year to make snickerdoodles. Buying cream of tartar from the bulk section lets us get just what we need and avoids food waste.
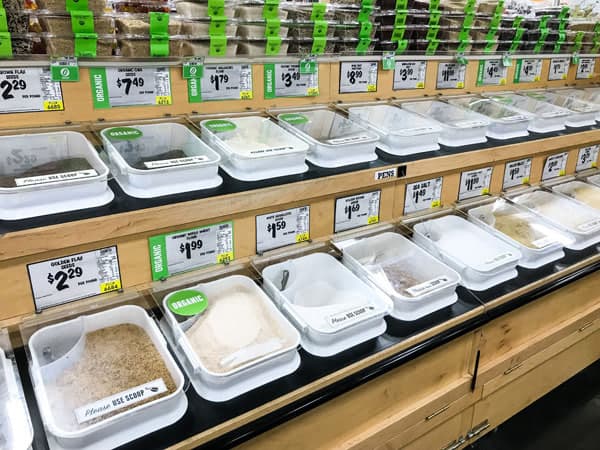
The bulks bins are also an inexpensive way to try trendy new grains, nuts, or flours. It only cost us $1.50 (instead of $10.00) to learn that coconut flour wasn’t for us.
Whenever we go to our local Sprouts you can always find Tim by the candy bins. He loves being able to get a small amount of candy (like chocolate-covered espresso beans) that he’d never buy a full-sized bag of.
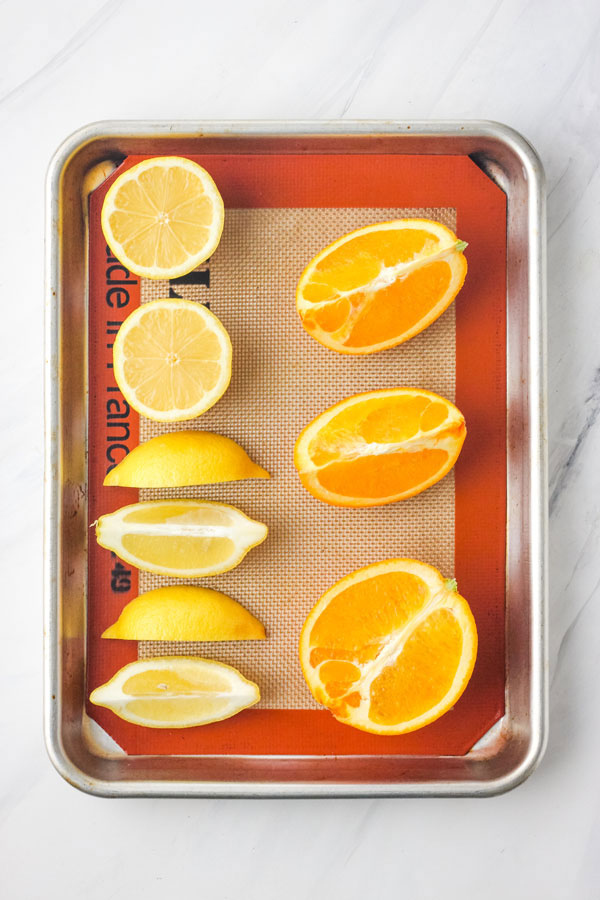
12. Freeze Extra Lemons
When life gives you too many lemons, limes, or oranges – freeze them!
This post for how to freeze citrus has lots of tips and will show you how to freeze your citrus bounty whole, sliced, or juiced.
We like to add lemon slices to iced tea during the summer, they keep your drink cool without watering it down.

13. Keep Binder Clips In Your Kitchen
Metal binder clips are way cheaper than those cumbersome plastic snack clips and are easy to keep on hand.
If you took a peek in our pantry and freezer you’d find open bags of chocolate chips, nuts, brown sugar, peas, popcorn, cereal, flour, and old-fashioned oats all held closed by binder clips.
The uses for these handy office supplies are pretty endless. We’ve even used uncoated metal clips to fashion a DIY dutch oven to bake no knead bread in.
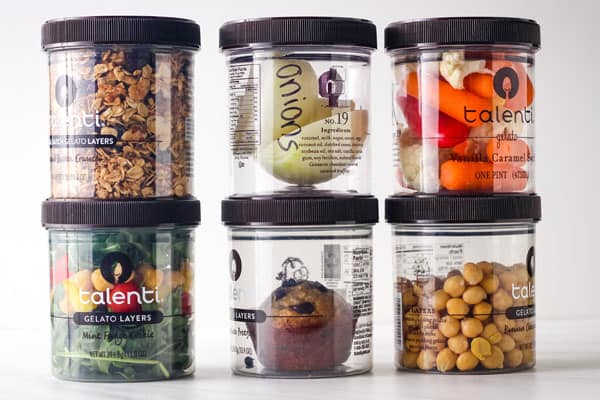
14. Reuse Clear Food Containers For Handy Storage
If you’re a fan of Talenti gelato, don’t toss the containers! They’re very stackable and great for storing all kinds of things from art supplies to loose change.
Here’s how we use them in the kitchen:
- Dedicated Onion Jar. Even our dishwasher-cleaned mason jars seem to retain a hint of onion smell. So we have one Talenti container that’s just for leftover onion.
- Storing Other Leftovers. Chopped bell pepper, beans, lemon wedges…the list goes on and on.
- Transporting Lunches and Snacks. Tim uses them to take muffins, raw vegetables, and even salads to work.
- Budget-Friendly Food Gift Containers. One Christmas I gave our neighbors homemade granola packaged in them with a bow on top. They were a big hit.
*Quick note: Talenti containers are not microwave or dishwasher friendly. If handwashing isn’t your thing, glass jam jars make a great reusable storage option too.
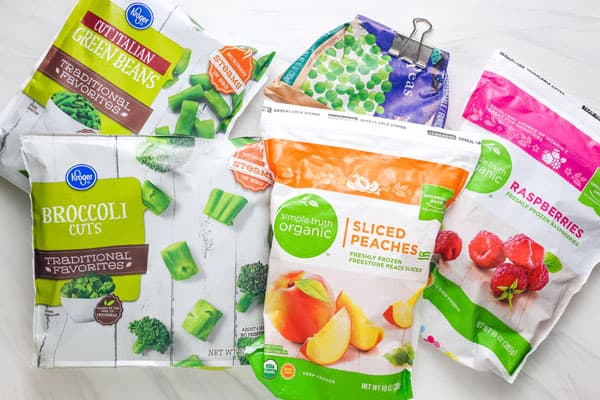
15. Stock Frozen Fruits and Vegetables
Frozen fruits and veggies are tasty, budget-friendly, and help cut down on dinner prep too (who doesn’t love a night off from peeling, slicing, and dicing?).
We keep bags of frozen broccoli and cauliflower on hand for roasting or tossing into a pot of boiling pasta. Frozen peas and edamame are both good sources of plant-based protein and make great additions to salads and soups.

It’s hard to go wrong with frozen fruit. Petty much anything is going to be good for topping oatmeal, making yogurt parfaits, or adding to smoothies.
Frozen blueberries are especially convenient to have on hand for baking recipes. You don’t even have to thaw them to make a batch of these yummy toaster oven blueberry muffins.
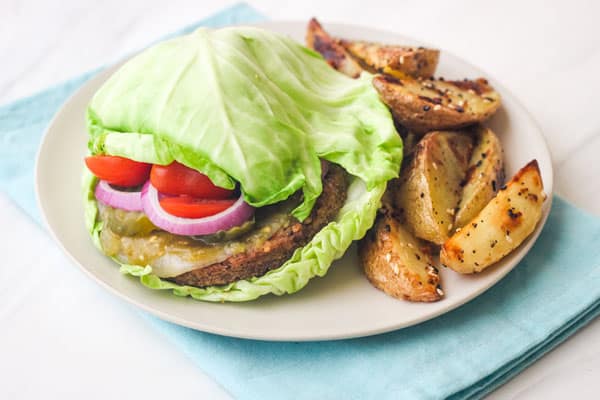
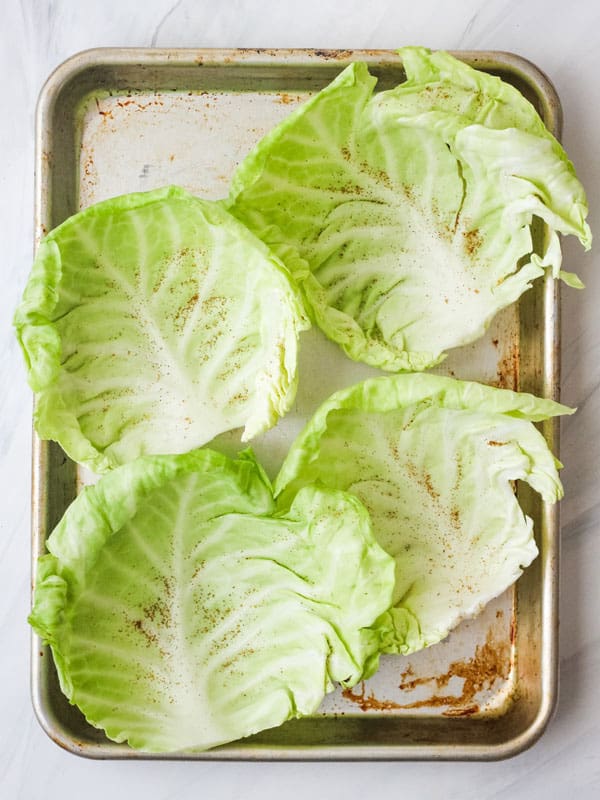
16. Turn Cabbage Leaves Into Burger Buns
You’ve probably heard of wrapping burgers in lettuce but have you tried using cabbage?
To make the buns: remove a few leaves from a small head of cabbage, sprinkle them with salt (we added chili powder too), and pop the cabbage in a 400°F oven/toaster oven for 2-4 minutes to soften slightly.
Then top one piece of cabbage with a cooked veggie burger, add your favorite toppings and top with another leaf.
The “buns” don’t fall apart or immediately go limp like lettuce and taste pretty darn good (you know, if you like cabbage). Add a batch of toaster oven potato wedges and dinner is served!
You can find the ‘tortilla’ recipe that inspired these buns along with some great cooking tips at Stonesoup.com.

17. Make Raw Winter Squash Easier to Slice
Slicing into a hard spaghetti squash can be a little dicey. I’ve got my knife stuck in one more than I’d like to admit.
But there’s an easy way to make slicing squash in half less terrifying. Pop it in the microwave!
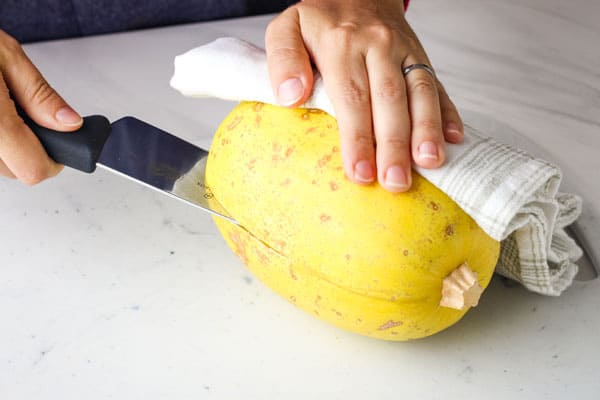
Just poke a few holes in the squash (similar to making a baked potato) and microwave it for 3 to 5 minutes to soften slightly. Let the squash cool for a few minutes, then slice it in half and dig out the seeds.
Now your squash is ready for roasting (and you still have all of your fingers, yay!). And if you don’t have a microwave, you can also use your oven to precook/soften harder squashes it just takes a little longer.
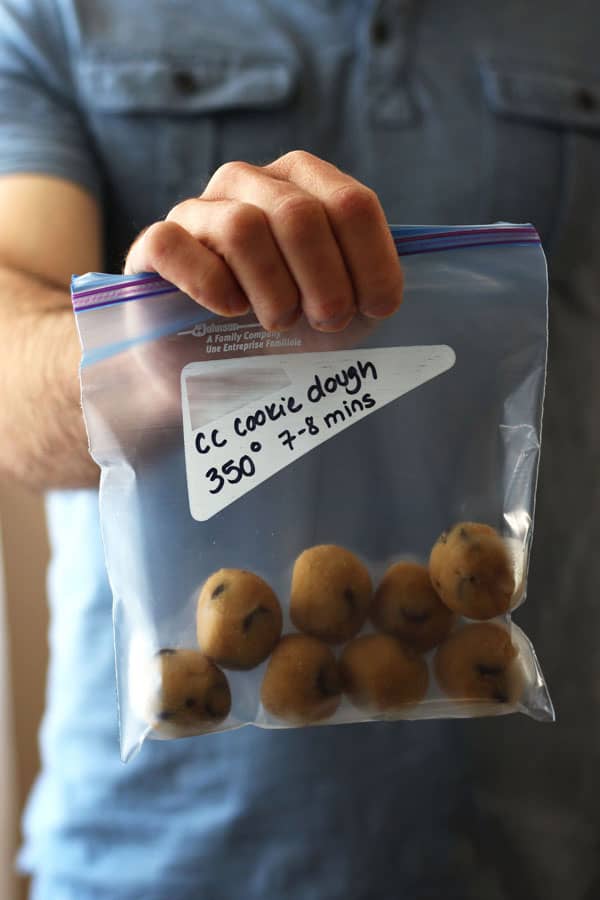
18. Freeze Extra Cookie Dough
Most traditional cookie recipes make a few dozen cookies – definitely more than any small household needs.
That’s why we love baking up small-batch cookie recipes, especially these toaster oven chocolate chip cookies. But if you’ve got a favorite family recipe, you can mix it up, bake just a few and freeze the leftover dough to bake whenever a cookie craving strikes.

To freeze leftover cookie dough:
- scoop it onto a lined sheet pan
- place the pan in the freezer
- freeze until the dough balls are firm and solid
- transfer the frozen dough to a sealed container and label it with the recipe’s name and baking instructions
To bake the dough from frozen, we like to reduce the recipe’s temperature a little (about 15 or 20 degrees) and increase the baking time by a few minutes.
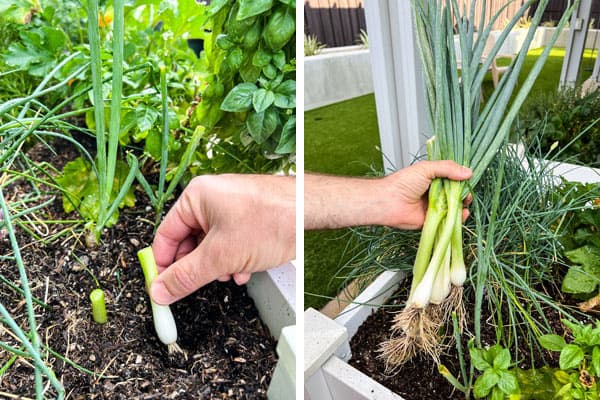
19. Regrow (Some) Of Your Food Scraps
Over the years we’ve tried regrowing a variety of different food scraps. While lots of them did grow, most of the veggies yielded results that weren’t really worth the effort. But two veggies, green onions and lettuce, have regrown nicely for us.
For both the green onion and lettuce we just pop the little leftover root portions into soil and water regularly. The green onions regrow quickly while the lettuce takes a bit longer to get going.
For tips on regrowing food scraps in water or in soil, the website A Piece of Rainbow has lots of helpful info.
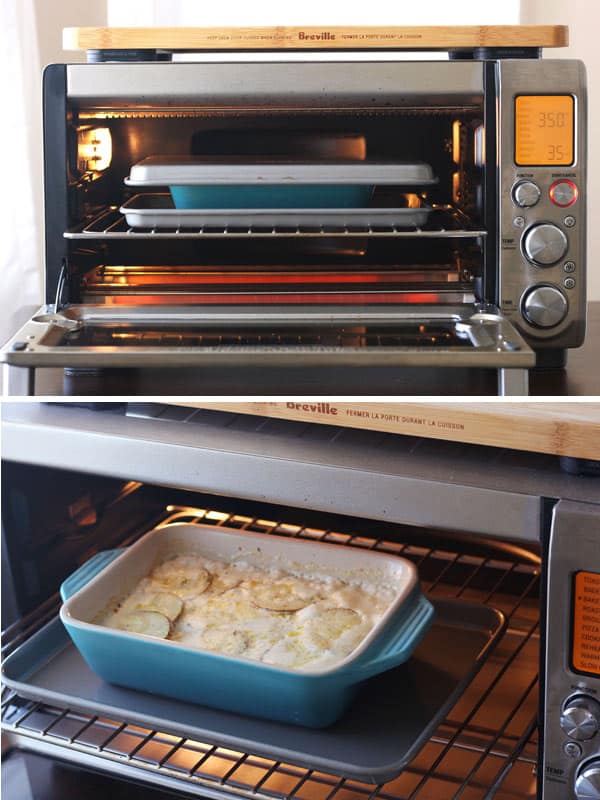
20. Cover Baking Dishes Without Using Foil
Need to cover a baking dish but don’t have foil? Use a sheet pan or pizza pan!
It works the same way to keep moisture in a dish (like with this toaster oven potato au gratin recipe) or to prevent over-browning.
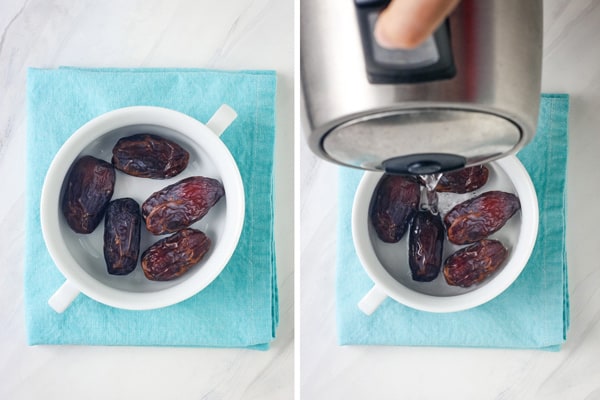
21. Rehydrate Dried Fruit
Dates stuffed with nut butter and a sprinkle of salt make for a very yummy snack. But even with storing our dates in the fridge, they do eventually get hard and dried out.
The good news is that rehydrating dates takes just a few minutes:
- Place the number of dates you plan to eat in a bowl and cover with boiling (or very hot) water.
- Let the dates sit for 10 to 15 minutes, then drain, dry, pit, and stuff.
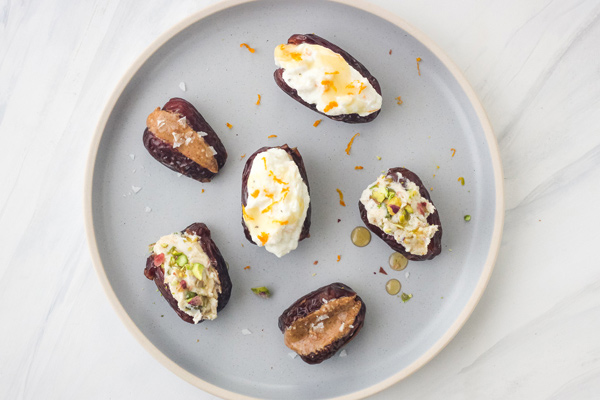
Even better, you can use this method to rehydrate any dried fruit (like raisins) and you can use other liquids too.
Try soaking dried cranberries in orange juice before adding them to muffins. Or using vegetable broth to soften sun-dried tomatoes for these spicy chickpea edamame pitas.
Similar to toasting nuts before adding them to a recipe, rehydrating dried fruit makes a big difference in the final dish.
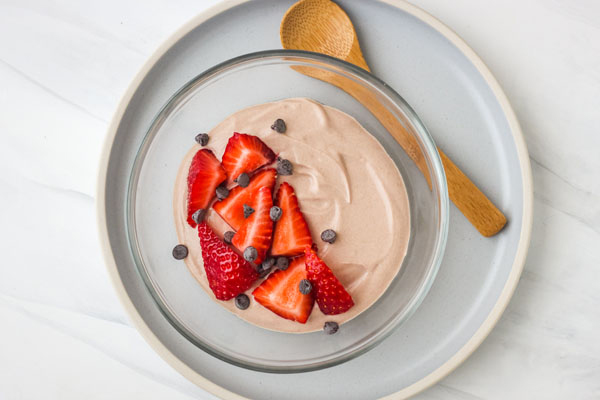
22. Make Your Own Flavored Yogurt
Plain yogurt is super versatile, you can use it in baking recipes, it makes a great sour cream substitute for topping baked potatoes, and you can flavor it for a sweet treat too.
Our healthy snack ideas post has “recipes” for making chocolate Greek yogurt, a lime pie topped with graham cracker, peanut butter and jelly swirled yogurt, and a cinnamon trail mix version with nuts and dried fruit.
And during the summer, you can spread your flavored yogurt into a pan and freeze it for some refreshing frozen yogurt bark.
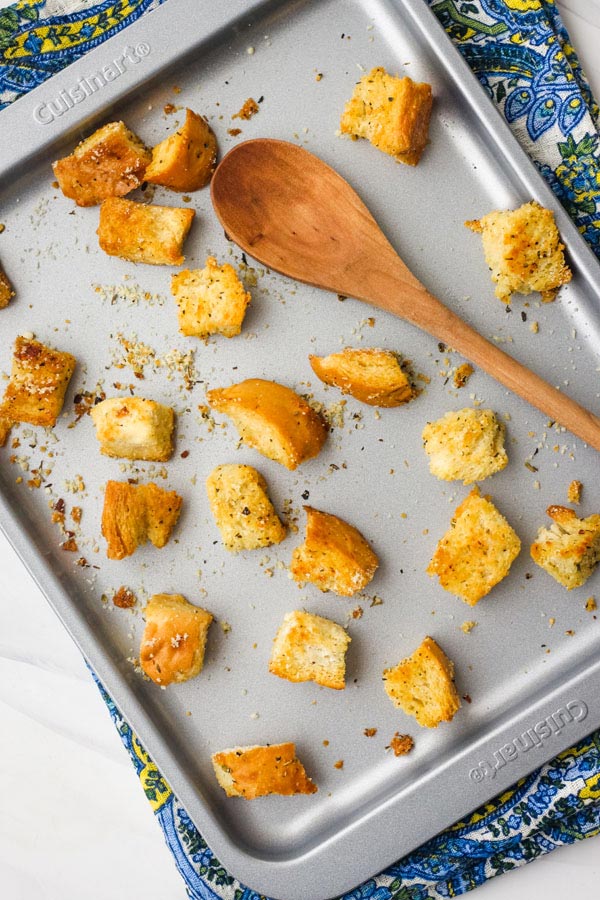
23. Give Stale Bread A New Purpose
There are so many ways to transform day-old bread into something delicious. Like making a quick batch of toaster oven croutons or toaster oven crostini.
French toast is another favorite since it will turn out better if the bread is a little stale. That’s because day-old bread absorbs more of the custard mixture than fresh bread.
If you have stale bread but don’t want to deal with it right away, you can always toss it in the freezer. Then when you have time, just defrost the bread and proceed with your recipe.
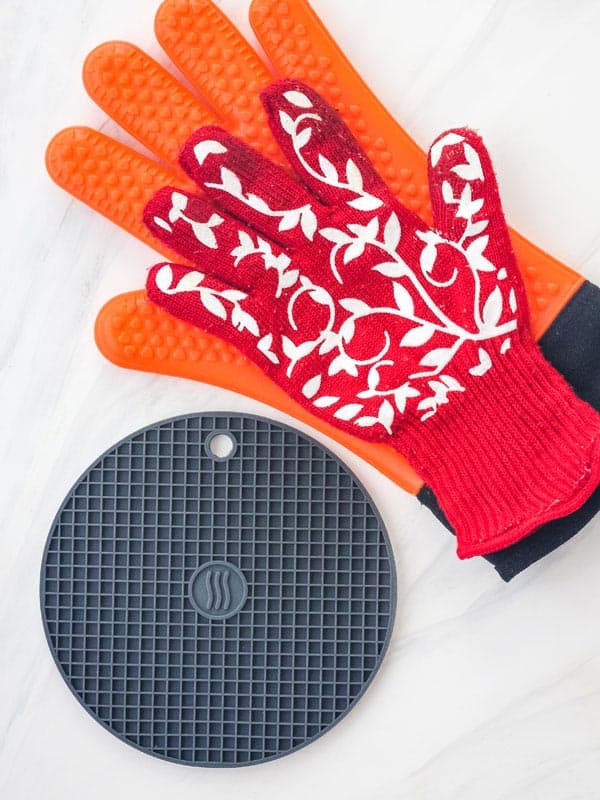
24. Use Silicone Mitts to Open Stubborn Lids
We discovered this handy tip courtesy of Food & Wine Magazine and couldn’t wait to give it a try.
Our gloves did a pretty good job with big lids but our small silicone trivet from ThermoWorks was the overall winner. From a brand new pickle jar to our maple syrup’s tiny always-stuck top, its grippy surface makes opening difficult lids easier.
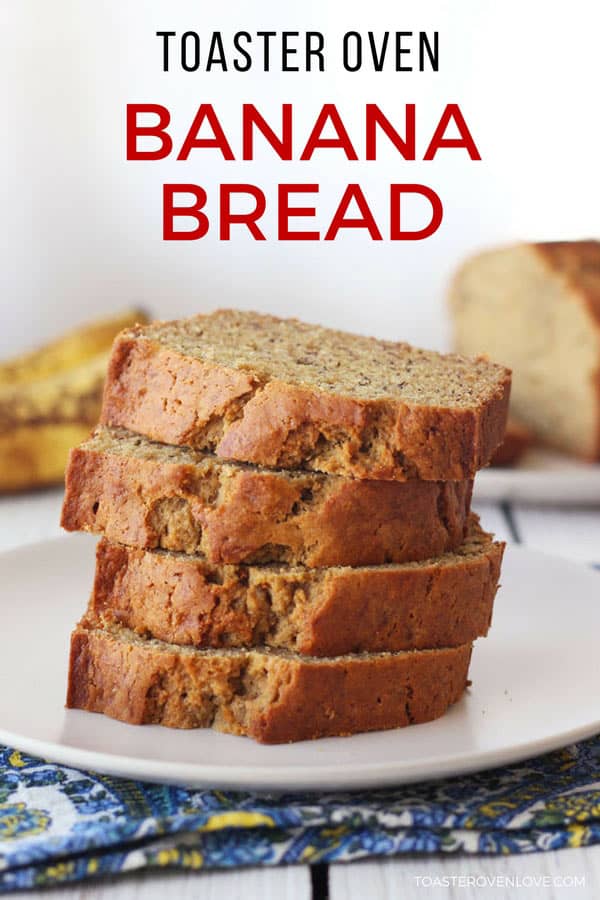
25. Slice Bread and Baked Goods Before Freezing
Slicing banana bread, brownies, or a rustic loaf of bread before freezing makes it easy to grab just a few pieces to defrost and enjoy.

26. Grow Your Favorite Herbs
When you’re cooking for one or two people, it’s hard to use a whole bunch of parsley or basil before it goes bad.
If you find yourself regularly buying the same herbs you might want to try growing one or two of them at home. Then you’ll be able to snip off just what you need to make dinner and the plant will keep on growing more for later.
Related >>> How to Store Fresh Herbs So They Last Longer
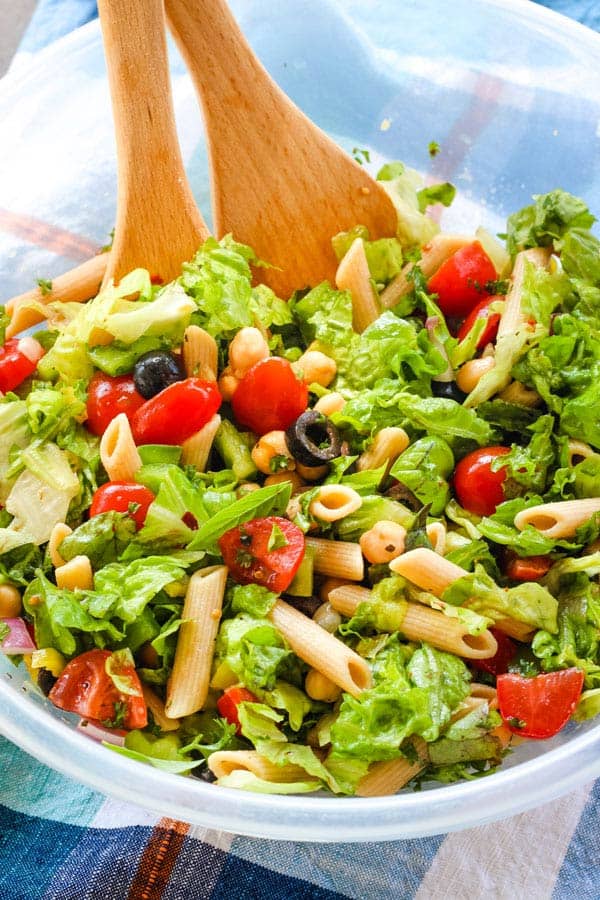
27. Make Use-It-Up Meals To Clean Out The Fridge
We try to clean out the fridge at least once a week and throw any leftover odds and ends into quick meals.
Pasta salads are fantastic for using up fresh herbs and condiments like sliced olives, roasted red peppers, and artichoke hearts.
Leftover roasted vegetables paired with cottage cheese, ricotta, or plain Greek yogurt make great baked potato and sweet potato toppings.
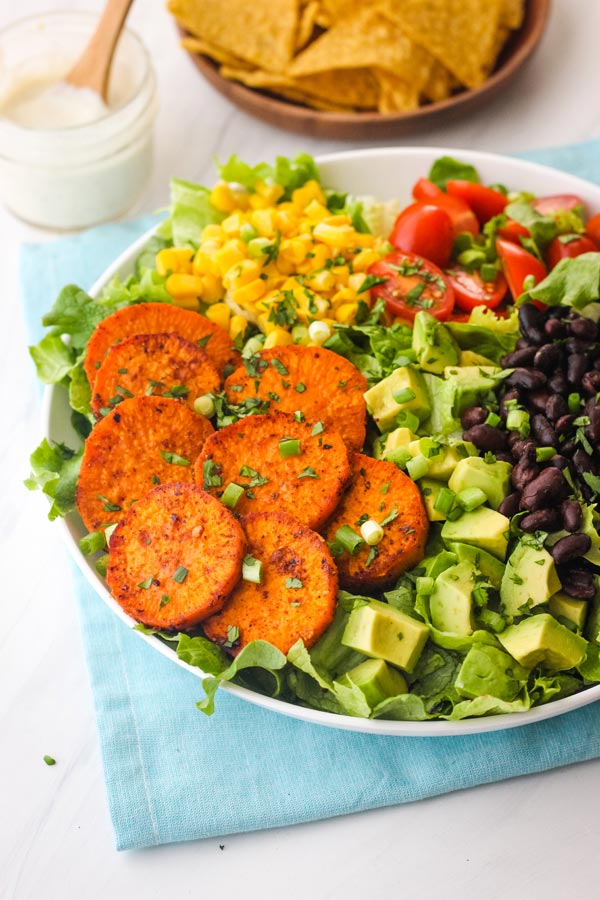
A taco salad or wrap is a fun way to use up lettuce, salsa, and beans. You can even make a quick batch of crunchy tortilla strips in your toaster oven to top them!
From sandwiches to scrambles, soups, and stir-fries, there are a lot of quick and tasty ways to turn leftover ingredients into a meal.
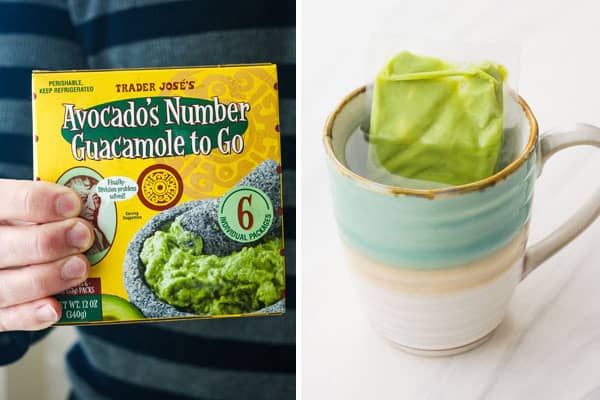
28. Freeze Single-Servings of Guacamole or Mashed Avocado
If you’re not a big avocado eater but still enjoy an occasional dollop of guacamole on your spaghetti squash burrito bowls or some avocado spread on a vegetarian sandwich, these little packets are nice to have on hand.
Plus you can freeze the whole box and just pop a packet in a cup of warm water to defrost. After a few minutes, you’re good to go.
Did you know that you can also freeze fresh avocado? The website Low Carb Yum has a great step-by-step guide for how to freeze avocados including tips to keep them from turning brown.
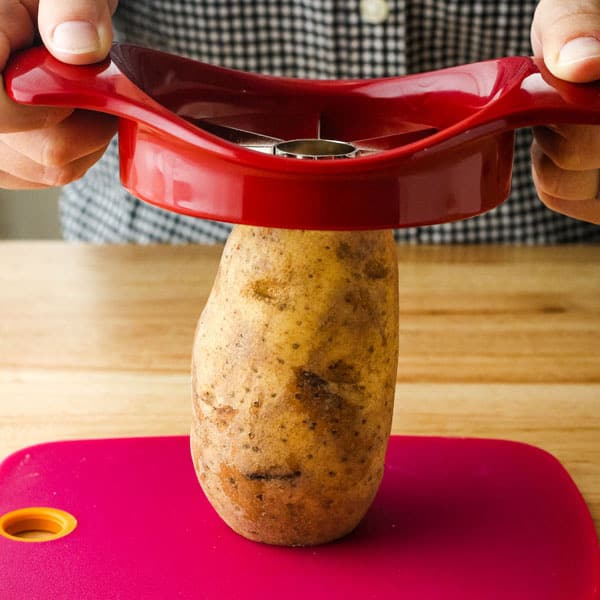
29. Use An Apple Corer To Slice Potato Wedges
Baked potato wedges are pretty easy to throw together but you know what makes the prep all kinds of fun? Using an apple slicer!
A reader named Heather shared this handy tip and we couldn’t wait to give it a try. You just slice the bottom off of the potato to create a sturdy base, line up the corer in the middle of the spud, and exercise your muscles for a few seconds pressing it down through the potato.

As Heather said, you get “equal size wedges…with the extra tube from the middle!” Because the wedges are roughly the same size, they bake up evenly and taste delicious.
More Helpful Kitchen Tips
Your Turn
Do you have a tip or trick that makes cooking for your small household easier or just more fun? Share it in the comments!