Toaster Oven Frozen Pizza Tips
When you bake a frozen pizza does the inside of your toaster oven look more like a messy convenience store microwave? If you answered yes, this article is for you! Today we’re sharing our best tips to help you make a delicious frozen pizza (think golden crispy crust and bubbly melted cheese) without a lot of cleanup.

Recently, Eryn B. left a comment on our guide for how to reheat pizza in a toaster oven asking:
“Do you have any tips on cooking a frozen pizza in a toaster oven? When I use the baking pan the bottom stays soft and doughy. When I don’t, the cheese will drip and burn making a HUGE mess!”
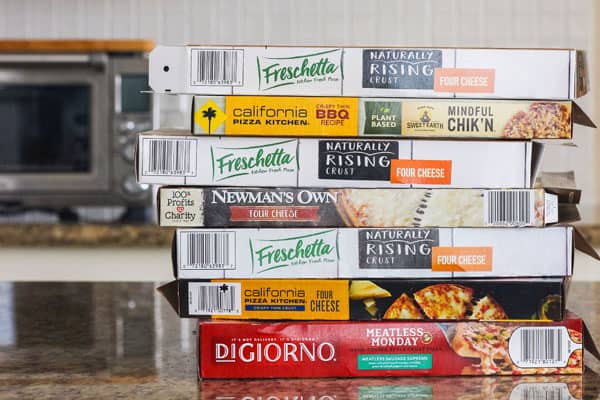
This rack vs. pan dilemma is something we’ve struggled with too. So we started experimenting with a variety of 13-inch frozen thin crust and naturally rising crust pizzas in our Breville Smart Oven Pro (BOV845BSS).
After lots of trial and error, we discovered some simple tips and hacks that make a big difference.
Below is a list of the things we do to get better results baking frozen pizza (on a pizza pan) in our toaster oven.
Quick Note: As toaster ovens, frozen pizzas, and personal tastes vary, you may need to experiment a bit to find the perfect settings and adjustments for your little oven.
1. Fully Preheat The Toaster Oven
Our toaster oven is designed to signal as done preheating once the oven has reached 75% of its target temperature.
This supposedly leads to a faster temperature recovery once you add your food but in my experience, it also leads to a soggy pizza crust.
The easiest way to know if your oven has actually reached the displayed temperature is by using an oven thermometer.
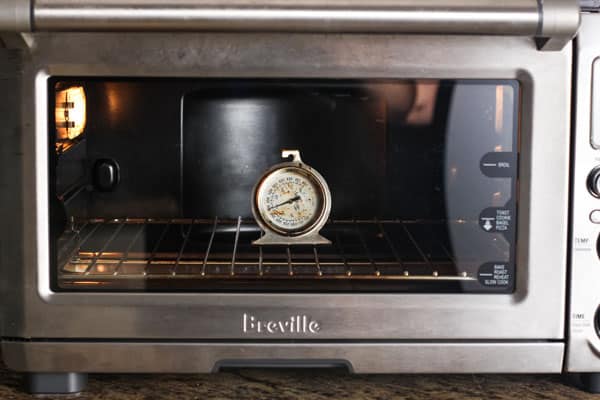
Here’s how we use an oven thermometer to make sure the toaster oven is fully preheated before we add the pizza:
- Place the oven thermometer in the center of the toaster oven and close the door.
- Select the “BAKE” setting and set the desired temperature. For this pizza, the box called for 400°F.
- When the oven beeps, check the temperature. After 5 minutes the preheating alert sounded but our oven was only at 300°F.
- Wait until the thermometer reaches the desired temperature. Our oven took 4 minutes more to reach 400°F for a total of 9 minutes of preheating time. Then we gave it 1 more minute just to make sure it was good and warm.
Frequently Asked Questions
What temperature should I use?
The temperature on the pizza box usually works best for us. You can start with that temperature and check on the pizza halfway through the cooking time. Then make adjustments (like turning the temperature up or down) as needed.
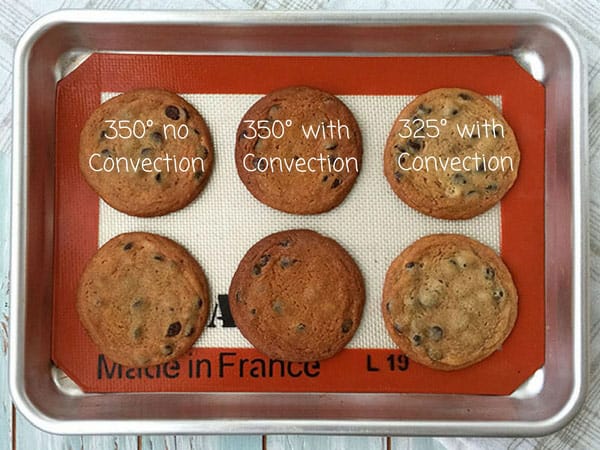
What about convection?
We turn off convection. If the convection fan is on it will blow heated air around the oven. This is great when roasting sweet potato rounds or baking chocolate chip cookies but that warm air constantly blowing across the top of our frozen pizzas has always resulted in overcooked toppings.
My toaster oven has a pizza setting, should I use it?
Manufacturers are mysteriously vague about their specialty settings. If you actually know how the pizza setting on your toaster oven functions and you think that it will benefit your pizza, then I say use it. Otherwise, just stick with the BAKE setting.
2. Poke Thick Crusts
I first saw this tip in a Frozen Pizza Upgrades article from Taste of Home.
Don’t remove the plastic from the pizza. Flip it over and then slice open or peel back the plastic covering the crust.
This way the bottom of the crust will be facing you and the top of the pizza (including all of the toppings) will still be wrapped in the plastic.

If the crust already has a bunch of holes (most thin-crust pizzas do) you can skip ahead to the next tip.
Otherwise, let the crust thaw for a few minutes, and then use a fork (or small pairing knife) to gently but deliberately poke holes in the bottom of the pizza.
Try to go easy with the poking. One time, Tim was really enthusiastic with his fork and managed to crack it.
Similar to prepping a baked potato, you’re not trying to pierce the center, you just want to let some of the steam and moisture out of the crust while it bakes.
3. Lightly Brush The Crust With Oil
While the pizza is still flipped over brush it with oil. Similar to roasting vegetables, the oil will help the crust brown and crisp as it bakes on the pan.

Also, it will make the crust more flavorful. I highly recommend using garlic-flavored avocado or olive oil if you have some.
Once you’ve oiled the crust, invert the pizza pan over it. Holding the plastic in place against the pizza, carefully flip the pizza, the pan, and the plastic right side up.

Remove the plastic and rearrange any toppings or cheese that may have fallen off during flipping.
Now it’s time to bake your pizza!
4. Try Using The Bottom Rack
Our toaster oven manual advises cooking frozen pizzas on the center rack but this has never worked well for us.
Positioned on the center rack the top of the pizza is too close to the upper elements. The cheese would always be burnt and overcooked well before the pizza crust was crisped to our liking.
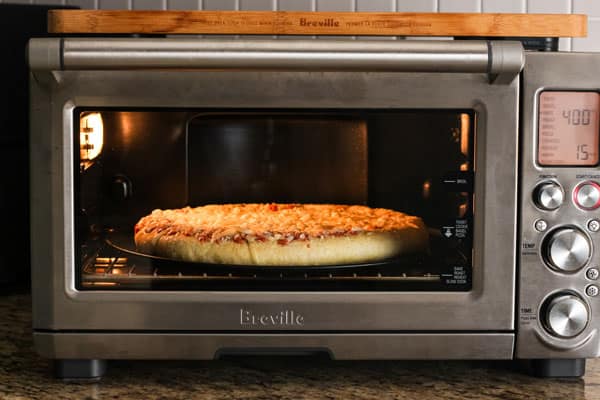
Since our goal is a crispy crust, we needed to get the pizza closer to the heating elements. So we placed the pizza pan on the bottom rack.
This also helped to keep the toppings from overcooking as they were now further away from the top elements.
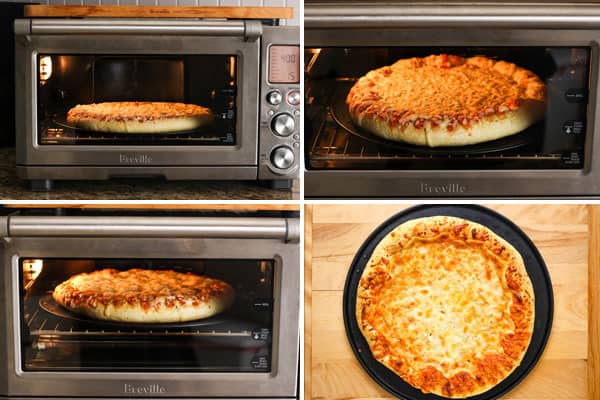
5. For Thin Crust Pizzas Try Removing The Pan Near The End
This smart tip is courtesy of an awesome reader named Gaylen. A while back, she generously shared with us her method for making fresh thin-crust pizzas.
Gaylen starts the pizza cooking on a pan and then near the end of the cooking time she moves the pizza off of the pan and onto the rack so the crust gets crispy.
To illustrate just how well this tip works, we baked two frozen thin-crust pizzas.
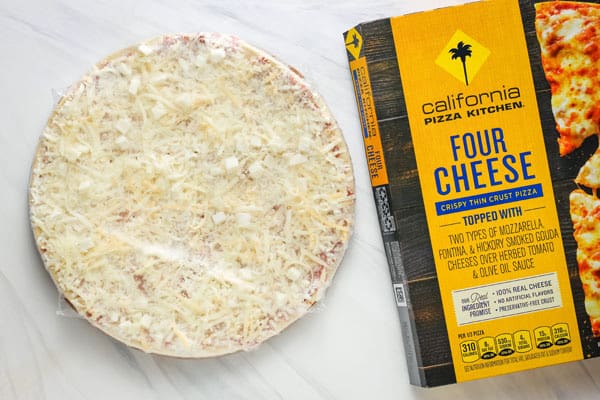
Pizza #1 – California Pizza Kitchen Four Cheese Thin Crust Pizza
- Prep: Preheated the toaster oven to 400°F and brushed the frozen crust with oil.
- Box Directions: Place directly on the center rack and bake for 15 to 16 minutes.
- How We Cooked It: Placed on pizza pan on the lowest rack level and baked for 16 minutes.

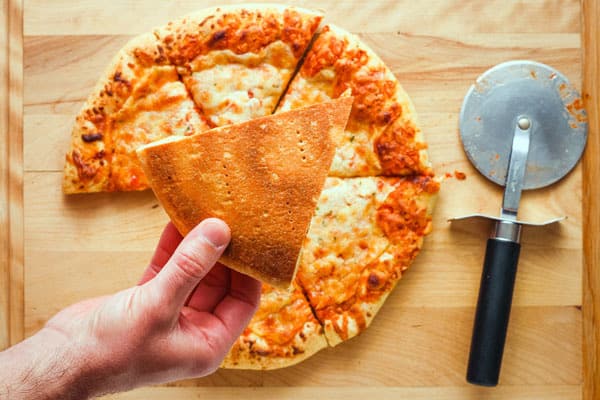
The Results: The cheese was melted, bubbly, and tasted delicious. While the crust had a nice golden color and was a little crisp at the edges the crust was still quite soft in the middle.
Not bad, but not crisp. It’s the kind of pizza I imagine would be a hit with little kids.
Pizza #2 – California Pizza Kitchen BBQ Recipe with Mindful Chik’n

- Prep: Preheated the toaster oven to 400°F and brushed the frozen crust with oil.
- Box Directions: Place directly on the center rack and bake for 14 to 15 minutes.
- How We Cooked It: Placed on pizza pan on the lowest rack level and baked for 10 minutes (about ⅔ through the cooking time). Then we used a spatula to gently slide the pizza off of the pan and directly onto the rack. Continued cooked for 5 minutes.
The Results: This pizza was fantastic! Now, I will admit that I am biased towards a BBQ pizza but even Tim who’s not a big fan of thin crust pizza thought it was great.

Despite looking a little dry the fake chik’n was crispy outside and moist inside and the cheese was nicely melted and browned.
But it was the crust that really stood out. It had crunchy edges, good flavor, and was crisped throughout. The best part was that with the exception of a few tiny bits of crusts, the crumb tray was spotless!

The reason this method works so well is that by waiting to move the pizza off the pan until later in the cooking time the sides are firmer and can keep the melty cheese contained.
Recently we baked a super-cheesy Newman’s Own thin crust pizza. When I slid the pizza off the pan there was so much bubbly cheese I was concerned it was going to make a mess but not a speck of cheese dropped onto the crumb tray.
6. We Found Two Methods For Baking Naturally Rising Crust Pizzas
Now that we had a go-to method for cooking frozen thin-crust pizzas it was time to turn our attention to frozen naturally rising crust pizzas.
This style of pizza bakes up great in our full-sized oven but cooking it in our toaster oven has given me nothing but trouble.
It’s been my white whale for years so I was really determined to figure this one out and actually ended up with two solid options.

For these experiments, we used 3 frozen Freschetta Naturally Rising Crust Four Cheese Pizzas. The directions on the box say to preheat the oven to 400°F, remove the wrapping, place the pizza on a pizza pan and bake on the center rack for 19 to 23 minutes.
Pizza #1 – The Control Pizza
- Preheated toaster oven to 400°F.
- Poked bottom of frozen crust with a fork and brushed with oil. Placed on pizza pan.
- Baked on lowest rack placement until the cheese was melted and the crust was browned, about 22 minutes.
This pizza was very meh. The bottom of the crust had a nice golden color but the sides were pale with a little browning.
Unfortunately, none of the crust was crisp. It wasn’t raw, everything was cooked through but it was just soft, doughy, and very chewy.

Another thing you’ll notice is the uneven browning of the pizza.
This is usually due to hot spots or areas in the toaster oven that are warmer than others (like by the glass door or the back of the oven).
We didn’t rotate this pizza so that is why it browned more on one side than the other.
If your oven has hot spots, the best way to help your pizza brown evenly is to rotate it halfway during cooking.
Pizza #2 – Removing The Pan Part Way Through
- Preheated toaster oven to 400°F.
- Poked bottom of frozen crust with a fork.
- Brushed the bottom crust and the sides with oil.
- Placed frozen pizza on a pizza pan.
- Baked on the lowest rack placement for 12 minutes (about ⅔ of the way through the shortest cooking time).

- Rotated the pan halfway and then carefully slid the pizza off of the pan. Continued baking for 7 to 8 minutes more.
- Cleanup: The crumb tray had a little bit of cornmeal that was easy to wipe off but otherwise it was free from any melted or baked-on cheese.
Wow! What a difference brushing the sides with oil and removing the pan during cooking made. Everything from the crust to the toppings tasted significantly better than the first pizza.

Tim loves a crispy crust and thought it was perfect. Personally, I found the crust a little too dark in some spots. Despite its darker appearance though, the crust still had a nice chew in the middle and lots of flavor.

To keep the crust from getting too dark. I’d probably keep the pizza on the pan a little longer (about 15 minutes) and then shorten the amount of time it bakes directly on the rack.
Pizza #3 – Using Multiple Rack Placements
- Preheated toaster oven to 400°F.
- Poked bottom of frozen crust with a fork.
- Brushed the bottom crust and the sides with oil.
- Placed frozen pizza on a pizza pan.
- Baked on the lowest rack placement for 13 minutes (about ⅔ of the way through the cooking).
- Wearing oven mitts, I carefully removed the pizza pan and moved the rack to the center position.
- Then I rotated the pizza pan 180 degrees, placed the pan on the rack, and continued baking the pizza for 6 to 7 minutes more.
This ended up being our favorite method for baking a frozen naturally rising crust pizza. If you’ve got multiple rack placements in your toaster oven, I’d definitely give it a try.
You get to keep the pizza on the pan the whole time, the toppings end up perfectly cooked, the sides get golden, and the crust is crisped but not too brown.
Ideas We Haven’t Tried Yet
Preheating The Pan
Recently I made a frozen pizza with the Ninja Dual Heat Oven from our Air Fryer vs Toaster Oven Air Fryer post.
That oven comes with a giant griddle that you heat up for 10 minutes before placing your pizza on it. I was pretty impressed with how the frozen rising crust pizza we baked on it turned out. We’ve also had a lot of luck with preheating our sheet pan before baking frozen pies in the toaster oven.

The only reason I haven’t tried preheating our pizza pan is that it has a non-stick coating. I want to do some research and check the manufacturer’s recommendations before preheating it empty as that’s sometimes not a great idea.
Using A Pizza Stone
We have a pizza stone that we never use because you have to preheat it for so long. I can see the benefit when cooking a fresh pizza but it kind of negates the convenience of making a frozen pizza.
Also, I’m a little concerned about the preheated stone cracking due to the temperature change from the frozen pizza.
Got Any Tips?
What’s been working for you when it comes to baking frozen pizzas in a toaster oven? If you’ve got a tip or two, please share them in the comments!
AWESOME AS THE SAYING GOES YOU LEARN SOMETHING NEW EVERYDAY THANK YOU 🤪 EH !
I have the Breville toaster oven with air fryer capability. When I do my pizza I bake on the 2nd to the bottom rack and use my air fryer basket to bake it. It is low and the bottom crust browns and crisp up nicely.
Thanks for the great tip, Barbra! What a smart way to use that basket for more than just air frying – I bet it makes getting the pizza in and out of the oven easier too.
You’re right! I had a home made pizza. I lowered my tray to the lowest setting, let it heat for 10-15 minutes at 415 (my parchment would burn above 420 is the reason, lol) before placing the pizza in. I then removed as suggested a little before done, sprayed the tray with a Pam spray and then slid the pizza without parchment back in for a crispier bottom. Easy, easy! As Id’ started the pizza on parchment, it easily slid from the paper into the tray and again, easily slid out of the tray once fully cooked. Bonus: a clean tray! Thanks!
That’s awesome to hear, Ty! Thanks for taking the time to comment and sharing how you cooked your fresh pizza – it’s super helpful.
Enjoyed your presentation and i know it was educating thank you for your info
Thanks, Ron, I’m so glad you found it helpful!
Do I brush the oil on the bottom of the frozen pizza crust? My frozen pizza has toppings frozen on it.
Karen
Hi Karen,
Yes, we like to brush oil on the bottom of the crust but you don’t have to, the pizza will still be very tasty.
If you want to give it a try here’s how we do it: Leave the frozen pizza wrapped in the plastic, flip it over, and remove just the plastic that’s covering the bottom crust.
After brushing the crust with oil, I put the pan on it. Then while holding the plastic that’s covering the cheese and toppings I flip everything (plastic, pizza, and pan) back over. We usually have to rearrange a few loose toppings but most of it stays in place.
Sorry if that sounded confusing. Next time we make a frozen pizza, I’ll try to take a picture of that step as I think it would do a much better job of explaining things 🙂
Love the tips about poking the crust and brushing with oil. I’m definitely going to try them both.
My tips is this: rather than using a pizza pan, I used a hacksaw to cut the handle off a spare spatter screen I had around the house. I cook the pizza on that for the entire cooking time and I thought the results were great. (I’m definitely Team Thick Crust, btw.) Love your site!
Thanks! I love your splatter screen tip. Awesome airflow and you don’t have to fuss with the pan – super smart. Thanks for taking the time to comment 🙂
Love seeing these options. I’m elderly so my poor teeth no longer like crispy anything, lol. I’m going to get a couple of the small pizzas, love the Digiorno Supreme, and experiment with thin and rising crust, and the bake method, not my Breville pizza option. Thank you for doing this ‘research’.
Thank you, Shirley! Our hope for this article was that it would offer something useful no matter how you like your pizza cooked. So it makes me really happy to hear that you’re going to be doing some experimenting of your own 🙂 I’d love to hear how the smaller pizzas turn out.
Happy Cooking!
Thanks for your post I I’m going to try using the pan next time I just bought a new toaster oven seems to kick off a lot of heat though my previous toaster oven I had about 7 years ago but I left it behind when I moved and it seemed to work a lot better than this one. So far I tried three frozen pizzas on the bottom rack the first one was the bottom was very burnt the second one the bottom was cooked but the top middle part was kind of watery and the third one was also sort of slightly burnt on the side and some of the toppings on the top were burnt but also it was not cooked I used convection on the third time so I’m going to try it without the convection I’m tempted to return the pant the oven I saw a picture of somebody who had a similar model and it stained their wall and that’s not something I want to deal with. I have new tile and new kitchen cabinets this past year so I’ll get pretty annoyed if they start turning brown I just return this thing and deal with paying a little extra electric on my regular oven