Make-Ahead: Frozen Grilled Cheese Sandwiches
Toaster oven grilled cheese – meal prep style! Stash these easy, cheesy, preassembled sandwiches in the freezer. They’re perfect for quick office lunches and busy weeknight dinners.
Earlier this month a reader left an intriguing comment on our toaster oven grilled cheese recipe asking: “Have you ever tried to prep these sandwiches ahead of time and freeze them, and cook in the toaster oven from frozen? I’d love to have this as a freezer meal for quick meals for my kids.”
What a fantastic idea, right? We’d never tried making frozen grilled cheese sandwiches and were excited to give it a go. So we grabbed some ingredients and made a bunch of them.
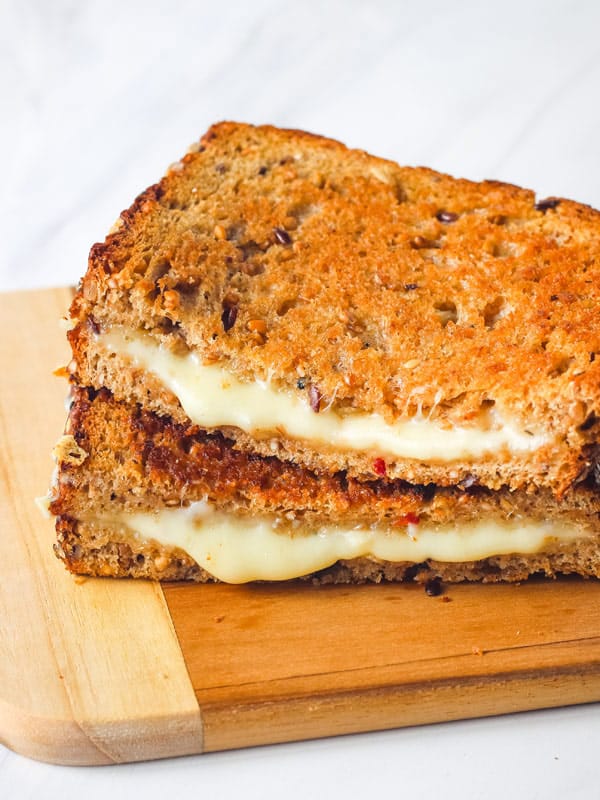
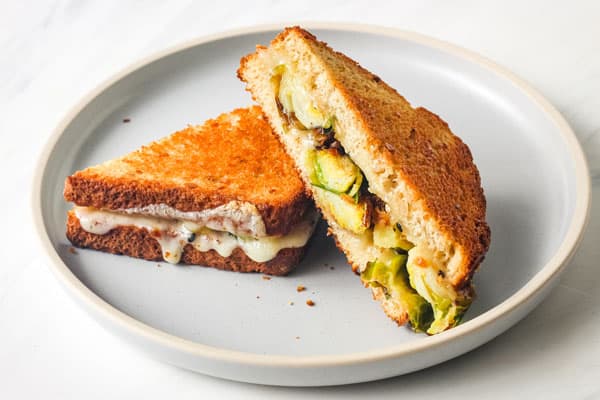
The traditional-style grilled cheeses turned out great with golden toasted bread and gooey melted cheese. But sandwiches with lots of thick fillings required an extra step to achieve that same level of toasty deliciousness.
Below we’ll walk you through everything you need to know to make these easy sandwiches including:
- How to prep and freeze your sandwiches
- Toaster oven cooking tips
- Our secret for avoiding frozen middles
- Flavorful ideas for customizing your sandwiches
Here’s What You Need to Make Them
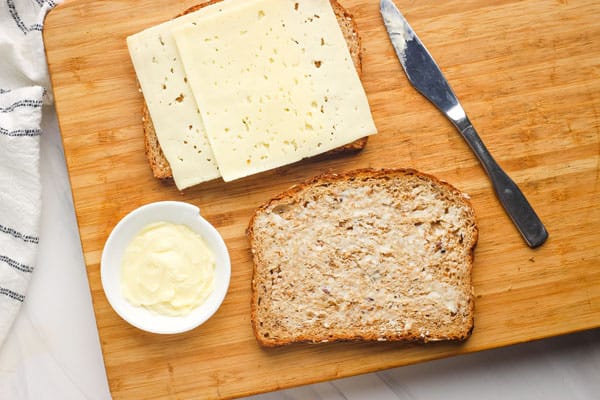
Butter: At room temperature so it’s easy to spread on the bread. While we’ve had good results using mayonnaise instead of butter for fresh grilled cheese sandwiches, according to this article from Real Simple frozen mayo can separate as it thaws.
Sandwich Bread: Use what you’ve got! We went with Dave’s Killer Bread and Oroweat Small Slices. Other types of bread might toast faster or slower, just keep an eye on your sandwich until you’ve got the cooking time dialed in.
Cheese: For the majority of our sandwiches we used Havarti, Provolone, and Pepper Jack deli slices. If you’re working with block cheese, make sure to slice it thinly as thick pieces will take longer to melt and could cause some problems.
Step by Step Instructions
1. Assemble Your Sandwiches
Start by assembling as many sandwiches as you want to freeze. Spread one side of each piece of bread with butter. On the unbuttered side of one piece of bread, place two slices of cheese. Top the cheese with the other piece of bread, buttered side out. Repeat until you have all of your sandwiches assembled.
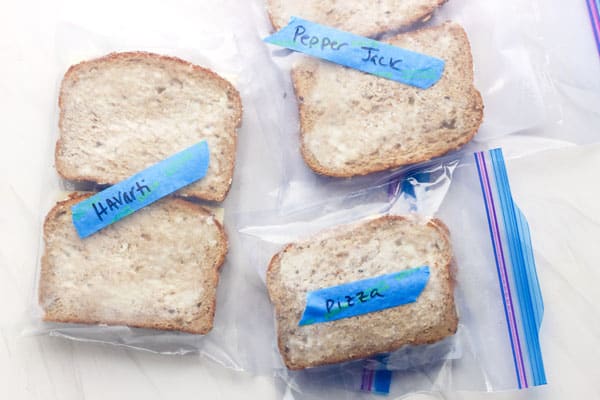
2. Bag and Freeze For Later
Add the sandwiches, in a single layer, to a freezer-friendly bag and freeze for up to 6 weeks. l put our bags on a sheet pan inside the freezer to give the sandwiches a flat surface. This also helped to keep any fillings from falling out if they got a little knocked around before freezing completely.
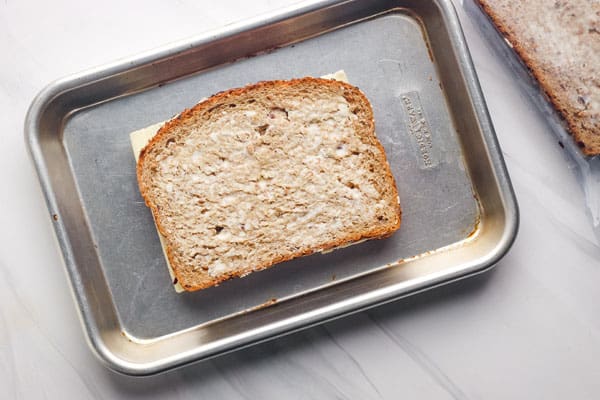
3. Baking From Frozen
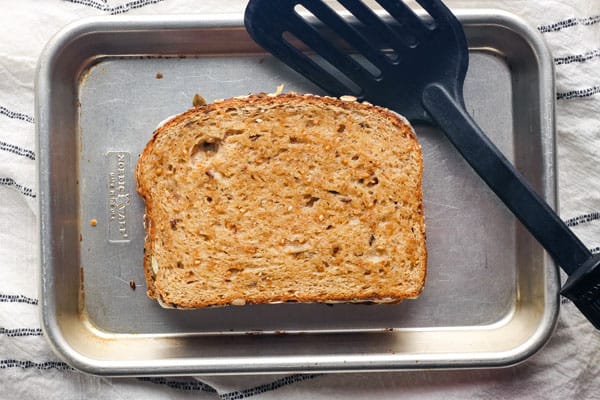
To make a grilled cheese from frozen you don’t need to preheat the toaster oven. Just grab one of the sandwiches from the freezer and place it on a pan inside of the cold toaster oven.
Set the temperature to 400°F (lower it to 375°F if you’re cooking with a convection toaster oven or your oven runs hot), select the BAKE setting, and press START.
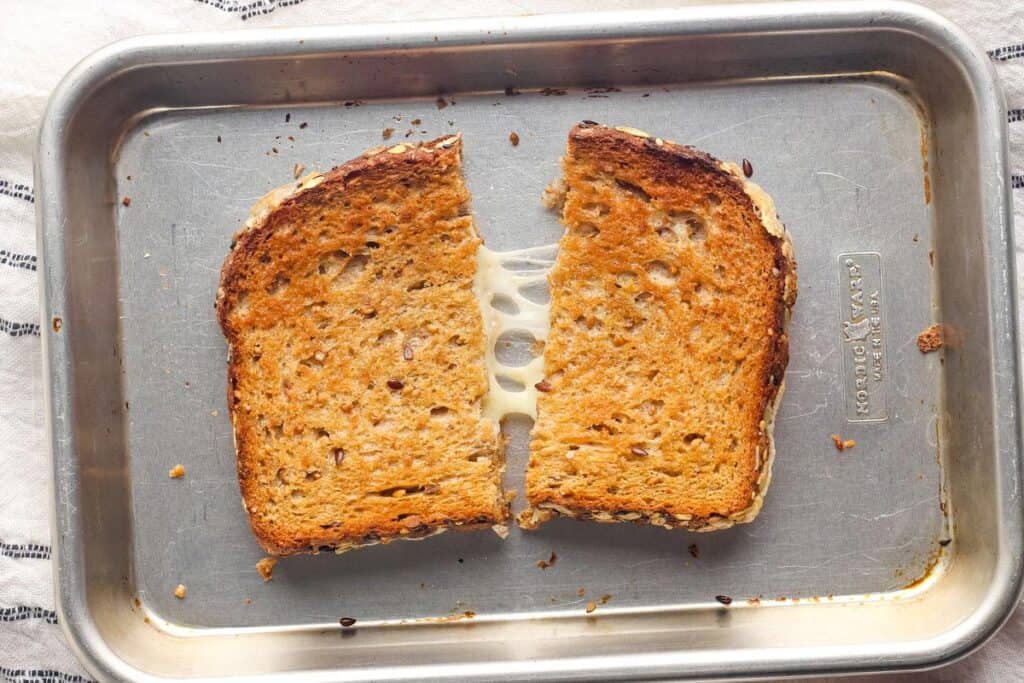
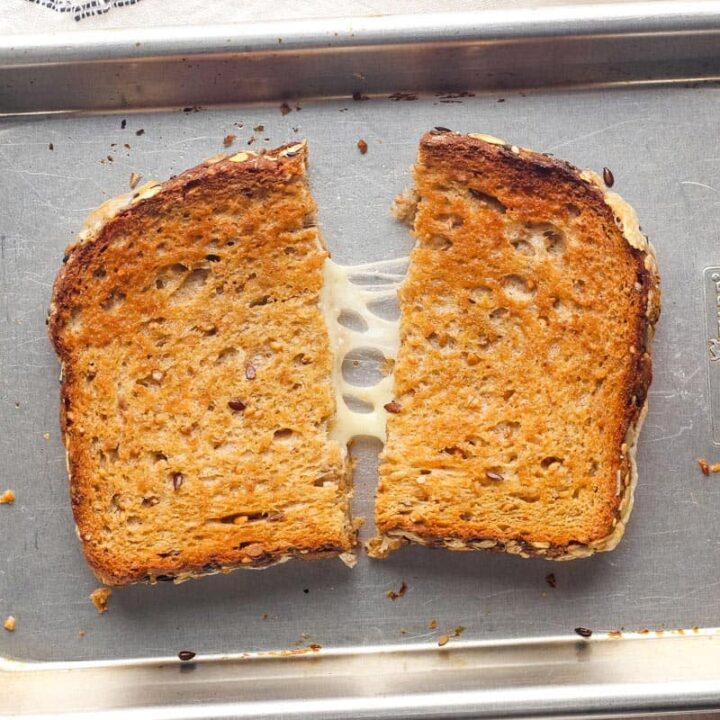
After about 5 or 6 minutes, use a spatula to carefully flip the sandwich. Continue cooking until both sides of the sandwich are toasted and the cheese in the middle is melted, about 4 to 6 minutes more.
Toaster Oven Tips
If we’ve learned anything creating toaster oven recipes for 5+ years it’s that every toaster oven is different! Below are a few tips to help you adjust this recipe for your little oven.
Rack Position: You can use the middle or bottom rack placements. In our toaster ovens, sandwiches baked on the middle rack tended to toast/melt a little slower.
Convection Adjustment: If you’re cooking with the convection fan on reduce the temperature to 375°F. Otherwise, the cheese in the middle won’t have enough time to melt before the bread is fully toasted.
Cooking Time: Start checking on your sandwich after the shortest cooking time listed and adjust things as needed. If it’s toasting too fast, turn down the temperature. Not toasted enough, let it bake longer.

Thaw Thicker Sandwiches For The Best Results
If your frozen sandwich has lots of fillings (like roasted Brussels sprouts) or extra layers of cheese and you just pop it in the toaster oven 3 things will happen:
- The bread will get golden and toasty.
- The edges of the cheese will melt beautifully.
- Everything in the middle of your sandwich will still be frozen!
The solution: Thawing the sandwiches before cooking them.
Thawing brings all of the ingredients to the same temperature and helps the sandwiches to cook more evenly. Below are two easy methods we use to thaw thick sandwiches for melty grilled cheese success.
Thawing Sandwiches in The Fridge
The good news is the sandwiches don’t take long to thaw. In the morning, Tim can pop one in the fridge at work and by lunch, it’s thawed and ready to be cooked in the toaster oven. You could also thaw your sandwich overnight in the fridge.
How to Thaw Thicker Sandwiches With The Microwave
Place a frozen sandwich on a plate and microwave for 30 to 60 seconds on defrost or 50% power. Carefully flip the sandwich and microwave for another 30 to 60 seconds at the reduced power.
The cheese and other fillings will still be cold, but should no longer be a frozen block. Also, the butter will melt into the bread (there’s no way around this) but it won’t affect how the sandwich toasts.
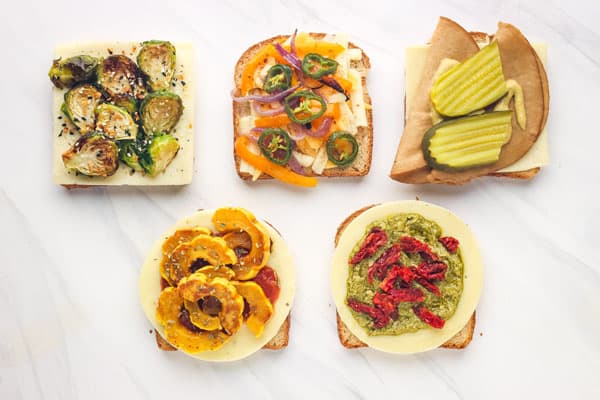
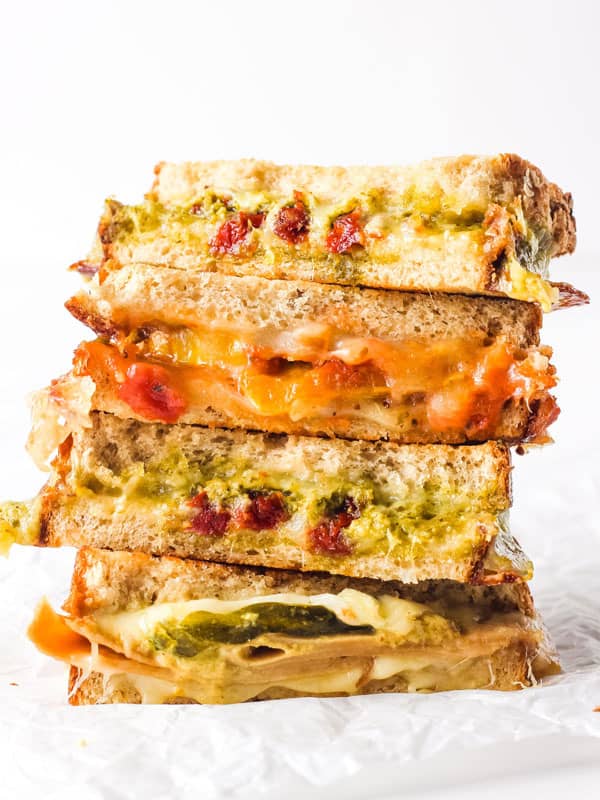
Sandwich Customizations
Okay, now that you know how to thaw an overstuffed sandwich let’s talk about some of the yummy fillings you might want to try and the best way to add them to your sandwiches.
- Place any fillings like veggies and spreads (pesto, mustard, or pizza sauce) between the cheese slices. This way they won’t make the bread soggy.
- Add a quick flavor boost with a sprinkle of your favorite seasoning blend. We tried everything bagel, Italian, and taco seasonings – they all tasted delish!
- Avoid fresh produce like tomato slices and lettuce. They’re packed with moisture that will make your sandwich soggy. Use roasted vegetables instead! Some of our favorites are leftover roasted broccoli, roasted red peppers, sweet potato rounds, and delicata squash.
- Tuck sandwich slices under the bread, otherwise they can get overcooked and become chewy.
- Pickle slices hold up surprisingly well as long as you pat them dry first.
More Tasty Sandwich Recipes
Love sandwiches? Us too! Here are more yummy vegetarian ideas for you to try:
Make-Ahead Frozen Grilled Cheese Sandwiches
Quick to prep, easy to cook, and so yummy! If you plan to add lots of fillings or extra cheese make sure to check out the tips for thawing thicker sandwiches.
Ingredients
- 4 slices Hearty Sandwich Bread
- 4 teaspoons Butter, softened
- 4 slices Cheese (Havarti, Pepper Jack, Cheddar, or any other kind of melty cheese that you like!)
Instructions
Assemble Sandwiches and Freeze
- For each sandwich, spread butter onto one side of each slice of bread. Place one piece of bread buttered-side-down on a cutting board and top with 2 cheese slices. Top with the remaining bread slice with the butter side facing out. Repeat to prepare the second sandwich.
- Place assembled sandwiches in a freezer-safe bag and freeze until ready to cook.
Bake Sandwiches
- You do not need to preheat the toaster oven.
- Place the frozen sandwiches on a pan inside of the toaster oven.
Set the temperature to 400°F (or 375°F for convection), select the BAKE setting, and press START. - After about 5 or 6 minutes, use a spatula to carefully flip the sandwich. *Don’t worry if the bottom bread is only lightly browned - it will keep toasting as it bakes.
- Continue cooking the sandwiches until both sides are toasted and the cheese in the middle is melted, about 4 to 6 minutes more.
- Allow the sandwiches to cool on the pan for 2 to 3 minutes before devouring.
Notes
Thawing Thick Sandwiches
Sandwiches with extra fillings or multiple layers of cheese need to be thawed before cooking or the middles will stay frozen.
- To thaw in the fridge: Transfer bagged sandwich to the fridge and thaw overnight or for at least 4 hours before baking.
- To thaw in a microwave: Place sandwich on a plate and heat at 50% power (or using the defrost setting) for 30 to 60 seconds, flip the sandwich, and heat for another 30 to 60 seconds until the center of the filling is no longer frozen. Proceed with the baking directions.
Nutrition Information:
Yield: 2 Serving Size: 1 SandwichAmount Per Serving: Calories: 420Total Fat: 20.5gSaturated Fat: 11gCholesterol: 90mgSodium: 640mgCarbohydrates: 44gFiber: 10gSugar: 10gProtein: 20g