Toaster Oven Roasted Chickpeas
Toaster Oven Roasted Chickpeas are going to be your new favorite snack. They’re crispy, crunchy, secretly good for you and so addictive!
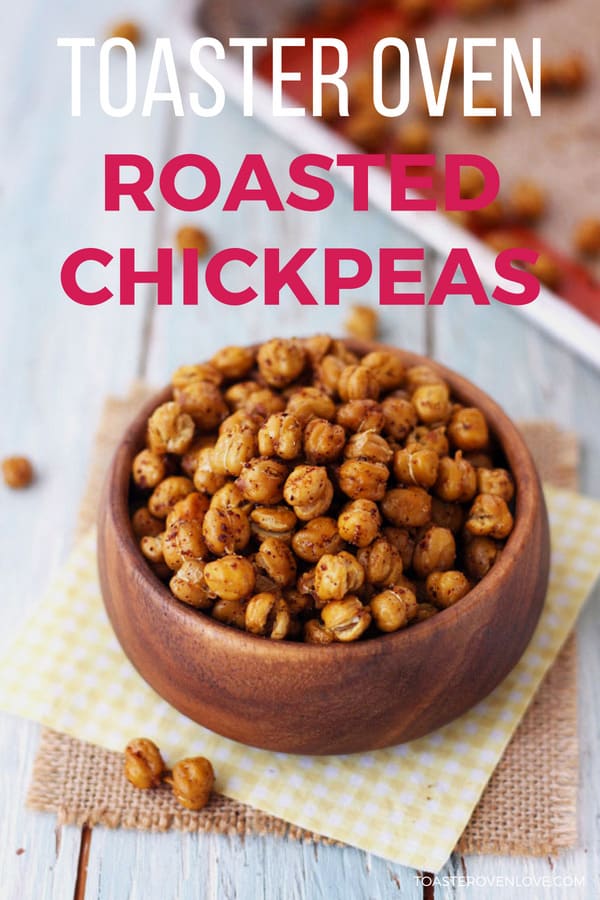
If you’re a fan of crunchy flavorful snacks then you’re going to be obsessed with these toaster oven roasted chickpeas.
The snack fan in our house is my husband Tim and he’s been eating these crispy beans warm right off the pan, tossed into salads (think high-protein croutons) and as a topping for avocado toast.
Taking pictures today, I could barely keep him from eating the whole bowl.
I can’t blame him though. They are kind of the perfect snack: All kinds of delicious and good for you too!
The funny thing is, roasting crispy chickpeas in our toaster oven was a little harder than I expected. It actually took me 5 attempts to get the time and temperature just right. But it was totally worth the effort.
~ Hey there Big Oven Cooks, scroll to the end of the post, we’ve included a few tips for you too! ~

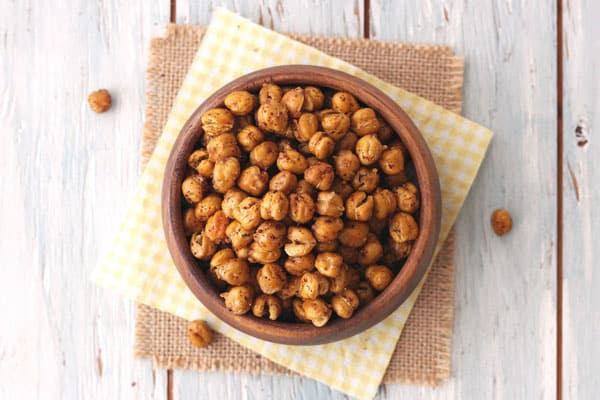
Toaster Oven Roasted Chickpeas
Crispy, crunchy, and secretly good for you! These little nuggets are great for a quick snack or fun salad topping.
Ingredients
- 1 15-ounce can Reduced Sodium Chickpeas, drained and rinsed
- 1 1/2 teaspoons Grapeseed Oil
- 1 1/2 to 2 teaspoons Seasoning of Choice, like Trader Joe’s Chile Lime Seasoning or Season Salt
Instructions
- Adjust the toaster oven cooking rack to the middle position and preheat to 375°F on the “Bake” setting. Line a rimmed baking sheet with a silicone baking mat.
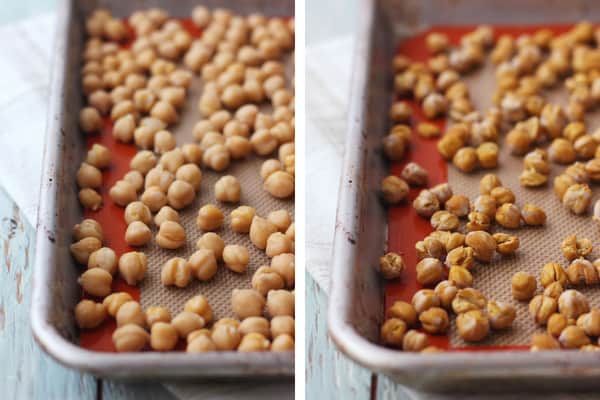
- Spread the chickpeas onto a clean kitchen towel, pat dry, and discard any loose skins. Arrange beans in an even layer on the prepared pan.
- Roast chickpeas in the toaster oven, stirring or shaking the pan every 10 minutes, until they are crisp and dry, about 30 minutes total. (After 30 minutes, if you’re worried the centers are still chewy, let the chickpeas cool a little and then taste one. If it feels chewy in the middle, pop the pan back in for another 5 minutes.)
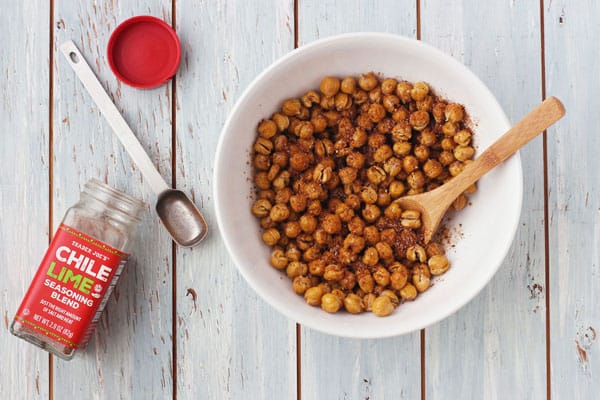
- Use oven mitts to remove the hot pan but leave the toaster oven on. Carefully transfer the chickpeas to a bowl. Add the oil and seasoning blend and toss to coat the beans.
- Pour the seasoned chickpeas back onto the pan and roast 5 minutes more.
- Allow the chickpeas to cool slightly on the pan before devouring by the handful.
Notes
Storage
Cool chickpeas completely before storing in a sealed container (like a mason jar) for up to 4 days.
Nutrition Information:
Yield: 4 Serving Size: About 1/3 CupAmount Per Serving: Calories: 120Total Fat: 2.6gSaturated Fat: 0.2gCholesterol: 0mgSodium: 328mgCarbohydrates: 19.3gFiber: 4gSugar: 3gProtein: 5.3g
Toaster Oven Tips
After all those batches, I learned a few tricks that I’m hoping will help you get the same crispy, crunchy, addictive results with your little oven!
Tip #1 – Line your pan with a silicone baking mat or Silpat. It makes cleanup easy and keeps the beans from getting burnt spots.
Tip #2 – If the pan that came with your toaster oven is a roasting pan (with a raised center and wells around the sides) use a different pan. Our Breville Smart Oven Pro (BOV845BSS) came with a pan like that. As soon as you add the beans they immediately fall to the sides and pile on top of each other.
Just like when making toaster oven roasted broccoli, you want your beans in a single even layer. If the beans are piled up they will steam and turn out squishy and chewy (yuck!).
Tip #3 – Use the middle rack position. On the “Bake” setting the heat in your toaster oven is concentrated at the bottom. Cooking on the middle rack, the heat will not be as intense and won’t burn or overcook your chickpeas.
Tip #4 – Dry roast your chickpeas. This might feel wrong initially (at least it did for me) but the beans crisp up so much better if you roast them without any oil or seasonings at first.

Tip #5 – You can make half a recipe and the cook time won’t change. If you’re cooking for one, using a smaller toaster oven, or just want to experiment with different seasonings feel free to split the recipe! This Spicy Chickpea Edamame Salad Pitas recipe is my absolute favorite way to use up leftover canned chickpeas.
Oven vs. Toaster Oven
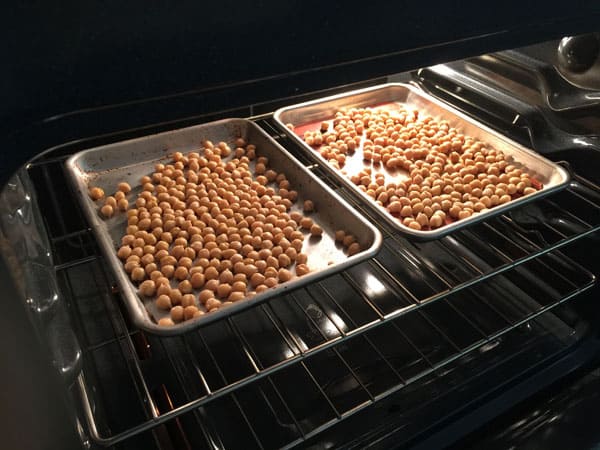
I know not everyone is rocking a reliable toaster oven so I threw a couple of pans of chickpeas into our big oven to see if they would cook any differently. Here’s what we learned:
- You don’t need the baking mat if you use a traditional oven. The beans cooked on the uncovered pan did not have any dark burn spots and crisped up fine.
- The chickpeas roasted in our big oven took longer to crisp up. Both of the pans took about 45 to 50 minutes to become completely crisped (aka no chewy middles). Combined with how long the oven takes to preheat, we spent over an hour making these in our big oven.
Looking for more “healthy-ish” snacks? Check out these Crispy Polenta Dippers (in 3 fun flavors), spicy Buffalo Broccoli and Cauliflower Bites with a creamy lightened-up blue cheese dip or everyone’s favorite easy recipe for Roasted Sweet Potato Rounds. They’re all irresistible!
Can’t wait to try this. What about old bay seasoning? Love the stuff just don’t want to ruin tge chickpeas. Also, what can I use instead of grape seed oil? My husband hates the stuff.
Hey Lisa!
What a great idea, Old Bay would be fantastic. Since you’re adding the seasoning after the dry roast you really can’t go wrong I’ve even used dried or fresh herbs like chopped rosemary.
Use any oil your husband likes, olive oil and avocado oil have worked well for us. I imagine coconut oil would impart a distinct flavor that might be good for sweet chickpeas mixed with a little cinnamon sugar.
Can’t wait to hear how your version turns out!