5 Tips That Will Make You A Toaster Oven Cookie Baking Expert
Become a Toaster Oven Cookie Baking Expert. With these five tips, you’ll learn more about your toaster oven and how to bake any cookie recipe using it.

Your grandmother’s oatmeal raisin cookies are legendary. You’ve baked the recipe hundreds of times.
In a full-sized oven.
Right now, you’re holding a tiny cookie sheet, eyeing your toaster oven and wondering…
“How do I convert my recipe’s cooking time or temperature, do I even need to?”
“Does making just one or two cookies affect the baking time?”
“Can I really bake cookies in my toaster oven?”
The good news is Yes You Can! Even better, there’s no magic secret to baking a fantastic batch of toaster oven cookies.
After years of baking crowd-pleasing cookies in our toaster oven, we’ve learned a few things.
Below you’ll find our best tips for baking small batch cookies you can be proud of!
Tip #1: Discover If Your Toaster Oven Lies
Does your toaster oven’s temperature run hot, cold or just right?
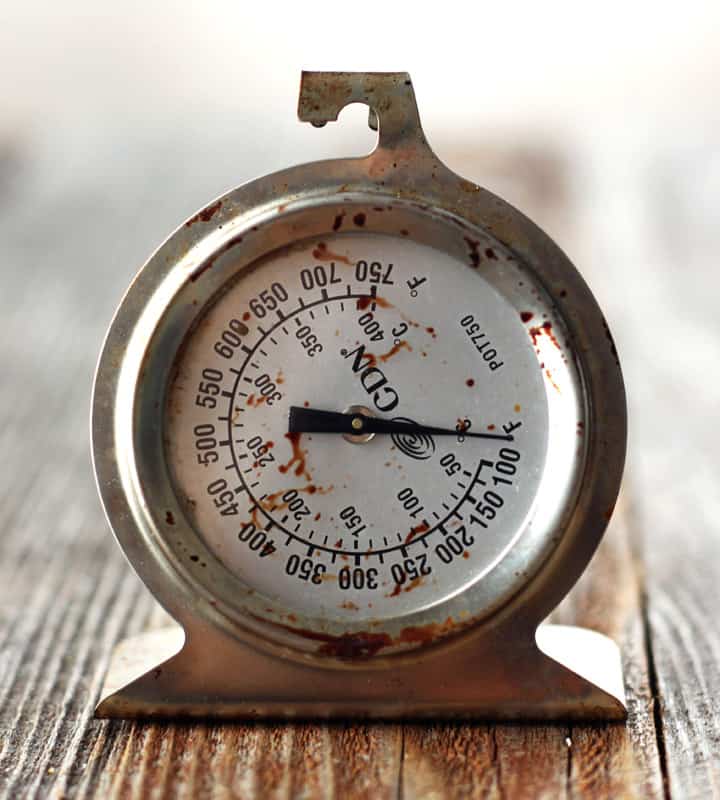
With a basic oven thermometer and our toaster oven temperature guide, you will know for sure.
Then it’s easy to make adjustments to any recipe’s baking temperature and time to accommodate your little oven’s heating quirks.
Tip #2: Make Clean-Up Simple
Have you been using parchment paper in your toaster oven? Take a second and grab the box from your pantry.
Look at it closely. Closer….
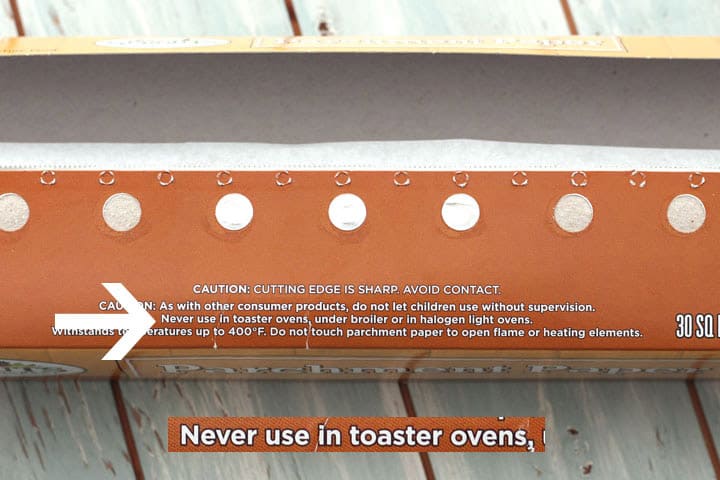
Yeah, it was an unpleasant surprise for us too. Since we found out, I’ve been reading every parchment paper box I see.
So far, all of them have expressly stated: “Not for use in a toaster oven.”
And the FAQ for parchment paper on the Reynolds Kitchens website says the same thing too “do not use with a broiling unit or toaster oven.”
You can always grease your pan old-school style if the recipe calls for it but we like to use a Silpat® or baking mat instead.
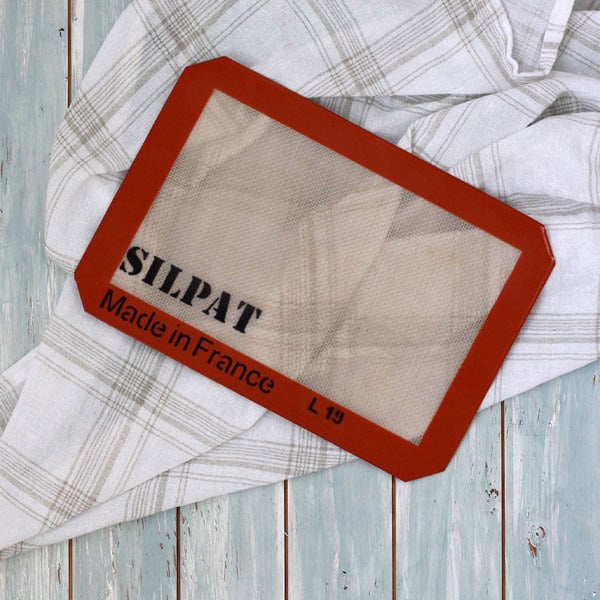
To learn more about them, you can check out this toaster oven silicone baking mats post.
Warning: Tempting as it is, do not cut a large Silpat or baking mat to fit your toaster oven. They have a mesh fiberglass inside that you don’t want to get into your food!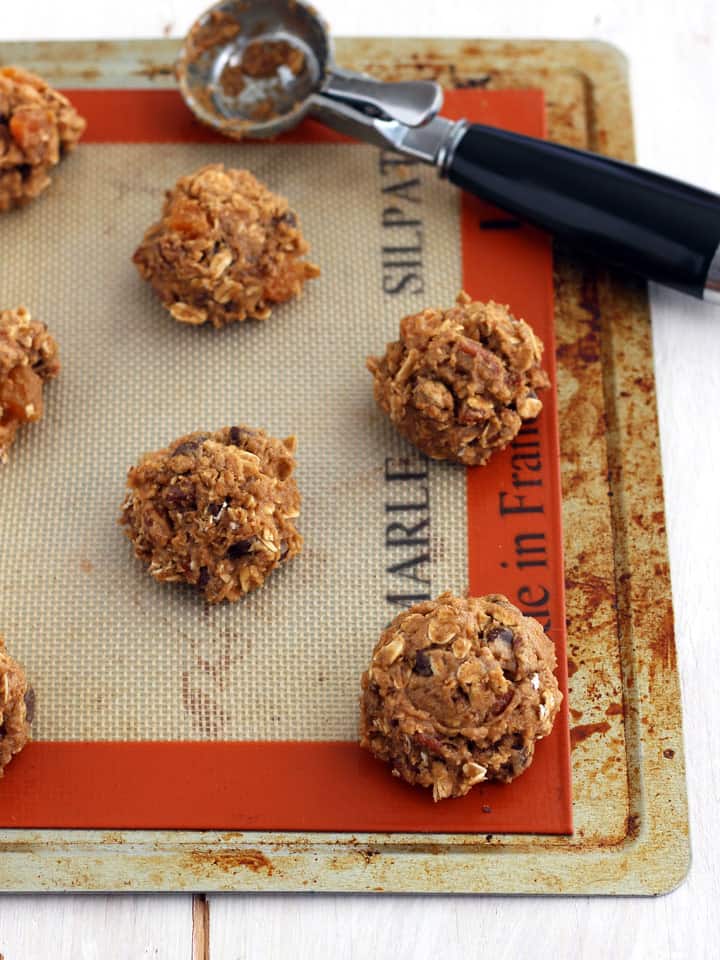
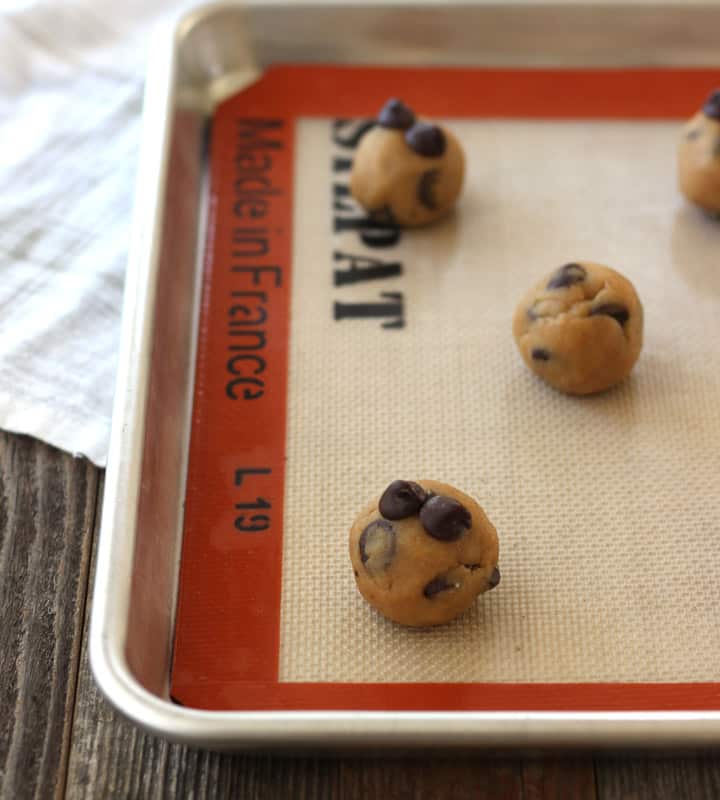
Tip #3: Bake A Toaster Oven Test Cookie
You’ve verified your toaster oven’s temperature accuracy, have your cookie sheet prepared and are ready to get baking.
But wait! If this is your first time baking that recipe in your toaster oven, take a few minutes and bake a test cookie.
A test cookie (or two) will tell you everything you need to know about how best to bake a whole batch of cookies.
Trust us, it’s better to sacrifice just one cookie than burn an entire batch.
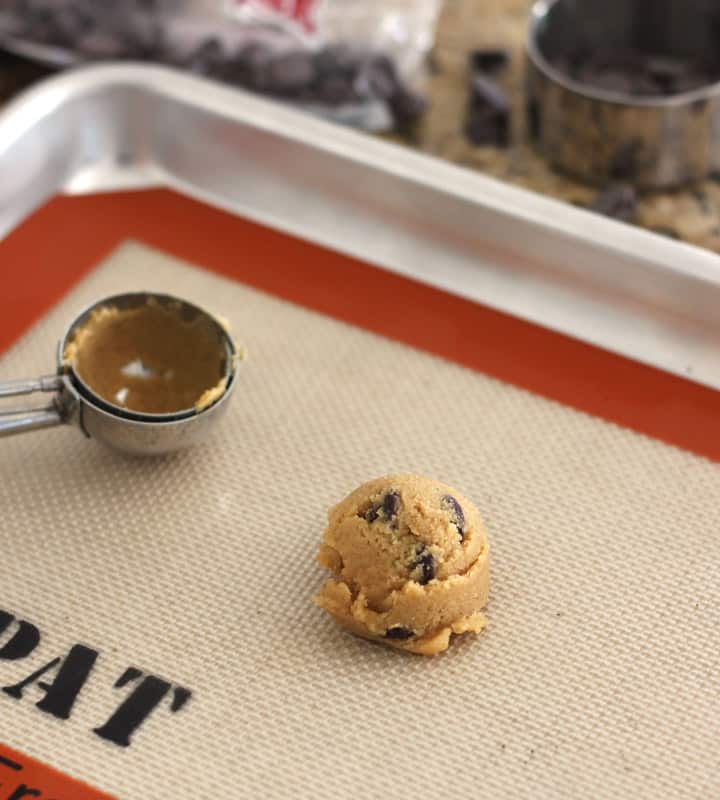
How To Bake A Test Cookie:
- Follow your recipe for preparing the cookie dough (including any chilling)
- Place one scoop or ball of dough on your cookie sheet
- Bake according to the recipe directions (with any adjustments from your thermometer test)
- Start checking 3-4 minutes early and note when the cookie is baked to your liking
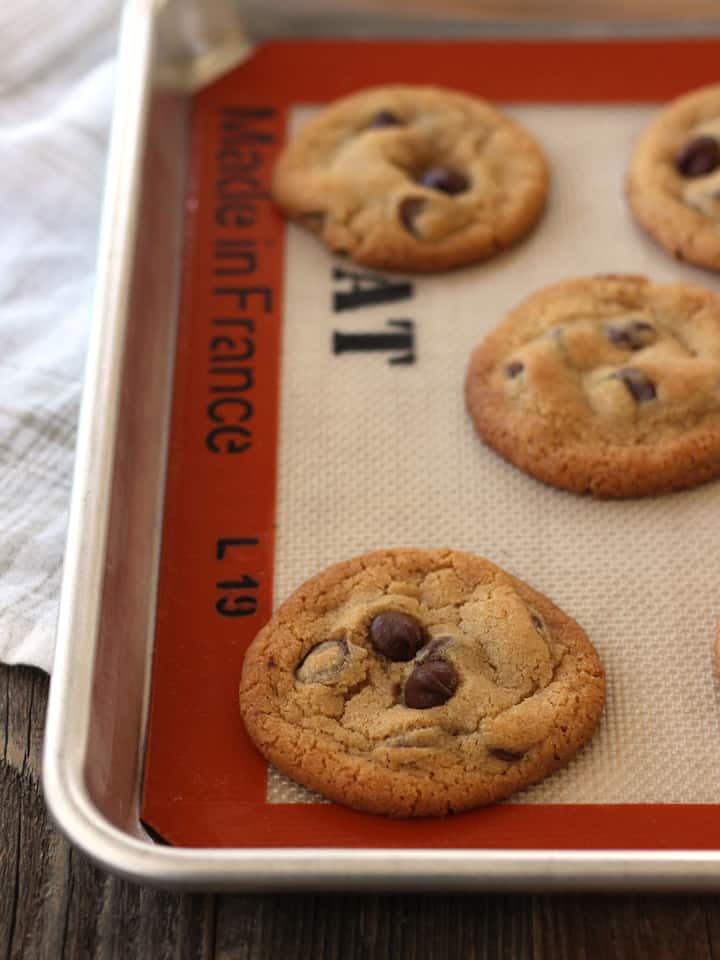
Now that you’ve got the timing down you can bake a whole batch!
In our experience, the increased portions won’t dramatically affect the baking time. Occasionally, you may need to bake a full batch for an additional minute or 30 seconds.
Troubleshooting: Overbaked Cookies
If your test cookie is burned or overcooked on the edges or bottom reduce the temperature by 15 to 25 degrees and bake another test cookie.
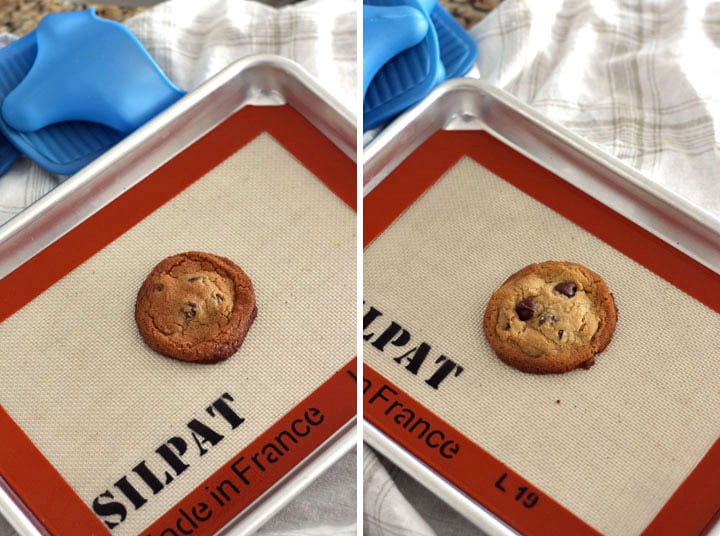
The cookie on the left was baked at 375 for 7 minutes and came out overdone. For the cookie on the right, we reduced the temperature to 350 for 7 minutes and it was way better though we probably could have taken it out 30 seconds earlier.
Troubleshooting: Underbaked
If your test cookie is taking twice as long to bake, increase the temperature by 25 degrees and test another one.
Troubleshooting: Over-Browned Bottoms
In one of our toaster ovens, we have four rack placements and the “middle rack” is closer to the bottom heating element. This is where the majority of the heat comes from when using the Bake setting.
Baking a batch of sugar cookies recently I noticed the bottoms were browning too fast while the rest of the cookie was baked perfectly.
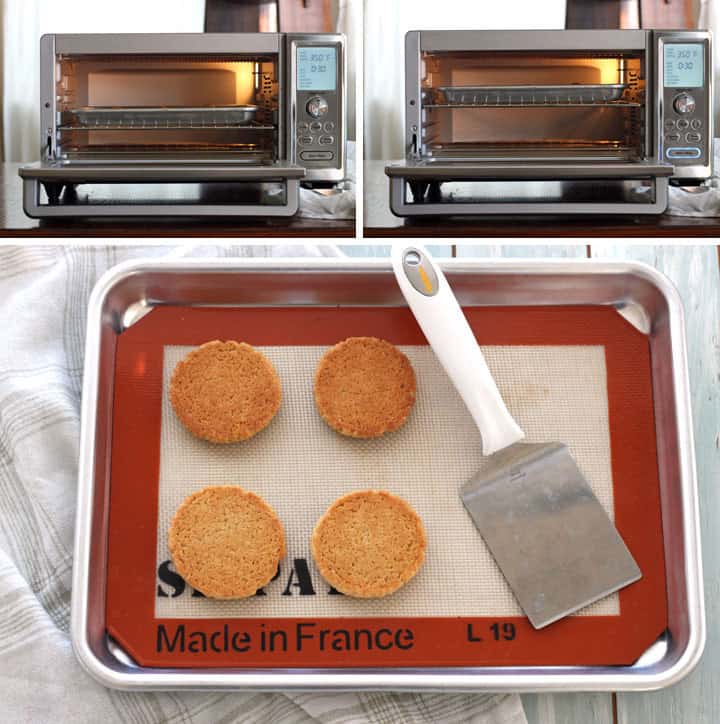
Instead of reducing the temperature for the next batch, I moved the baking sheet up one rack placement.
This easily gave my cookies nice golden bottoms without making any changes to the baking time or temperature.
What about Convection?
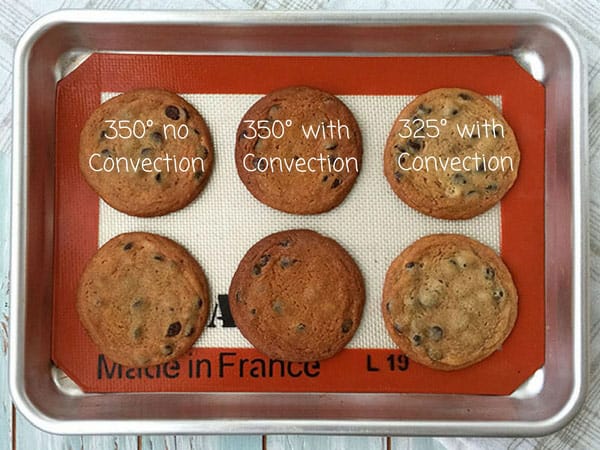
Follow the same Test Cookie steps, but reduce the temperature by 25 degrees and start checking for doneness even earlier.
{Related: Everything You Need to Know About Convection Toaster Ovens}
Tip #4: Give Your Cookies Some Space
Almost all cookie doughs spread but especially chewy chocolate chip cookies.
Before baking check your recipe for notes on spacing the dough or if the cookies will spread.
If your recipe doesn’t specify, leave at least 1 to 2 inches of space between the cookies.
To keep from overcrowding the pan, you may need to bake your toaster oven cookies in more than one batch.
But What if You’ve Only Got One Cookie Sheet?
If that’s the case, let the cookie sheet cool between batches. A warm cookie sheet will cause the dough to spread too fast and could burn your tasty cookies.
To quickly cool a hot baking sheet run the backside under lukewarm water, dry well and bake another batch!
Do You Want to Bake A Lot of Cookies?
You might want to consider getting a second baking pan then.
If you like the one that came with your toaster oven visit the manufacturer’s website they usually sell replacement pans.
Before purchasing a pan that’s not from your oven’s manufacturer you should measure the interior of your toaster oven to make sure it will fit.
To see our Top 6 favorite pans check out this Toaster Oven Sheet Pans Post.
4.1 Battling Hot Spots
All ovens big and small have hot spots: areas that are warmer than others.
While you can’t do much to change them, you can rotate your pan halfway through the baking time to equally expose your cookies and even-out any browning issues.
Tip #5: How To Handle Grandma’s Awesome But Enormous Recipe
We’re working on a series to help you “small-batch” your favorite large-oven sized family recipes. But until it’s ready, we know you still want to enjoy your Grandma’s famous cookie recipe, right?
Well, you probably only want 2 or 3 cookies. So what to do with all the leftovers?
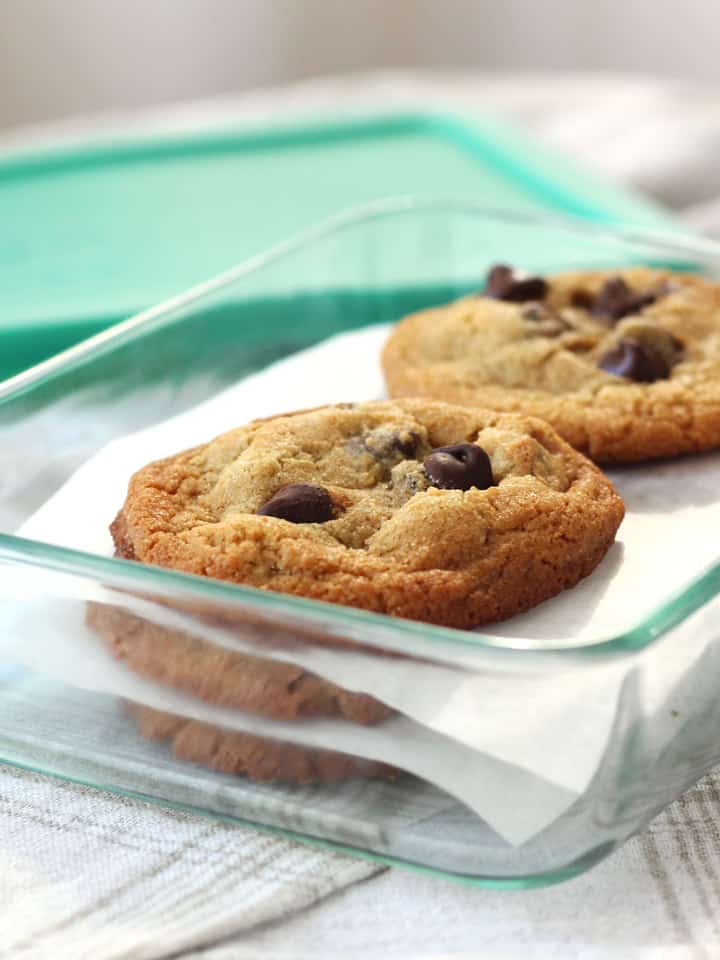
How To Freeze Baked Cookies:
- Allow baked cookies to cool completely
- Place cookies in an airtight container (or bag) with pieces of parchment paper between the cookies
- Seal the container and freeze cookies
- They’ll have the best flavor for about 1 month but still be good well after that
To Thaw: Leave frozen cookies on a plate for 10 minutes to bring to room temperature. Rewarm in a 350 toaster oven for 2-3 minutes if desired.
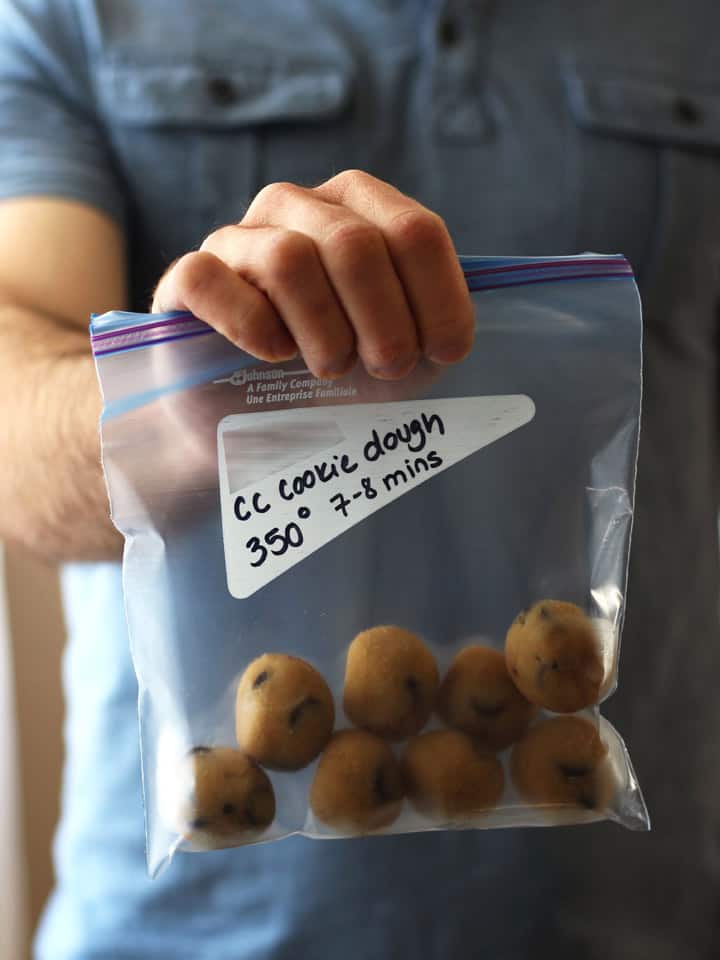
If you don’t want to stand at your toaster baking dozens of cookies all at once you can always freeze the dough.
How To Freeze Extra Raw Cookie Dough:
Roll or scoop the leftover cookie dough into evenly sized portions. Then, place them on a baking mat or parchment-lined cookie sheet in your freezer until frozen.
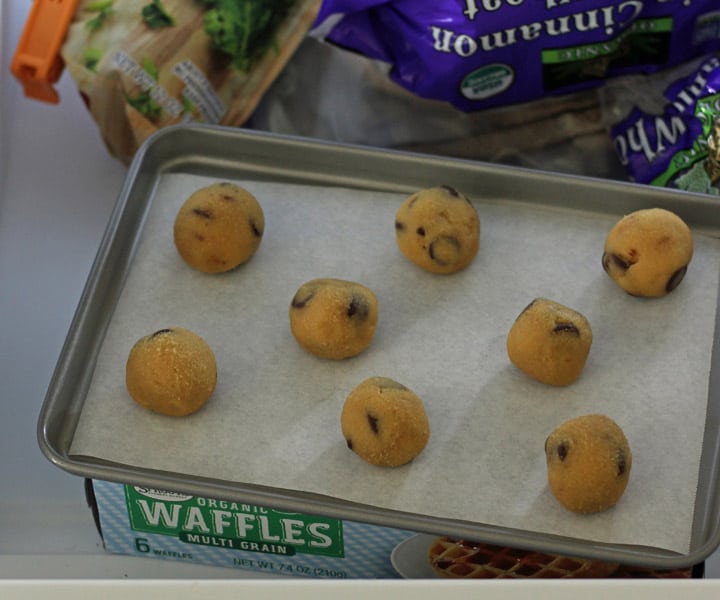
Use a marker to write the original baking directions on a freezer-safe bag. You can store the dough in your freezer for up to 6 weeks.
Again, that’s for best flavor, the frozen dough will still be okay to bake and eat after 6 weeks.
How Should I Bake The Frozen Cookie Dough?
The Choice Is Yours!
You can bake the dough straight from the freezer. Just add 2 or 3 additional minutes to the baking time.
They won’t taste exactly like the fresh cookies, baking freezing cold cookie dough will result in a thicker denser cookie.
Instead, we like to bring the frozen dough to room temperature first (about 10 minutes) and then bake as originally directed.

Keeping a batch of cookie dough in the freezer is our favorite baking tip.
Without dirtying a single dish, you can enjoy a freshly baked cookie (or two) in 20 minutes or less.
We do it all the time with our double chocolate chip cookies and it’ll work great for your Grandma’s famous oatmeal raisin cookies too!
Brie
Thank you
Baking tips are awesome
I got a cosori toaster convection
You explained 👍 did coconut
Shredded time was perfect
Thanks again your recipes
Are five stars
Thank you for the lovely message, Aeil! I hope you have lots of fun with your new Cosori 🙂
Happy Baking!
Brie
Looking, looking, looking still looking …this is a maze to find the recipe.
Hi Diane,
I’m not sure what recipe you’re referring to – as the title says, this is an article about Baking Tips.
If you’re looking for cookie recipes, you can find a bunch of them here: https://toasterovenlove.com/category/toaster-oven-treat-recipes/toaster-oven-cookie-recipes/
Happy Baking!
I’m new to the counter top toaster style ovens. I’ve baked a lot of bread in a standard stove oven. However I tried several times to bake a loaf of sourdough in my new Breville Smart Oven Air, and each time I don’t get oven spring. I’ve turned the temperature down 50 degrees, turned off the convection function and still having similar results. I have searched Breville site for help/recipes and the web without clear answers. Have you cooked bread in your oven and do you have any suggestions that might help?
Thanks
Hi Peter,
Unfortunately, I am the absolute worst a baking bread in any oven. The good news is there is a great Facebook group that’s dedicated just to the Breville Smart Oven Air and it’s filled with many talented bread bakers.
You can find the group here: https://www.facebook.com/groups/127215904662130/ (It’s a closed group so you’ll need to request to join but they approve new members pretty quickly.)
Once approved, you can ask your questions or just search the group for “bread” and you’ll find a bunch of bread posts with tips for your oven.
Hope that helps and happy baking!
Hi: I have read that using pizza stone in my toaster oven will help with even baking. Do you recommend one and if so, do I put it in the bottom of my toaster oven?
Linda, I’ve heard of that working in a traditional oven but we’ve never tried it in a toaster oven or countertop oven. Looking online I found a great conversation with some tips that you can read here.
It appears the consensus is to put the stone on the bottom rack (not the bottom of the oven). Also, you should expect the oven to take longer to preheat.
If you give it a try, I’d love to hear how it goes!
This may sound goofy, but am I suppose to take crumb tray out of toaster before baking cookies, for example?
Hi Michaele, that’s not a goofy question at all. Unless your manual says otherwise, you should always leave the crumb tray in while cooking and/or baking.
The crumb tray is great for catching spills and splatters and in some ovens (like our larger countertop oven) the shiny metal has a reflective property that helps to cook food more evenly.
Thanks for stopping by!
Brie
Any guidelines for quick breads? Or even regular breads?
Hi RM!
We’re working on a series of posts with toaster oven muffins tips and a troubleshooting guide that we’ll hopefully have ready next month. A lot of the info will apply to quick bread too.
In the meantime, you can find a few tips on this post for toaster oven banana bread recipes https://toasterovenlove.com/petite-whole-grain-banana-bread/
Using our toaster oven’s conventional heating I find mini loaves usually bake well at the temperature called for in the recipe but larger full-sized loaves do better if you reduce the temperature by 25 degrees. If you reduce the temperature it may require a little more baking time but will help to prevent over-browning on the top of the loaf.
We just picked up the Convection Oven Cookbook by Beatrice Ojakangas and she recommends if you’re using convection to bake any kind of breads to reduce the temperature by 50 to 75 degrees but to not go below 300F. We usually reduce at least 25 degrees when using convection but sometimes do need to go 50 degrees lower depending on the recipe.
Hope that helps, happy baking!
Brie
Hi. any reason I couldn’t use foil to line the baking sheet?
Great question Lynn!
Most toaster oven manufacturer’s have specific instructions about the use of foil in their toaster ovens. Some even caution against it completely. So you’ll want to check your manual or speak with the manufacturer before using foil in your toaster oven.
Personally, if I can’t use a baking mat I just go old-school and lightly grease the pan because any cookies I’ve ever baked in a traditional oven using foil always over-brown on the bottom.
Can standard size silpat be cut to fit small cookie sheets?
Great question, Emmy!
A silpat is made of fiberglass mesh coated with silicone. According to Silpat’s FAQ you should not cut the silpat “as the fiberglass mesh particles might migrate into the food.”
Hi Tim and Brie! Thanksabunch for your Toaster Oven Cookie baking tips. I have a Oster convection toaster oven which does a great job but I am probably going to eventually get a slightly bigger oven (eyeing the Breville!) since the interior dimensions (width) is about 11 3/4 which wont allow me to get a 13 x 9 pan in there and I can’t find a cookie sheet to fit so I can get the toaster oven silpat you recommend. Plus I’m pretty much eyeballing the temperature since it isn’t digital. Anywho love your blog and keep up the great information. This cooking/baking noob needs all the help she can get.
Hi, Cindy! Thanks for dropping a note it’s great to hear from you!
We’re always eyeing the Breville too lol, those are some sweet toaster ovens. 🙂
We used to have an Oster convection like you and loved using it. I think it might have been the same as yours. If that’s the case, you might want to try measuring the cookie sheet. The 4th picture from the post above is actually the silpat on the flat baking sheet that slid into the grooves in our Oster.
Thanks! I measured the width at the grooves and it’s just about 12in. What brand is that baking sheet I can’t seem to find one online that is the right size.
Sorry I got your hopes up Cindy because it appears the Oster doesn’t come with a thin metal cooking sheet, just the black baking pan. I was looking at our old manual for their customer service number to call and ask about the baking sheet when I noticed it wasn’t on the parts list.
So, this is equally embarrassing and hilarious…we’ve been using the crumb tray as a cookie sheet this whole time!
I’d love to say it was a clever hack we designed but nope, we just slid the tray in and when it fit we figured that was the baking pan and kept using it that way.
Anyway, it’s obviously not the recommended use but your crumb tray could work in a pinch. If yours fits, you might want to call Oster (800) 334-0759 and see the price for a second crumb tray that you can use as a baking sheet?
That is funny. I didn’t think my oven came with a crumb tray but it did. I found a replacement online and will be ordering one soon. I assume since you used it that way you didn’t have any issues with warping or anything. Will also get the silpat. Thanks alot for the advice. Saving me a bunch of money not getting the bigger oven, may ask for my birthday this year though!
Yeah, when we slid the tray into the grooves on the sides of the toaster oven it was a tight fit that kept the sheet flat the whole time.
The only issue we had was not being able to rotate the pan. When baking cookies, I would try to keep the dough away from the silpat edges so I could rotate the silpat halfway through the bake time but otherwise it worked great.
Can’t wait to hear how your setup turns out Cindy!
And a new toaster oven sounds like the perfect birthday present 🙂
Do you have a similar guide for baking muffins in a toaster oven?
Hey, Wanda! Not yet, thanks for the great idea, we’ll get on that 🙂