Toaster Oven Frozen Pot Pie Challenge

Years ago we showed you how to use a convection toaster oven. Since then, we’ve all been having fun baking up the best cookies, roasting vegetables, and devouring batches of crispy fries.
One of the most popular requests in the comments on that post is for frozen pot pie tips. Since Tim and I don’t eat meat we haven’t had much to offer on the topic.
Well, that was until I ran across Amy’s Vegetable Pot Pies at our grocery store. They’re frozen, vegetarian, and even include toaster oven cooking instructions* on the box!
(*If you’re curious why some frozen foods advise you not to cook them in a toaster oven check out these Frozen Meal Cooking Tips.)
Excitedly, I tossed a bunch in the shopping cart and headed for the checkout.
Frozen Pot Pie Challenge
As a ThermoWorks affiliate, we may receive commissions from purchases made using the links on this page.
Armed with 2 toaster ovens and a mini metal pie pan, Tim and I set out to find the best way to cook frozen pot pies in a toaster oven.
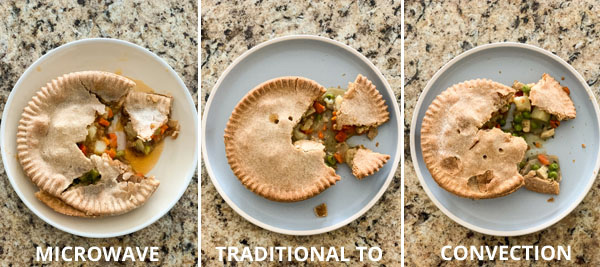
In total, we cooked 5:
- 1 in the microwave (for comparison)
- 1 in our traditional toaster oven
- 3 using convection in our countertop oven
We were looking for the method that produced a flaky crispy crust, a saucy filling that flowed smoothly, and (for you Great British Bake Off fans) no soggy bottom!
Some cooking methods worked better than others and one was just flat-out gross. Today we’re sharing the good. The messy. And the occasionally inedible results.
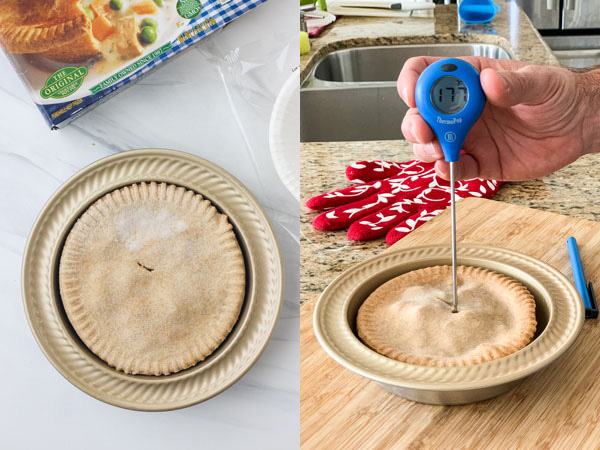
Don’t worry, we used our favorite instant-read thermometer to verify all of the pot pies had reached a safe internal temperature before taste-testing them.
Here’s a handy temperature guide in case you need it for your own pot pie adventures.
Okay, let’s get this challenge started!
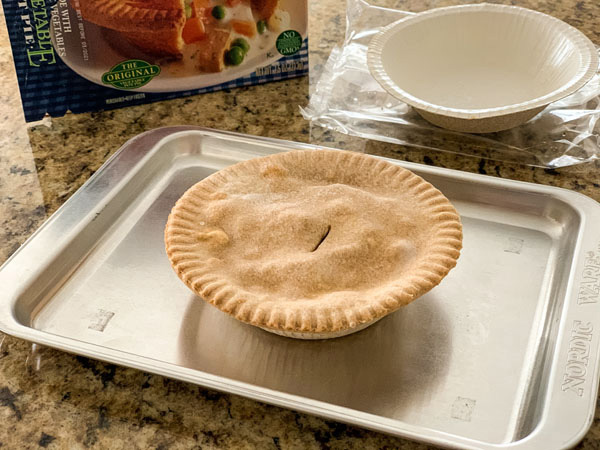
The box directions for toaster oven cooking were as follows:
- Remove the plastic wrapping and paper bowl.
- Transfer pot pie to an oven-safe dish.
- Follow the conventional oven directions of 350°F for 50 to 55 minutes.
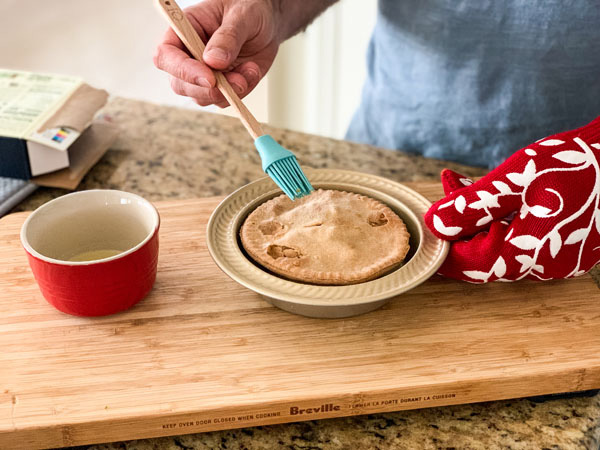
We also used their directions for glazing the pie by brushing each pie with melted butter or milk and honey after 20 minutes of cooking. FYI: The butter worked best.
On the first day, we tried 3 different cooking methods.
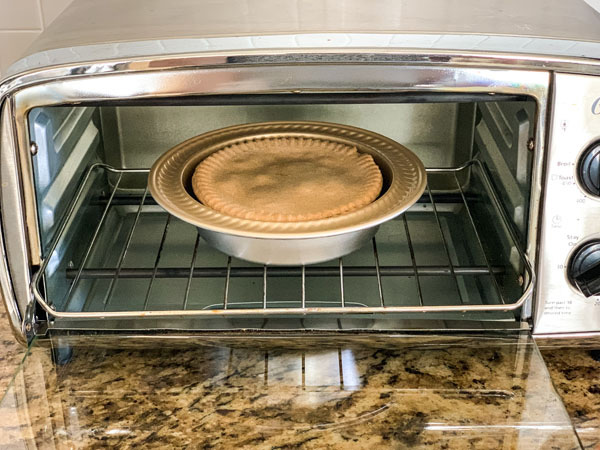
Method: Conventional Toaster Oven
- Bakeware: Metal Mini Pie Pan
- Temperature: 350°F
- Total Cook Time: 45 minutes
The Results: The top crust was nice and crispy. The bottom crust was dry, not soggy but not very crispy either. The edges where we’d been a little heavy-handed with the butter glaze were super crunchy (in a good way), while the filling was juicy and the vegetables tasted great. The sauce flowed well and covered all of the ingredients.
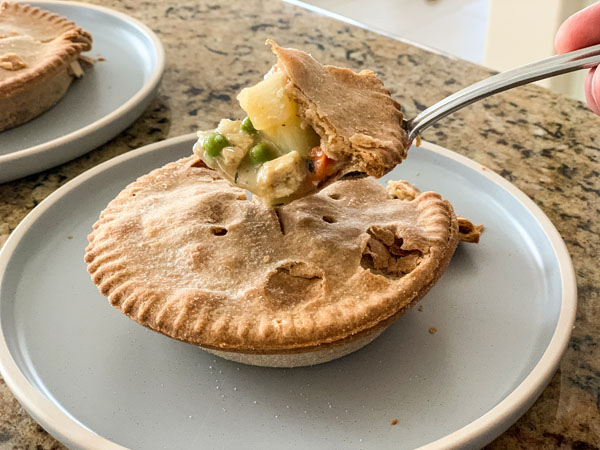
Method: Convection Toaster Oven
- Bakeware: Metal Mini Pie Pan
- Temperature: 325°F
- Total Cook Time: 40 minutes
The Results: The top crust was flaky and nicely browned. Both of us liked the crunchy edges. The biggest surprise was the bottom, it was dry and crisped. The creamy sauce was smooth and not too thick while the tofu and vegetables were warm and cooked through but not dry, tough, or mushy.
Related >>> Toaster Oven Frozen Fruit Pie Showdown
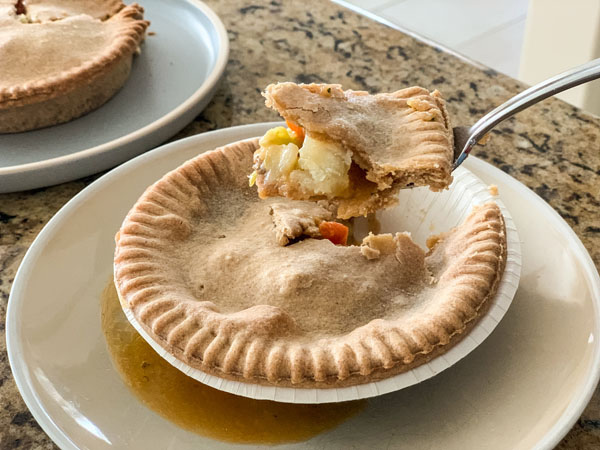
Method: Microwaved
- Bakeware: Paper bowl included in the package.
- Total Cook Time: 4 minutes
- Quick Note: I accidentally grabbed a broccoli and cheese pot pie so the sauce looks a little different than the others.
The Results: Terrible. The crust was gummy and chewy while also dry in some parts. The vegetables were very mushy. Some of the sauce spilled out onto the pan, and what was left inside the pie was thick.
I think the pictures say it all.
Conventional Toaster Oven vs. Convection
Both pot pie fillings tasted identical. The only noticeable difference was in the crust.
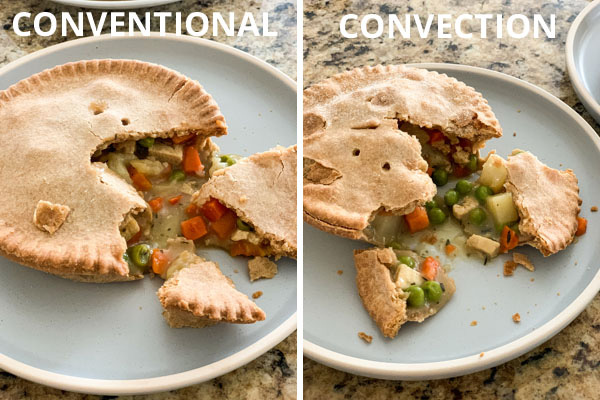
The pie cooked with convection had:
- more browning
- a lighter, flakier, crisper top and bottom crust
- drier bottom crust
With more pot pies in the freezer, we decided to try a few other ideas using the convection setting.
The secret to cooking with convection is to let the warm air circulate around the food. So we thought the frozen pies might cook even better if we didn’t use the pan and cooked it on a rack instead.
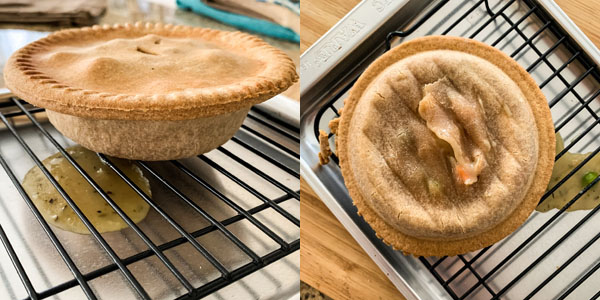
Method: Convection On Rack
- Temperature: 325°F
- Total Cook Time: Doesn’t matter – it’s not a good method.
The Results: The crust was looking great but about 2/3 of the way through the cooking time our pie sprung a leak. When I flipped it over, you could see the bottom crust had defrosted and softened during baking. Without the support of a pan, it just fell apart.
Since that was a bust, I wanted to see what would happen if all you had to cook the pot pie with was a small baking sheet.
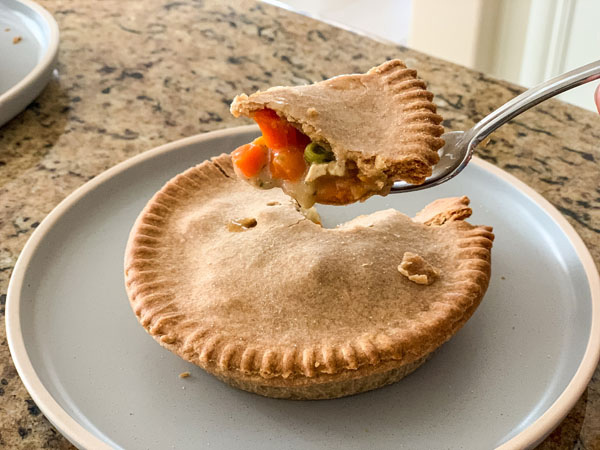
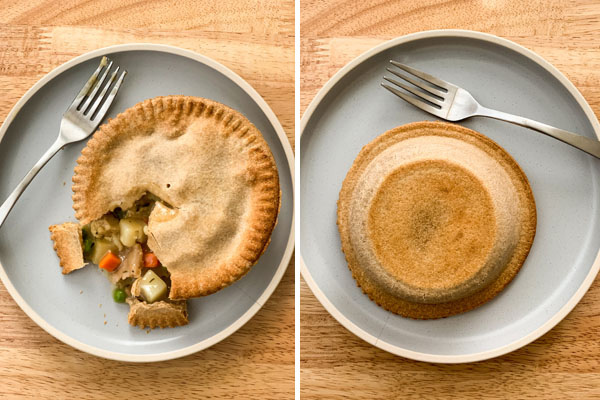
Method: Convection on Baking Sheet
- Temperature: 325°F
- Cook Time: 35 minutes
The Results: Because the pie was directly on the pan it cooked faster than any of the other pies (well, except the gross microwave one). After the rack collapse, I was a little worried the pie might leak or fall apart but it stayed intact just fine.
The top crust and filling looked and tasted like the one cooked in the pie pan. The only noticeable difference was the bottom which was nicely browned.
This ended up being our favorite pot pie out of the 5. I’m not sure this would work for every kind of frozen personal pot pie but I’d definitely try it again.
5 Takeaways
- Frozen pot pies do not belong in the microwave, ever.
- The convection-cooked pies tasted the best but I’d happily eat one baked in a regular (non-convection) toaster oven too.
- You should reduce the temperature by 25 degrees if you’re cooking frozen food with convection.
- Instant-read thermometers are awesome and help you avoid accidentally giving yourself food poisoning.
- Check on your pot pie early, all of the pies we baked were ready at least 5 minutes (sometimes up to 15 minutes) earlier than the shortest baking time listed on the package.
Thank you for doing the test, great information and much appreciated. I brought home a frozen pot pie from the grocery store hoping a good quick meal. I’m not sure if my sister’s toaster oven is convection or not so I’m going to go with the temperate as if it is a convection o en and I will post results. I did a similar test with root beers and vanilla ice creams for rootbeer floats and just so you know, french vanilla ice cream and A&W rootbeer was the winners
I hope the pot pie turned out well, Jackie! Thanks for the root beer float ingredients tip, I’m sure that was a tough taste to do 🙂
Thanks for all the info. I cook frozen pot pies in a fairly large convection toaster oven on a metal flat pan, middle rack and I use narrow strips of foil and place it all the way around the edge of crust, covering only about 1/2 inch & remove for last 5-10 minutes of cooking time. That way the edges do not over brown.
Thanks for taking the time to leave your tips, Mary! Including the rack placement and the type of toaster oven you use is super helpful for the community. 🙂
Happy Baking!
~ Brie
Silvia- what position should the rack be in when convection baking?
Hi Lynn,
I like to use the bottom rack placement for our toaster ovens. If you’ve got the manual for your toaster oven, I’d check there too, they might give a suggested rack level.
My frozen pie says, right on the box, not to cook in a toaster oven. Which is why I googled it. What’s up with that! I bought the pie because Ihad just bought a toaster over – in the old days we made them in the toaster oven all the time.
Please advise 🙂
Hi Silvia,
I’m not a pot pie manufacturer 🙂 so I can’t say for sure but I have noticed two reasons manufacturers usually give for that warning.
The first is the disposable container the pie is in. Most of them have a heat sink which could be a potential fire hazard in some toaster ovens. Also, most toaster ovens list any kind of paper as something you shouldn’t put in the appliance.
The second reason is food safety and concerns about uneven cooking.
Depending on how the toaster oven cooks, the pot pie could appear done but might not have reached the required food-safe internal temperature. And I think it’s fair to say that the majority of people don’t check their food with a thermometer.
This post about cooking frozen meals in a toaster oven has some more info on the topic: https://toasterovenlove.com/toaster-oven-frozen-meals/
If you’re curious why the manufacturer of your pot pie has that warning you should reach out to them. I’m sure they’d be happy to share their specific reasons with you 🙂
Thank you for all your research. I love the Marie Callander’s large serving chicken pot pies. I hate a soggy bottom crust. My issue is the top crust burns around the edges, even with covering it. The instructions call for 400 degrees for an hour. I use a countertop oven but not the convection setting. Any advice?
Thank you!!
Susie
Hi Susie,
We haven’t made any large frozen pot pies yet but I did bake a semi-homemade pumpkin pie last year using a frozen crust. Before I added the pie to the toaster oven, I put a quarter sheet pan in it and let it preheat for about 15 minutes. Then we baked the pie in a metal tin on top of the preheated pan. The bottom of the crust turned out really nicely cooked and browned – no soggy bottom 🙂
If you’ve been covering the edges once they’re browned you might want to try doing it at the beginning instead. Then removing the shield when there’s about 15 to 20 minutes left in the bake time.
If the edges have been covered the whole time and they’re still burning, I’d try reducing the temperature by 25 degrees and seeing if that helps.
Wishing you lots of good pie-baking success!
Do NOT put pot pies on a baking sheet without its pie plate! I tried (Marie Calendars) and within minutes, the crust collapsed and juice was running everywhere. Ruined lunch.
I love the broccoli pot pie from Amy’s and will definitely try the baking sheet method
I think you’ll really like how the crust turns out. btw I was on the Amy’s website looking something up and saw they’re coming out with a Homestyle Pot Pie too!