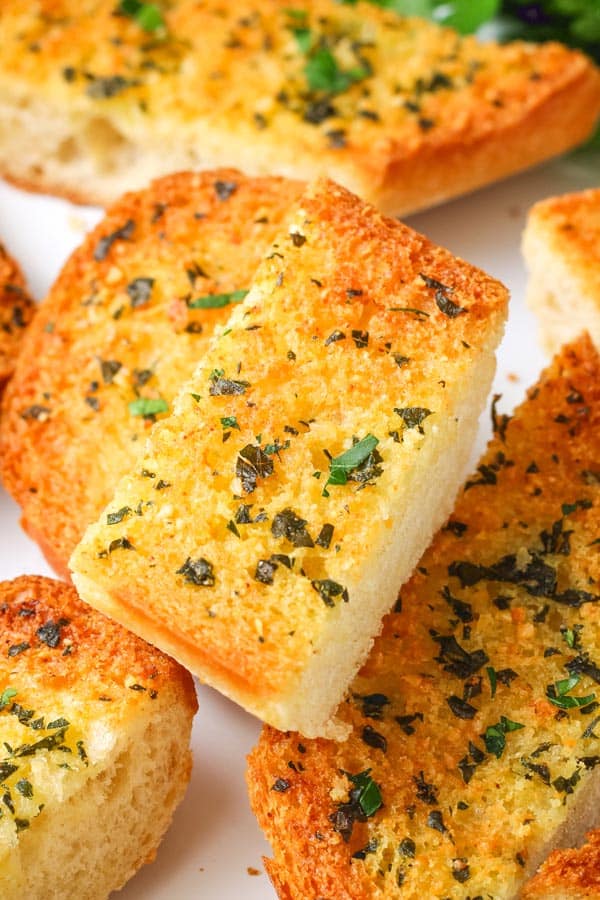
Toaster Oven Garlic Bread
Looking for an easy side dish? Use your toaster oven to make a small batch of deliciously crisp and buttery homemade garlic bread!
Similar to chocolate chip cookies, there’s no one single way to make garlic bread. Cheesy, extra garlicky, packed with herbs – the variations are endless.
And then there’s the texture. Some people like their bread lightly crisped outside and very soft in the middle. Others want crouton-level crunchyness.
Our goal today is to help you make your garlic bread just the way you like. So let’s get cooking!

Ingredients You’ll Need
- Salted Butter: Softened at room temperature or microwaved for a few seconds until softened. Unsalted butter will work too, just add a pinch of salt.
- Olive Oil: A tiny bit leads to even browning and helps to make the butter more spreadable (similar to the butter tubs at the store).
- Garlic: To keep things super easy we’re using garlic powder. But you can always substitute ½ a clove of fresh garlic finely chopped or grated. If you prefer a stronger garlic flavor try adding some of both types.
- Fresh Parsley: Brings a little color and brightness that balances out the rich butter and pungent garlic. Fresh oregano is another good choice.
- Parmesan Cheese: Optional but very fun. The topping bakes up crispier with a deeper savory flavor. And you don’t need a fancy variety, the stuff in the “shake jar” works great – Trader Joe’s makes a tasty vegetarian one.
The Bread: Since it’s only the two of us we like to use sub rolls or ciabatta rolls. But really any bread will work. A few slices of French bread, sourdough, or even English muffins would all taste great.
How To Make Garlic Bread In A Toaster Oven

1. Select the BAKE setting and preheat the toaster oven to 400°F. If your oven runs hot, you prefer a softer bread, or if you are using a convection toaster oven reduce the temperature to 375°F or 350°F. Then mix up the garlic butter ingredients.
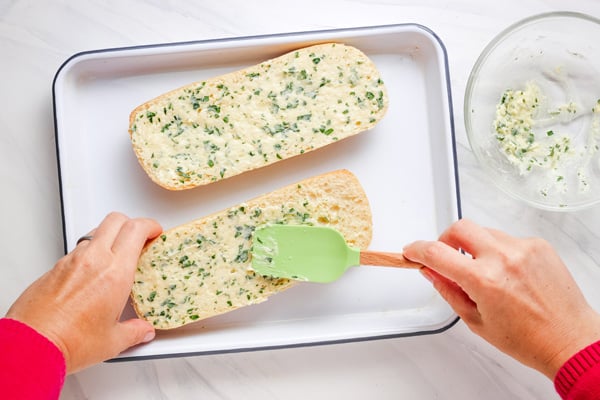
2. Slice the sub roll in half and spread with an even layer of the butter. Depending on the size of your bread, you may have some spread left over (we usually do). It’s great for making grilled cheese sandwiches.

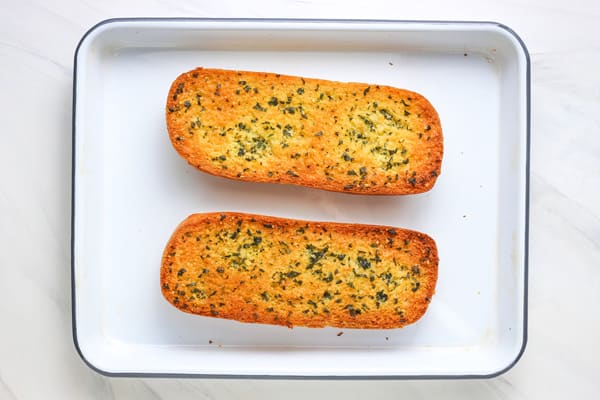
3. Bake on the middle rack until the bread is browned and crisped, about 8 to 11 minutes. *If your oven only has two rack placements, use the bottom one.
4. Once your kitchen starts to smell amazing and the bread is crisped to your liking remove it from the oven. Let it cool for a few minutes, then dig in!
Is The BAKE Setting Best For Making Garlic Bread?
It’s a reliable option for sure. But toaster ovens nowadays offer a variety of other settings like Air Fry, Bagel, Broil, and Toast.
Each setting (or function) will produce a different result, like toasting only one side of the bread or making the outside crust extra crispy. So the “best” one to use is all about how you prefer your garlic bread.
To help you decide, we made a bunch of garlic bread using those other settings. Here’s what we learned.

Air Fry
This setting uses a fast-moving convection fan to quickly circulate heated air around the bread. Some air fryer ovens are also programmed to deliver the heating in a more intense manner.
To air fry our bread: we preheated the toaster oven on the Air Fry setting at 350°F for 5 minutes. Then we added the prepared bread to the air fryer basket and cooked it at 350°F for about 5 to 7 minutes.
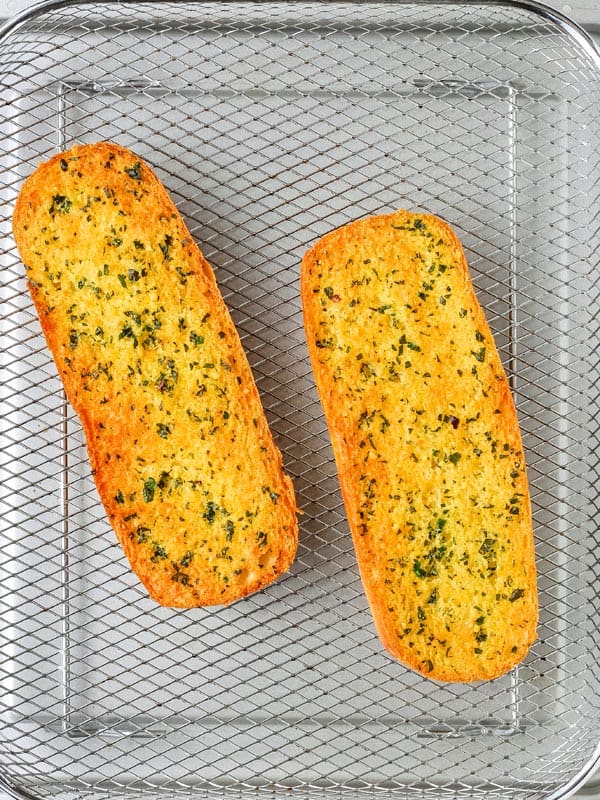
The sub rolls were nicely toasted outside, soft inside, crispy on top (like Texas toast), and very flavorful.
While the ciabatta rolls were super crunchy outside and softer in the middle. Like a mashup of garlic croutons and chewy fresh-baked French bread.
Toast
This setting uses an even heat to dry the surface of the bread, quickly toasting and browning both sides of it.
We placed the buttered roll halves directly on the cooking rack and turned the dial to medium darkness. It took about 3½ to 4 minutes for the bread to toast and brown.
- Pros: The garlic bread was crispy outside (but not hard), the top was golden brown, and it was very soft in the middle.
- Cons: The flavor was not as developed as the baked or air-fried ones but the quick cook time makes it a great option for busy days.
For most toaster ovens I’d start with the medium darkness setting and then add more time if it’s needed.

Bagel
You may be wondering how this function is different from the Toast setting. With the bagel setting the heating elements evenly toast the buttered side of the bread while gently warming the bottom exterior crust.
This results in garlic bread that’s crisped and browned on top, with a soft middle and a tender bottom crust.
Bagel Setting Tip
Use less butter. With the shorter cooking time and gentle bottom heating the butter doesn’t soak into the bread as much. With our generously buttered ciabatta roll, we found the extra butter made the bread feel kind of greasy.
Similar to the toast setting, you may need to play around a bit at first to find the perfect darkness level for your little oven.
For us, the sub roll turned out well with a Level 4 Darkness but the ciabatta needed more time so we upped it to Level 5.
Broil
With this function, a high heat is delivered from the upper elements. That means it will only crisp and brown the part of the bread that is facing up towards the top of the oven.
It’s a powerful setting that requires a more watchful eye as things can quickly go from crisped to burned (ask me how I know).

We also found that broiling didn’t toast the bread very evenly. Overall it was our least favorite setting in terms of attention required, flavor, and texture.
Given that, we’d rather bake the garlic bread and then use the broil setting to melt cheese onto it.
To make the crispy cheesy bread pictured below:
- I topped some baked garlic bread with a few tablespoons of shredded cheese.
- Then I popped it in the top rack of the toaster oven.
- And broiled it until the cheese was melted and bubbly, about 1 to 2 minutes. Yum!


Toaster Oven Garlic Bread
Use your toaster oven to make a small batch of crisp and buttery garlic bread! This basic recipe is super flexible and easy to customize using any herbs or seasonings that you like.
Ingredients
- 2 tablespoon (28 grams) Salted Butter, softened
- 1 teaspoon (5 grams) Olive Oil
- ¼ teaspoon Garlic Powder
- ¾ teaspoon Finely Chopped Fresh Parsley
- 2 teaspoon (5 grams) Grated Vegetarian Parmesan Cheese (optional)
- 1 Crusty Sandwich Roll (about 128 grams, 6 to 7-inches)
Instructions
- Select the BAKE setting and preheat the toaster oven to 400°F or 375°F (for convection toaster ovens/if you prefer a softer bread). We like to use the middle rack placement. If you only have two options in your oven, use the lower rack placement.
- In a small bowl, add the softened butter, olive oil, garlic powder, parsley, and Parmesan cheese. Mix together until well combined.
- Slice the sandwich roll in half lengthwise and place it on a baking sheet with the cut side facing up.
- Spread each piece with an even layer of garlic butter. (How much garlic butter to use is more of a personal preference but we usually have some leftovers.)
- Bake until the edges are golden brown and crisp about 8 to 11 minutes. As toaster ovens vary you may need to adjust the time to be shorter or longer.
- Cool for a few minutes, then slice each half into 4 pieces, and dig in!
Notes
Garlic Types: Garlic powder is our go-to for a quick option. If you prefer to use fresh, substitute ½ a medium garlic clove finely chopped or grated. Really love garlic? Try using a little of both types.
Vegetarian Parmesan: This is cheese made with microbial enzymes or non-animal rennet.
Leftover Butter Spread: Store covered in the fridge for 2 to 3 days. It’s great for spreading on biscuits or making grilled cheese sandwiches.
Jazz Up The Flavor: Add a pinch of red pepper flakes, your favorite Italian Seasoning Blend, chopped oregano, or basil. I like to sprinkle a little smoked paprika over the butter just before baking, it adds a subtle smoky finish.
Air Fryer Toaster Oven: Select the AIR FRY function and preheat at 350°F. Arrange bread in the air fry basket with the buttered side facing up. Air fry until the bread is crisped and browned, about 5 to 7 mins. Since all ovens are different, begin checking on the bread after 4 or 5 minutes, adding more time as needed.
Using The Toast or Bagel Settings: Place buttered bread cut-side up in the center of the wire rack. Set the cooking function to TOAST or BAGEL. Start with a medium toast shade or darkness level, about 3 minutes. Then add more time if needed for the desired amount of toasting.
Broiled Cheese Bread: Top the baked bread with a few tablespoons of shredded cheese (we like a mix of mozzarella and cheddar) and Broil until melted, about 1 to 2 minutes.
Nutritional Info is an estimate and will vary depending on the type of bread and amount of garlic butter used.
Nutrition Information:
Yield: 3 Serving Size: 1/3 of RecipeAmount Per Serving: Calories: 168Total Fat: 10.8gSaturated Fat: 5.7gCholesterol: 21mgSodium: 216mgCarbohydrates: 14.9gFiber: 0.7gSugar: 1.1gProtein: 3.8g