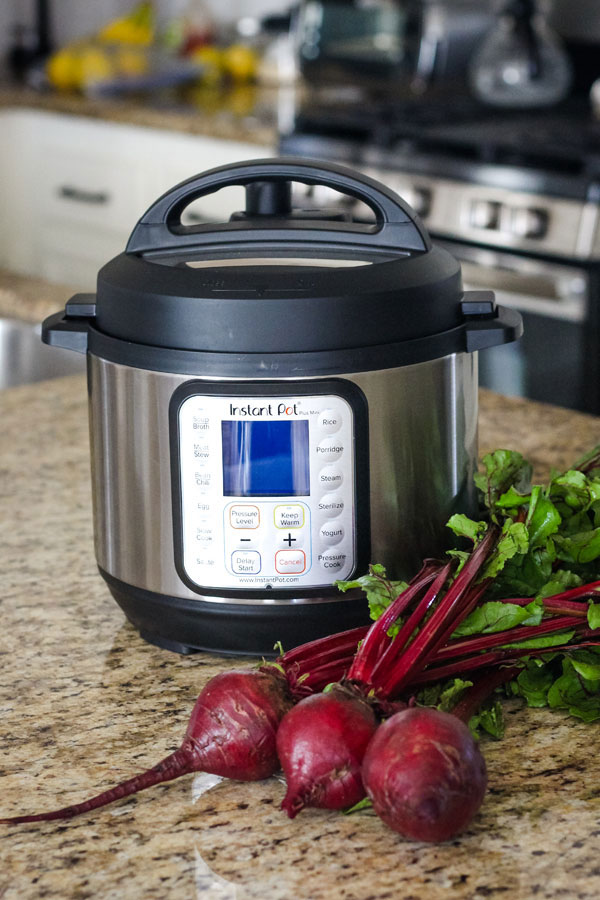
Instant Pot Mini Cooked Beets
Learn how to cook beets in your 3 qt Instant Pot Mini. With this handy little pressure cooker, it’s easy to make the perfect amount of beets for just one or two people.
Do you love beets?
If you’re like us, I bet you’re a big fan of their flavor but not the long cooking time or clean up associated with roasting beets.
Last year we bought a mini 3 qt Instant Pot Duo Plus and I couldn’t wait to try cooking beets with it. I’d heard rumors it was easier and faster than roasting.
When our local grocery store had organic red beets on sale for $.99 a bunch (squeal!) I saw my chance to put our little pressure cooker to use.
The Results
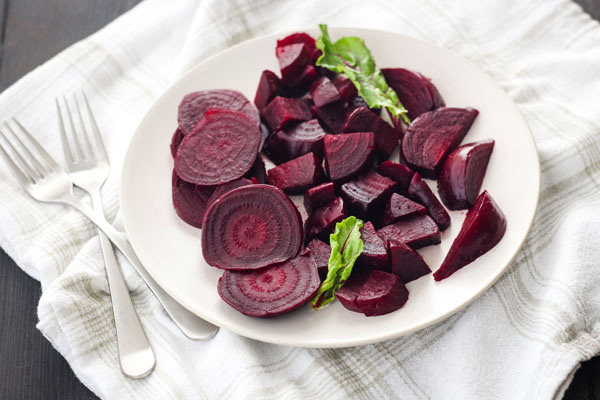
- Flavor: Better than canned but not near as sweet and deeply flavored as roasted beets.
- Texture: Delicious, perfectly “meaty” and juicy. Yep, it does feel strange describing a vegetable that way.
- Effort Level: Prep takes only a few minutes and cleanup couldn’t be easier, just wash the pot and wipe down the lid.
- Time Commitment: About 30 minutes (+ or – depending on the size of your beets)
- Bonuses: No added oil, no reason to waste foil, and zero time spent cleaning your toaster oven or oven.
Final Verdict
I’m not ready to forsake our beloved toaster oven roasted beets just yet. But it’s awesome to have the option of making a big batch of cooked beets in only 30 minutes.
~ Keep scrolling for step by step photos & instant pot beets tips after the recipe ~
Instant Pot Mini Beets
Sweet and earthy beets cooked in the instant pot mini duo plus.
Ingredients
- 1 Bunch Small Raw Beets, about 2" to 3" diameter
- 1 cup Water
Instructions
- Remove greens from the beets, wash and scrub the beetroots well.
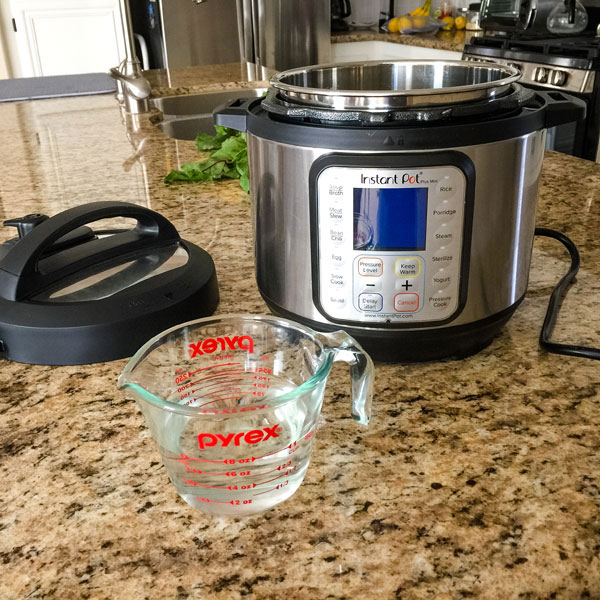
- Pour the water into the inner pot of your 3 qt Instant Pot.
- Place the rack that came with your pressure cooker in the bottom of the pot and and add your beets on top of the rack.
- Close and lock the lid. Make sure the steam release handle is pointed towards the Sealing position.
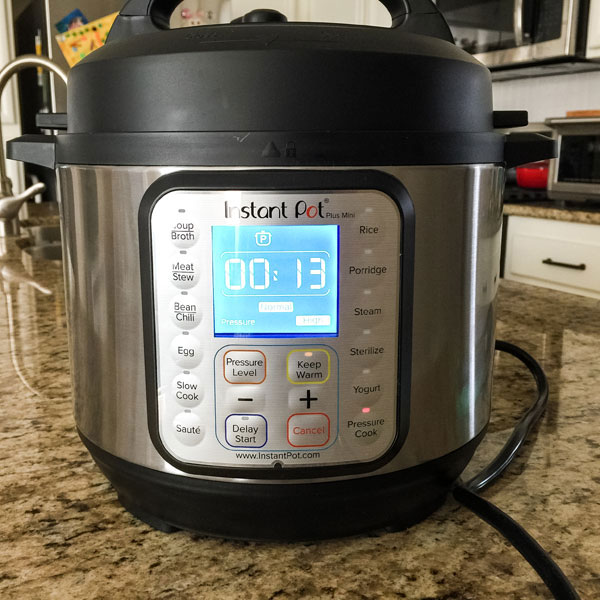
- Select the Pressure Cook or Manual button and adjust the settings to cook on High Pressure for 13 minutes
- When the cooking time is up, manually release the pressure using a Quick Release.
- Once the float valve has dropped down, carefully open the lid turning it away from you as you lift it up.
- Test the beets by piercing with a sharp knife or fork.
- If the beets are too hard, recover with the lid and repeat the cooking process but adjust the time to just 4 minutes on High Pressure.
- Once the beets are ready, let them rest until cool enough to handle. Rub the skins off and enjoy.
Notes
Recipe developed using a 3 Quart Instant Pot Duo Plus Mini.
Small Beets, about 2 to 3 inches around, will take 13 to 15 minutes.
Larger Beets will take about 20 to 25 minutes.
Nutrition Information:
Yield: 1 Serving Size: 1 Bunch Cooked BeetsAmount Per Serving: Calories: 132Total Fat: 0.5gSaturated Fat: 0.1gCholesterol: 0mgSodium: 238mgCarbohydrates: 29.9gFiber: 6gSugar: 23.9gProtein: 5g
How to Cook Beets in Your Instant Pot Mini
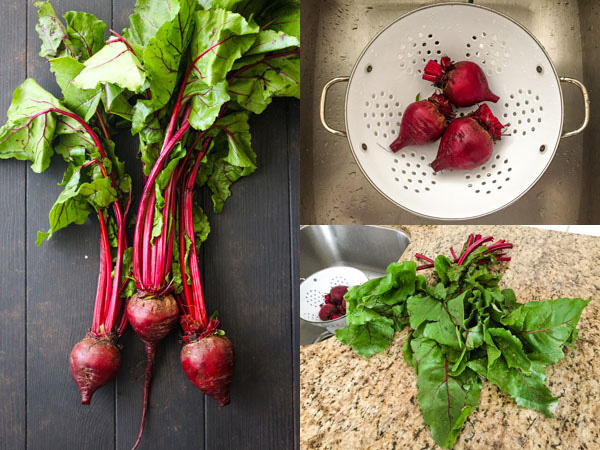
Step 1: Start By Prepping Your Beets
If your beets came with the greens attached you’ll want to remove them.
The greens are actually edible and can be sauteed or added to a salad. They have a bitter flavor you may not like but you’ll never know if you don’t try them 🙂
After you’ve removed the greens, rinse and scrub the beetroots.
Step 2: Prep Your Instant Pot Mini
If you read your manual then you already know your Instant Pot needs liquid to work.
The liquid creates the steam which leads to the whole pressure cooking thing that we’re after here.
Because I am easily distracted, I always add the liquid first.
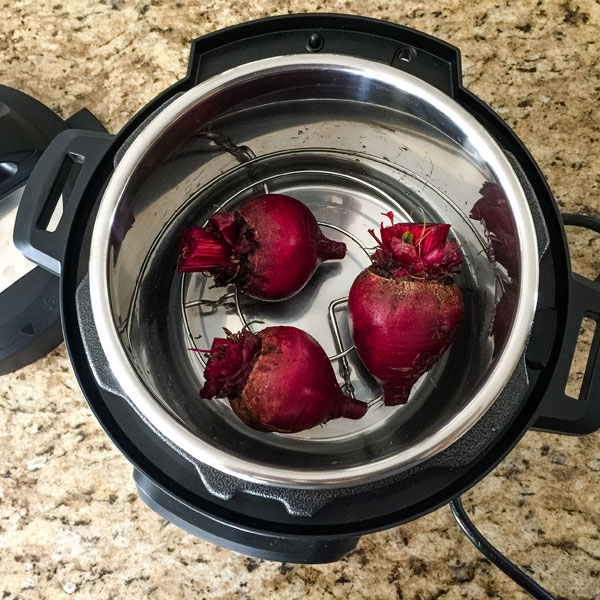
Pour the water into the inner pot and then place the rack that came with your little multi-cooker in the bottom.
Lastly, place your beets on top of the rack.
Step 3: Pressure Cook Your Beets
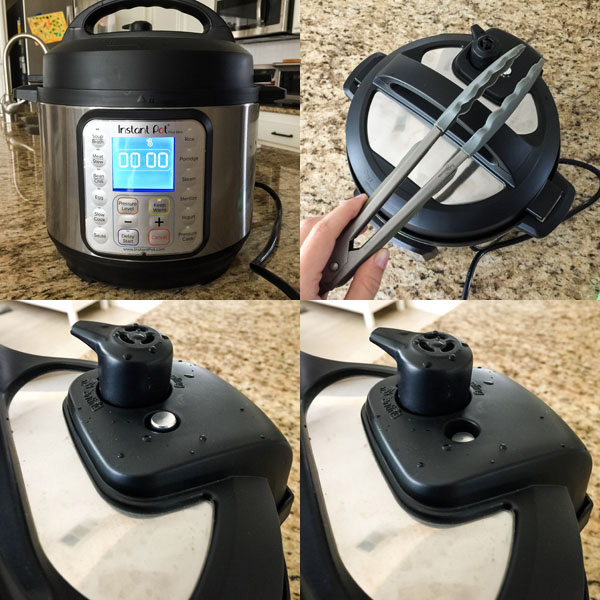
Place the lid on top of your instant pot and lock it. The machine will play a cute little song once you’ve got it correctly in place.
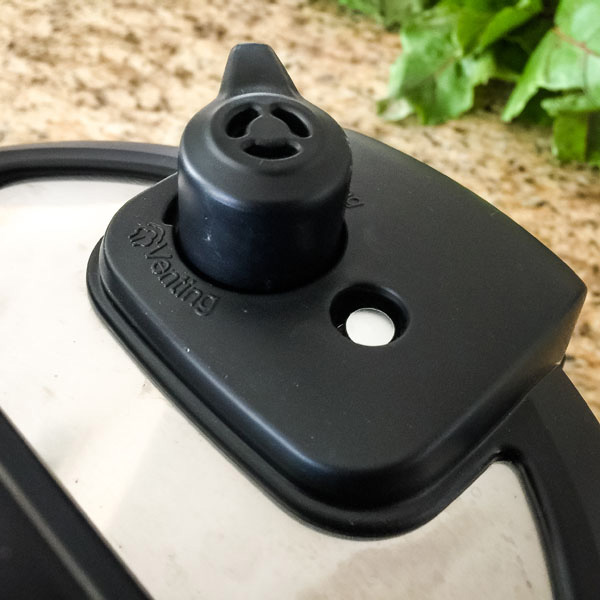
Before you start fussing with the timing, make sure the steam release handle (aka black knobby thing) is pointed towards the Sealing position.
Select the Pressure Cook button (or Manual button depending on the model of Instant Pot you own) and adjust the setting to cook on High Pressure.
If your beets are small, set the time for 13 minutes. Larger beets take more like 20 to 25 minutes.
What if the beets are different sizes?
Our store always sells beets bunched with at least one giant beet and two smaller ones.
So I was super excited to learn that if your beets aren’t done after the initial pressure cook you can just put the lid back on and set them to cook for a few minutes more.
When we cook beets, I set the time for the smallest size in the pot and add more time as needed.
Okay, back to the cooking…
A few seconds after you adjust the settings the machine will start working to build pressure.
For beets, this usually takes our machine about 8 to 9 minutes.
Once it reaches pressure you will notice the float valve will have popped up. The machine will beep again and start counting down the cooking time.
When the cooking time is up the screen will read zero and the machine will beep again. It’s very chatty.
At this point, you want to manually release the pressure using a Quick Release.
We like to use a pair of tongs or a silicone spatula to turn the steam release handle to the venting position.
Make sure you’re not venting towards yourself. A LOT of steam is going to come out of that little valve.
Once the float valve (aka silver pin thing) has dropped down, carefully open the lid.
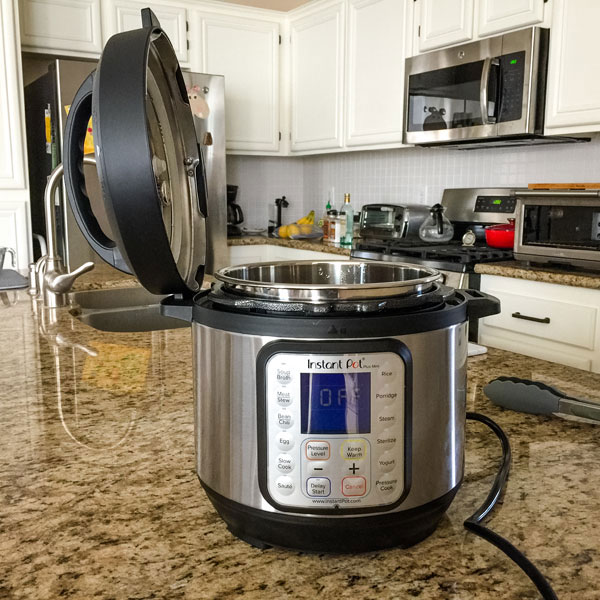
There will be condensation on the inside of the lid (like a regular pot lid) so you want to turn it away from you as you lift it up.
Stick a sharp knife or fork into each beet to check for doneness.
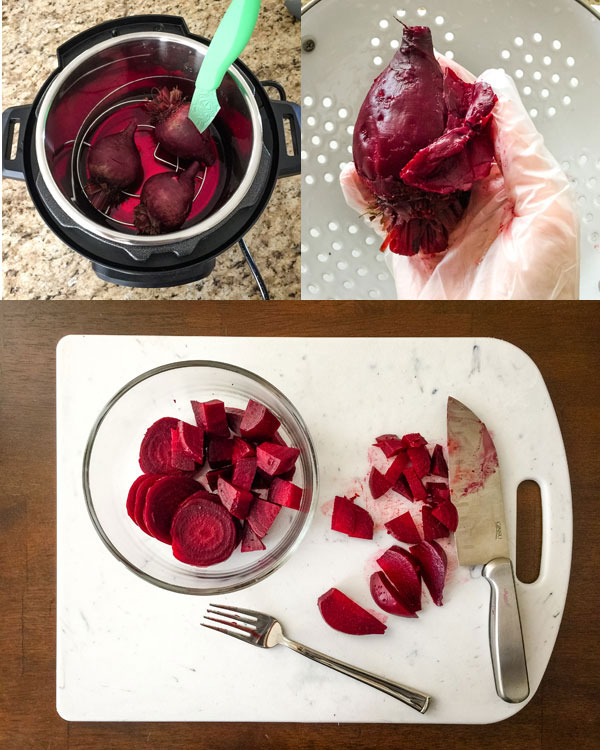
If the beets are too hard, put the lid back on and repeat the cooking process with a shorter amount of time. Like 4 or 5 minutes on High Pressure.
Once the beets are ready, you can let them hang out in the pot for a bit until they are cool enough to handle. Just make sure the machine is unplugged so you’re not accidentally keeping them warm.
Lastly, you’ll want to remove the skins – they’re not particularly tasty.
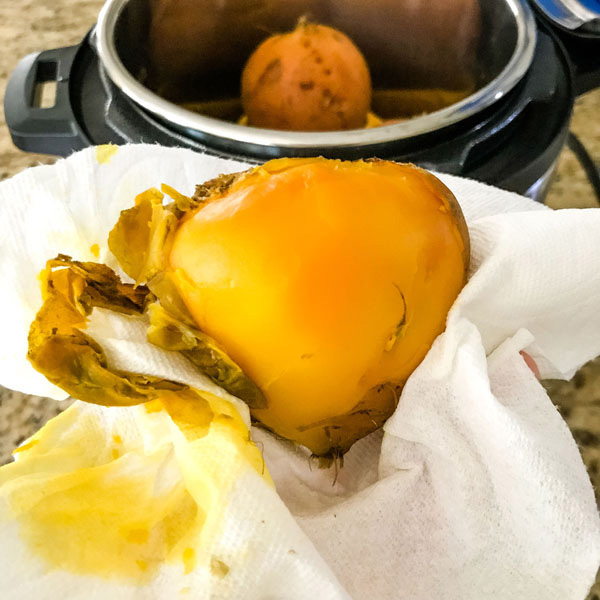
Rubbing the skins with your thumb will make them slide right off the beets. But the juices can stain your hands pink (or yellow if you’re cooking yellow beets for a Golden Beet and Avocado Sandwich or batch of Golden Beet Salsa).
To keep your hands stain-free, use a paper towel or consider throwing on a pair of plastic gloves.
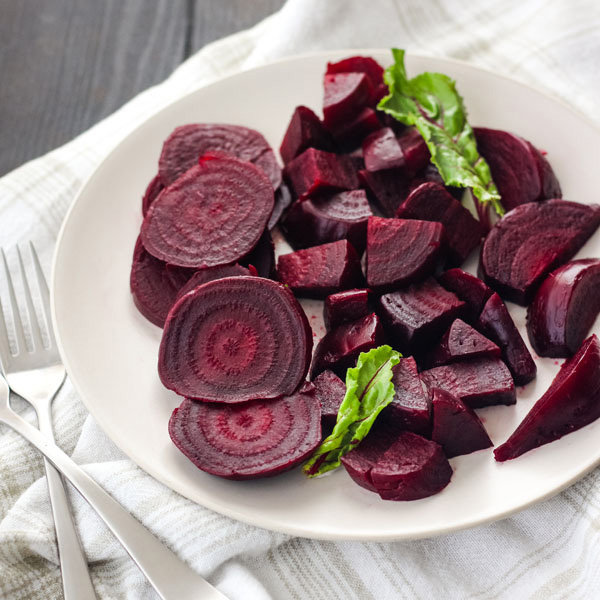
Now you’ve got a batch of beautiful juicy beets that need to be eaten – dig in!
I’ve just pulled first time growing, 4 baby beets from my garden. And wasn’t really sure what I could do with just 4. But I was super happy to see your IP recipe. Thank you in advance !!!!!
Congrats on your first batch of homegrown beets, Donna, how exciting! I bet they’re going to taste extra delicious 🙂
Yay, I came here for beets cooking guidance today and didn’t expect to find Instant Pot instructions. I was fully prepared to roast them, but will IP them esp because they’re larger than softballs and will take less electricity steaming vs roasting.
Megan, I’m so inspired and impressed by the variety of vegetables you’re always cooking. We tend to fall into ruts and every time you leave a comment it reminds me to add some different veggies to our grocery list. Thanks!
I was a really picky kid, so I am making up for all those years. 🙂 I also live in Monterey County (a native), so produce is all around me. I also found / find shopping from Imperfect Foods / Misfits Market, a wide but limited variety really helps me focus on variety (I try to choose a variety of colors every time) and for meal planning. When I go into the grocery stores now, I find the excessive amounts of products overwhelming and in the past would walk out with a hodgepodge of stuff that made odd meals.
PS – My beets are in the IP right now!