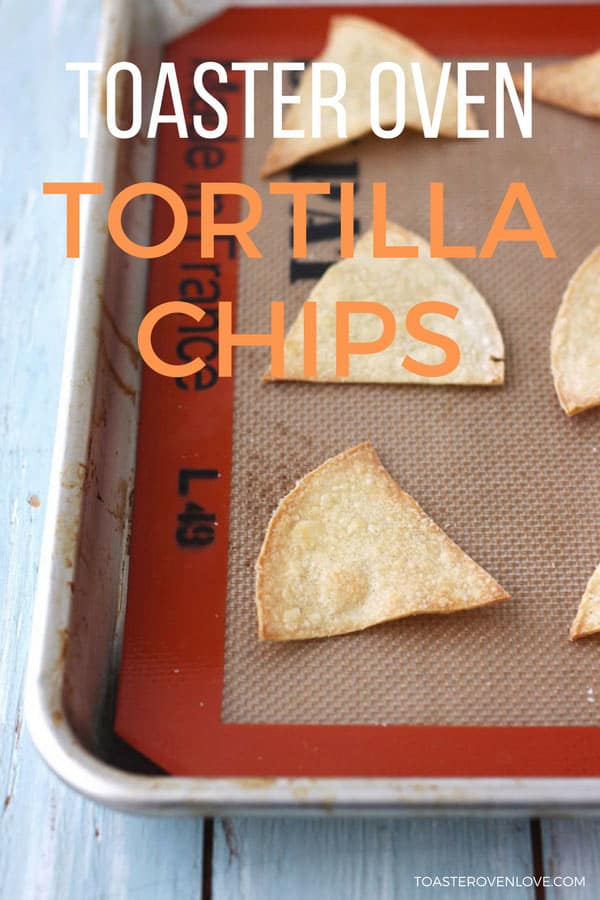
Toaster Oven Baked Corn Tortilla Chips
The ultimate guide to baking corn tortilla chips in your toaster oven. With these simple step-by-step instructions, you’ll be snacking on a pile of warm crispy baked tortilla chips in just 20 minutes!
Baking crispy tortilla chips at home is E-A-S-Y. Especially with the help of your little toaster oven.
The problem is, well, actually it’s two problems:
- Corn tortillas vary by brand (thickness, ingredients, size, etc.)
- All toaster ovens do not cook the same.
So what’s worked for us might not always work for you. ← That’s something that really bothers me because I want you to win.
I want you to turn on your toaster oven, toss in your food and have it come out right EVERY TIME.
When a new recipe is successful it’s exciting.
You’re encouraged to try more complicated recipes, experiment and have fun. These are the things I LOVE about cooking myself and hope to share with any recipe or guide we post.
Sometimes we can help you win by sharing simple tips. Like how to use convection. But I knew for this one we’d have to get deep in the tortilla trenches.
So here’s what we learned after reading every baked tortilla chips recipe I could find (and the comments too):
- Whether you’re using corn or flour tortillas; 350 is the best temperature to start with.
- The most common complaints were chewiness or rock hard crunchiness.
Armed with this info, we hit up our local Trader Joe’s for a package of their plain corn tortillas. Then we stopped by our favorite local markets for more tortillas, packaged and freshly made. Okay, and a few pan dulce too.
Then we got to baking…A LOT of chips.

Right from the start, we noticed the baked corn chips had three big differences from our baked flour tortilla chips:
- They take longer to bake, about 12 to 14 minutes total.
- The chips taste best if you bake them in a pan instead of on a rack.
- Using convection makes them taste Ah-Mazing.
Don’t worry we’ll get back to convection later. But first, let’s cover the basics of making baked corn tortilla chips in your toaster oven.
Toaster Oven Baked Corn Tortilla Chips 101
Step 1
Adjust your toaster oven’s cooking rack to the middle position and preheat it to 350F on the “Bake” setting. Lightly grease your baking pan or line it with a silicone baking mat, they make mats sized for small toaster ovens and bigger ones that can fit a quarter sheet pan too.
Step 2
Grab a cutting board, 1 or 2 small corn tortillas, oil, salt, and a sharp knife or pizza slicer.
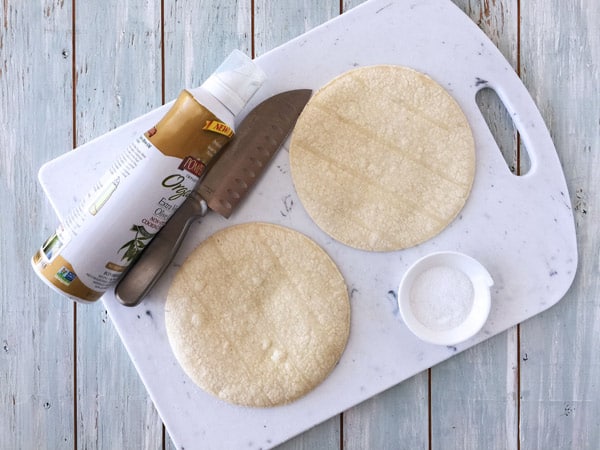
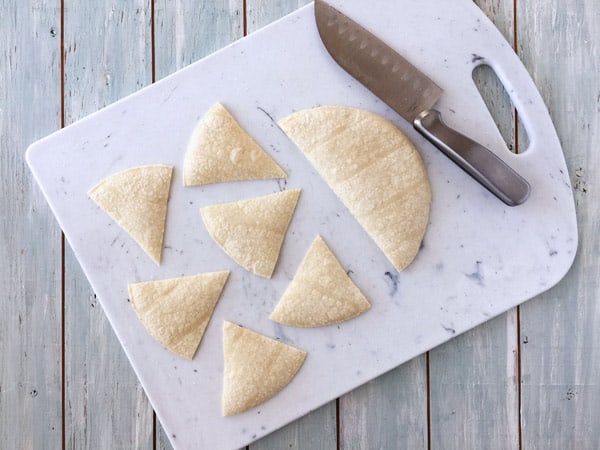
Lightly brush or spray one side of the tortillas with oil and sprinkle with seasoning. Flip tortillas over and repeat.
Stack tortillas on top of each other and slice into six triangles. Try to get them the same size, this way they’ll all bake at the same rate.
Step 3

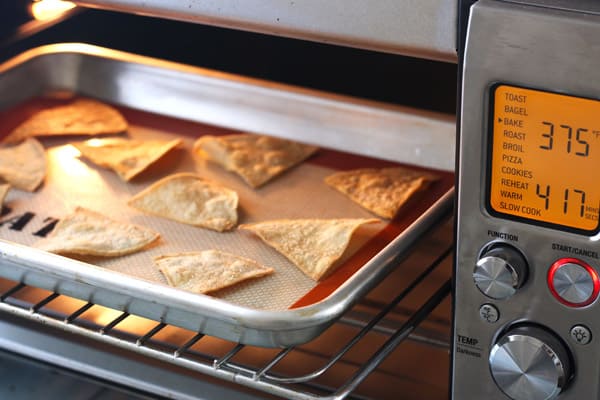
Arrange the tortilla slices in an even layer on your prepared pan. Make sure the pieces are not touching or overlapping.
We were able to bake all of the chips in one batch using our large countertop convection oven. If your toaster oven is smaller you may need to bake your chips in two batches.
Step 4
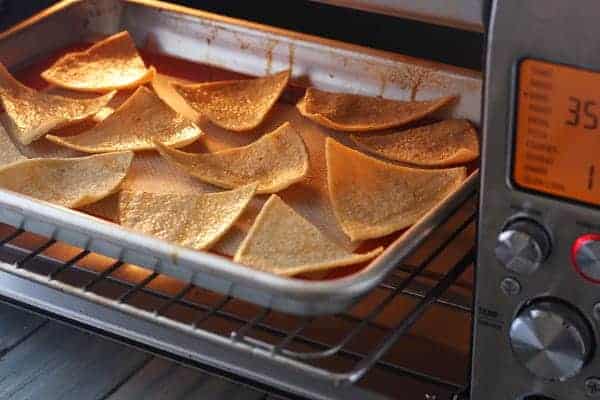
Bake the chips for 8 minutes. Then remove the pan, carefully flip the chips and rotate the pan before returning to the toaster oven.
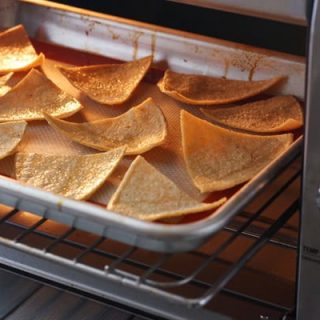
Continue baking the chips until they are crisp, about 4 to 6 minutes more.
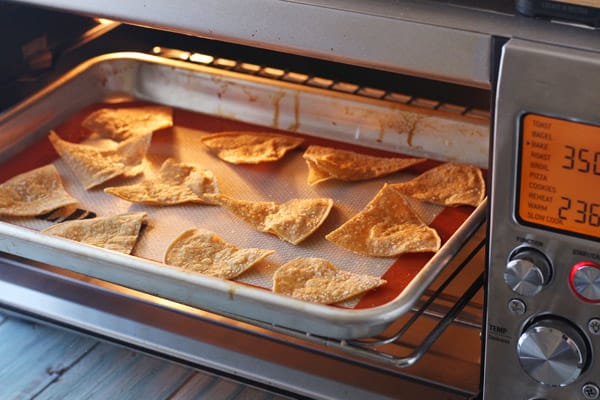
White corn tortillas will have some browning on the edges and usually take about 11 to 13 minutes to bake. Yellow corn tortillas take a little longer and it’s pretty hard to see any browning but the chips will look different.
Step 5

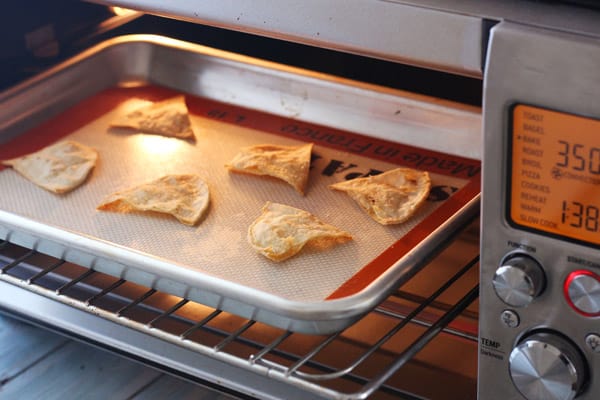
Allow the chips to cool completely on the pan, they will crisp further as they cool.
Are your chips still chewy after cooling completely? Check out these Troubleshooting Tips for help.
How To Use Convection
The first time you try a new recipe using your toaster oven’s convection fan it’s best to reduce the temperature and cooking time.
So to start, we made a batch of white corn tortilla chips with the convection fan on and a temperature of 325 F. The chips took almost 16 minutes to brown and were chewy in the middle after cooling.
For the second convection batch, we turned the temperature up to 350 F and began checking on them after 9 minutes. The chips were browned and crisp at 11 minutes.
After letting them cool, we tried a few.

Hands down they were the best tasting baked corn tortilla chips to ever come out of our toaster oven.
Crisp. Light. Crunchy.
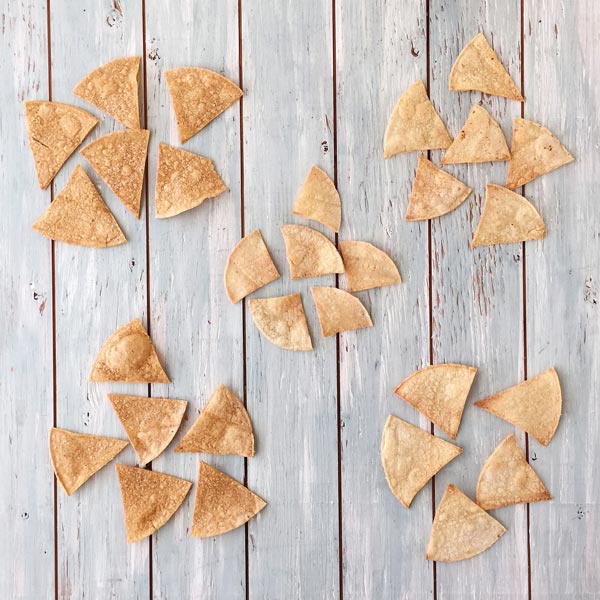
Overbaked, Underbaked or Just Right?
Now, before you start troubleshooting, let’s take a quick minute and talk about chip preference. Trust me, it’s related
From scrambled eggs to toasted bread and even double chocolate chip cookies, everyone has a way they prefer their food cooked. Most of the time their way is not going to be the way you enjoy it.
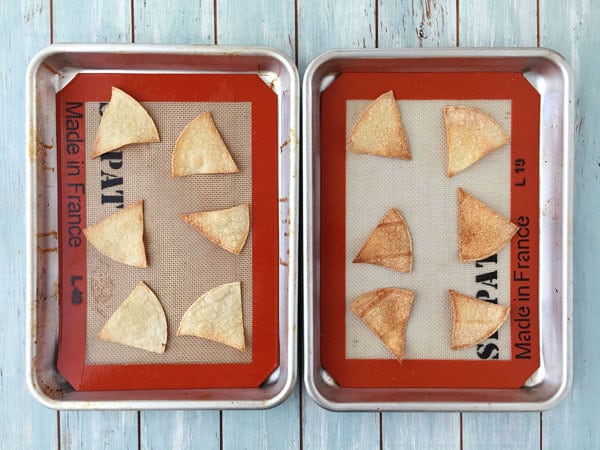
Take these two batches of white corn tortilla chips. The chips on the left were cooked for 11 minutes – the chips on the right 13 minutes.
After tasting both chips I thought the pan on the left was crisp with a nice corn flavor. The pan on the right tasted over-baked, the chips felt hard and way too crunchy.
Guess what Tim thought?
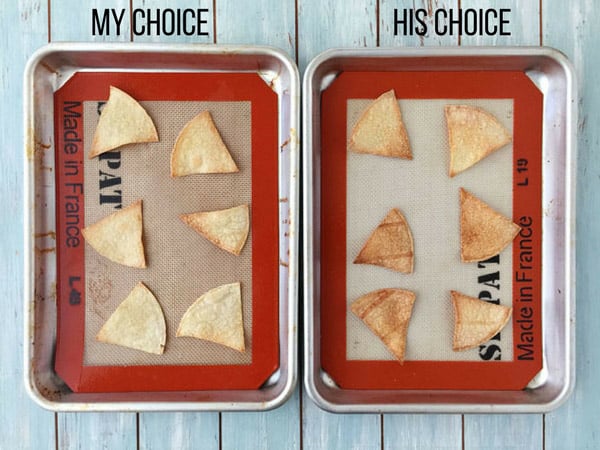
Yep, the pan on the right was purrrrfect. He said the chips on the left were okay but a bit underbaked.
The point of this riveting story?
Like with toaster oven cookies, you might have to make a few batches before finding the exact method (time, temp., etc.) that suits your tastes.
{Related: 5 Tips That Will Make You A Toaster Oven Cookie Baking Expert}
Re-Crisping and Troubleshooting

The chips taste best the day they’re made but you can store leftovers in a sealed container for 1 to 2 days. The chips will be a little stale and chewy but you can re-crisp them in the toaster oven.
We used the directions from this article by Epicurious about 6 Tricks to Reuse Stale Tortilla Chips, to re-crisp our leftover chips:
Adjust your toaster oven’s cooking rack to the middle position and preheat to 375 F on the “Bake” setting.
- Arrange the corn tortilla chips in a single layer on a baking sheet.
- Place the pan in your preheated toaster oven and cook for 3 to 5 minutes until the chips are warm and crispy.
- Remove chips and allow them to cool in the pan, then dig in!
Our day-old chips tasted great after their little re-crisping session. Maybe even better than the fresh ones.
Troubleshooting: Burnt Chips
Start by dialing back the bake time.
If you’re still having trouble try reducing the temperature to 325 F for the next batch. Also, you might want to check your toaster oven’s temperature accuracy.
Troubleshooting: Chewy Chips
#1 – Bake Them Longer
If this is your first time making chips in the toaster oven start with baking them for a little more time.
Toss the pan back in the toaster oven at 350F for another 2 to 3 minutes. But keep a close eye on the chips, it’s easy to burn them.
Then let the chips cool on the pan to crisp further before eating.

#2 – Cool the Chips In Your Toaster Oven
I found this clever post-bake tip in the comments section on an article from The Kitchn.
Once the chips are baked, turn off the toaster oven but leave the pan inside to cool. The warm air should help to remove any extra moisture that would cause your chips to be chewy.
What If They’re Still chewy?
#3 – Turn up the heat
If you’re still having trouble, try baking your next batch of chips at a higher temperature, like 375 or even 400. Make sure to check the chips early, adding more time as needed.
For us, chips made using the mini tortillas were chewy when baked at 350 but perfect and crisp at 375 and 400.
I can’t explain why only those tortillas needed a different temperature, but it worked!
Well, that’s it, everything we’ve learned about baking corn tortilla chips in a toaster oven. We’d love to hear about any of your crispy crunchy toaster oven tips for turning tortillas into chips.
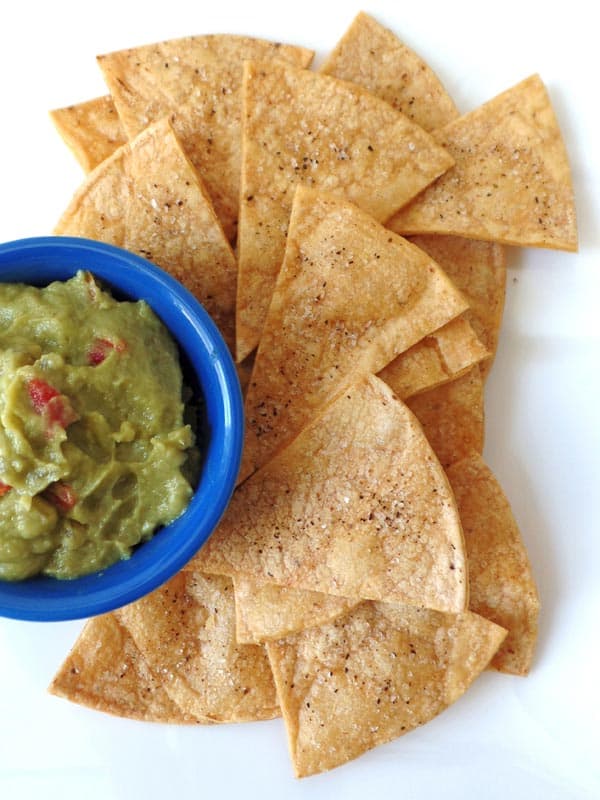
Toaster Oven Baked Corn Tortilla Chips
Freshly baked in your toaster oven, crisp and salty corn tortilla chips in less than 20 minutes.
Ingredients
- 2 Corn Tortillas
- Olive Oil, (or any oil of your choice)
- Fine sea salt
Instructions
- Adjust your toaster oven’s cooking rack to the middle position and preheat it to 350°F on the “Bake” setting. Lightly grease your baking pan or line it with a toaster oven baking mat.
- Brush or spray one side of the tortillas with oil and sprinkle with salt. Flip tortillas over and repeat. Stack tortillas on top of each other and slice into six triangles
- Arrange tortillas in an even layer on your prepared pan.
- Bake the chips for 8 minutes, then remove the pan, carefully flip the chips and rotate the pan before returning to the toaster oven. Continue baking until the chips have crisped, about 4 to 6 minutes more.
- Remove from the toaster oven and allow the chips to cool completely on the pan, they will crisp further as they cool.
Notes
If your toaster oven is smaller you may need to make your chips in two batches to keep them from overlapping.
See Troubleshooting Tips if your chips are chewy after cooling completely.
Nutrition Information:
Yield: 2 Serving Size: 6 ChipsAmount Per Serving: Calories: 62Total Fat: 1.8gSaturated Fat: 0.3gSodium: 10.8mgCarbohydrates: 10.7gFiber: 1.5gSugar: 0.2gProtein: 1.4g
I recently went to Applebee’s and got the Spinach Artichoke Dip for an appetizer and had those while waiting for my meal, but after finishing the meal I had some chips left over and figured I’d get a to-go box for them and eat the rest of them when I was feeling peckish. Today I was excited to eat the chips, so I pulled them out of the fridge and wondered “how am I gonna heat these up?” I looked at my microwave but I knew they’d be soggy if I tried that, then I looked at my toaster oven and figured I’d see if the internet could aid me. And so I found this and followed your directions and they were great! They even caramelized slightly so it might’ve been better than how they tasted fresh! I’m so glad I didn’t end up throwing them out and you helped me make them delicious again 🙂 thank you so much!
Yay! I’m so glad you found the directions helpful, James. Great job on reviving those leftovers and avoiding food waste too!
I LOVE your site, tips, and recipes. I’ve used my toaster over tons more since I discovered it. I have been using it for tortilla chips and nachos ever since. Thank you so much!
One question. not related to this recipe…,I would like to support your site by looking at, and sometimes using, the ads that help you out. But I’m not sure if ONLY the ones that say Sponsored Ad are yours, or if any ad on the web page from MEDIAVINE will credit you.
Hi Gaylen!
I’m so glad to hear how much you’re using and enjoying your toaster oven 🙂
Thank you so much for wanting to support us and for asking about the advertisements.
All of the ads support the site. The advertisements that say “sponsored” have that notice because they are within a post and look a bit similar to the site. The sponsored notice is an attempt to be transparent that it is an advertisement and not something we have written ourselves.
If an advertisement is of interest to you feel free to click on it but just spending time reading our posts and allowing the ads to appear on your screen helps to support us and the site.
I can’t tell you how excited I am to hear about all the chips and nachos you’ve been making 🙂 thanks for stopping by!
I tried this exact method in 4 different types of ovens, with frozen and thawed corn tortillas and they never did come out very crispy. They were crisp, but a chewy crisp, not chip crispy,
Hi Anna thanks for trying the recipe I’m sorry to hear it didn’t work out for you. Ours are always crunchy and crispy.
You might want to try a little less oil. I’ve also heard of people turning the oven off after baking corn tortilla chips and leaving the chips in there to cool, it’s supposed to lead to a crispier chip.
Thanks for stopping by and sharing your experience 🙂